Your C: drive is filling up, or a folder answered “Access is denied”, and you want to know whether it is safe to delete the System Volume Information folder in Windows 11. It isn’t. Windows locks it to its SYSTEM account, and the folder holds the data behind your restore points, but you can still shrink it safely. We hit its lock, then measured and shrank it on a Windows 11 PC, build 26300.
Below, you’ll learn how to see the System Volume Information folder, what happens when you try to open or delete it, how to read its real size, and three safe ways to make it smaller.
What Is the System Volume Information Folder?
The System Volume Information folder is a hidden system folder at the root of your drive, where Windows keeps the data behind restore points. Restore points are snapshots of system files, installed apps, the Windows Registry and system settings, which System Restore can roll your PC back to.
System Restore relies on the Volume Shadow Copy Service, which keeps copies of changed data in what Microsoft calls a shadow copy storage area. On the C: drive, the folder sits here:
C:\System Volume Information
Windows marks it Hidden and System, and it has held System Restore data since Windows XP.
How to See the System Volume Information Folder
You won’t see it in C:\ by default, and turning on Hidden items alone still doesn’t show it. With Hidden items on, our test PC revealed ProgramData and OneDriveTemp, but this folder stayed out of the list.
The setting that reveals it is Hide protected operating system files (Recommended), on the View tab of File Explorer’s Options, which you open from … (See more). Untick it. Our walkthrough on showing hidden and protected files in File Explorer has the full steps for both settings.
When you untick the box, File Explorer asks you to confirm with this warning:
“You have chosen to display protected operating system files (files labeled System and Hidden) in File Explorer. These files are required to start and run Windows. Deleting or editing them can make your computer inoperable. Are you sure you want to display these files?”
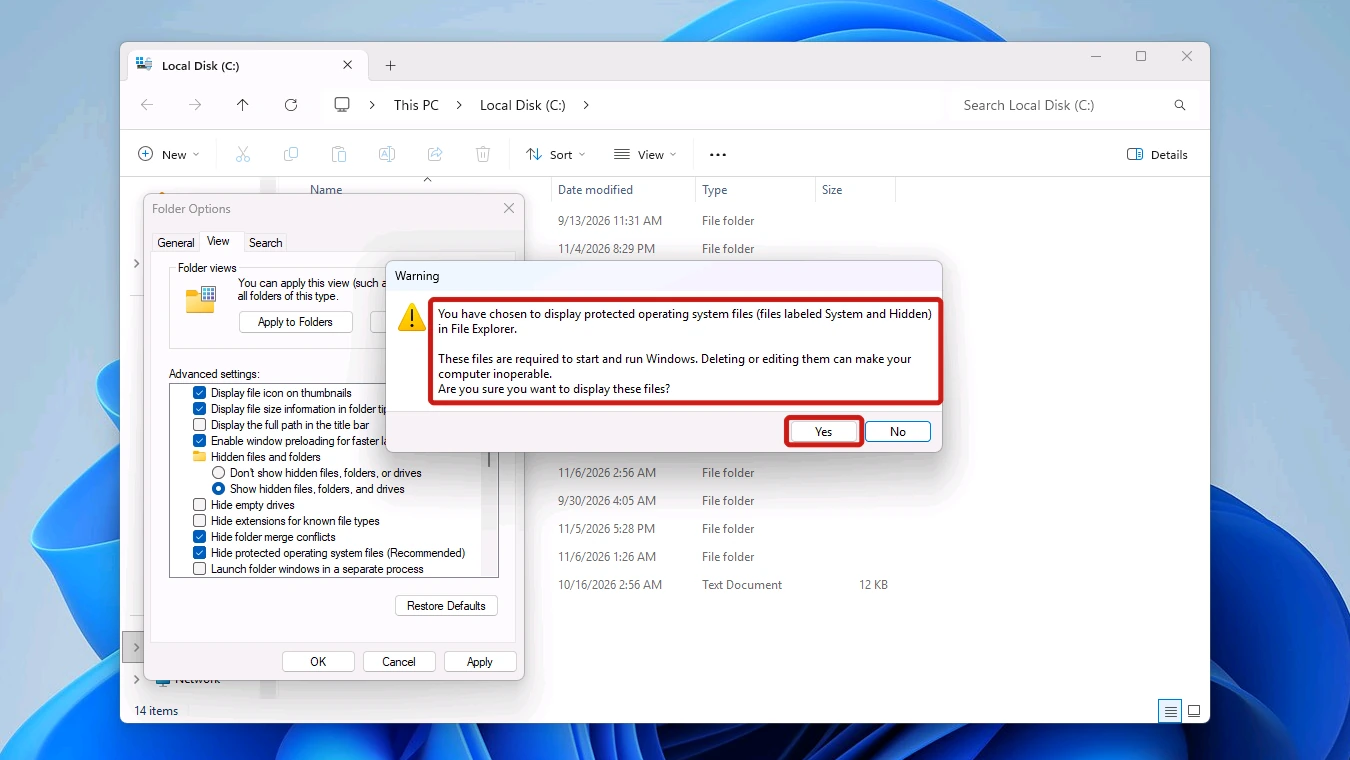
Tip: Select Yes, then OK, and the folder appears in C:\. Tick the box again when you’re done, so protected files go back to being hidden.
Is It Safe to Delete the System Volume Information Folder?
No. Emptying it would remove your restore points, and Microsoft warns that deleting a shadow copy is permanent: you lose the restore points that depend on it. Without restore points, System Restore has nothing to roll your PC back to.
Windows won’t let you in anyway. Double-clicking the folder on our test PC brought up “Location is not available” with the message “C:\System Volume Information is not accessible. Access is denied.” The only button was OK, even though we were signed in as an administrator.
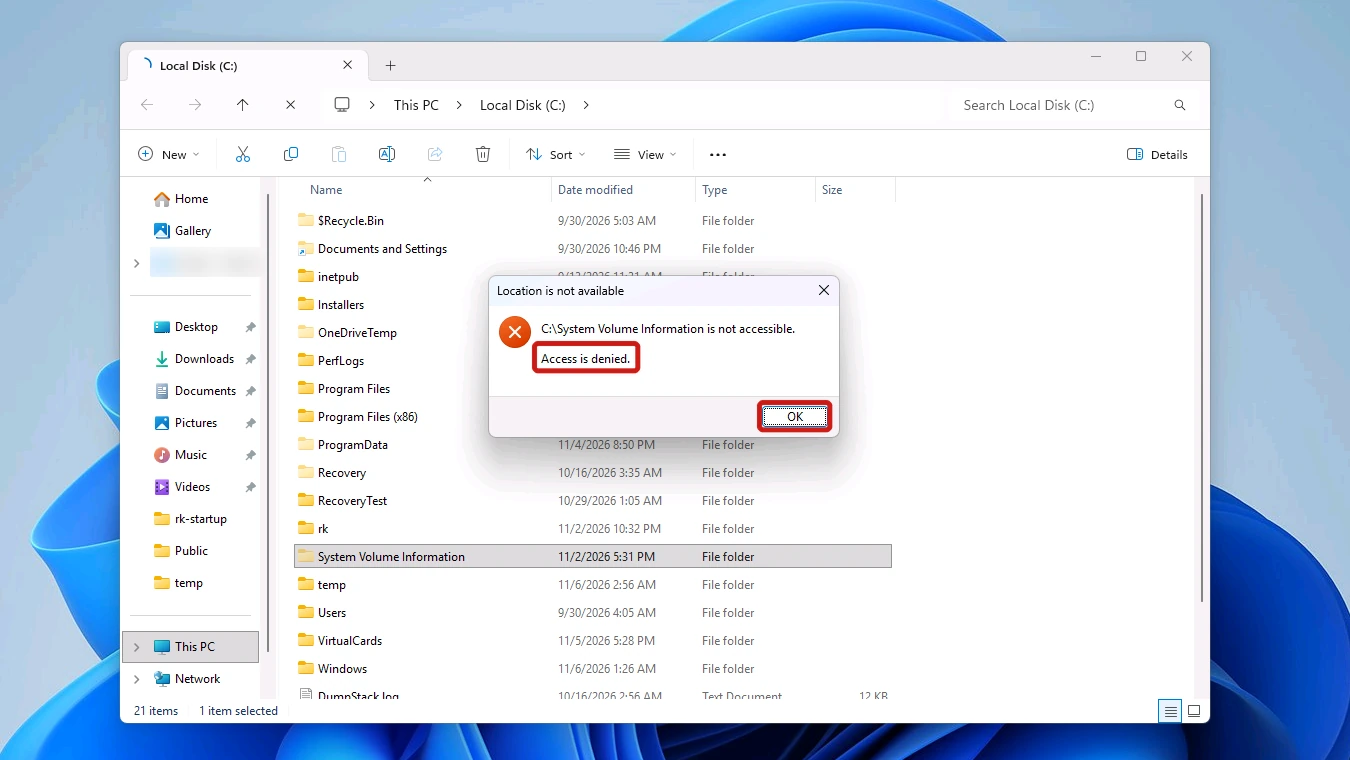
Only the SYSTEM account had access to it, and a PowerShell prompt running as administrator was turned away with “Access to the path … is denied.” as well.
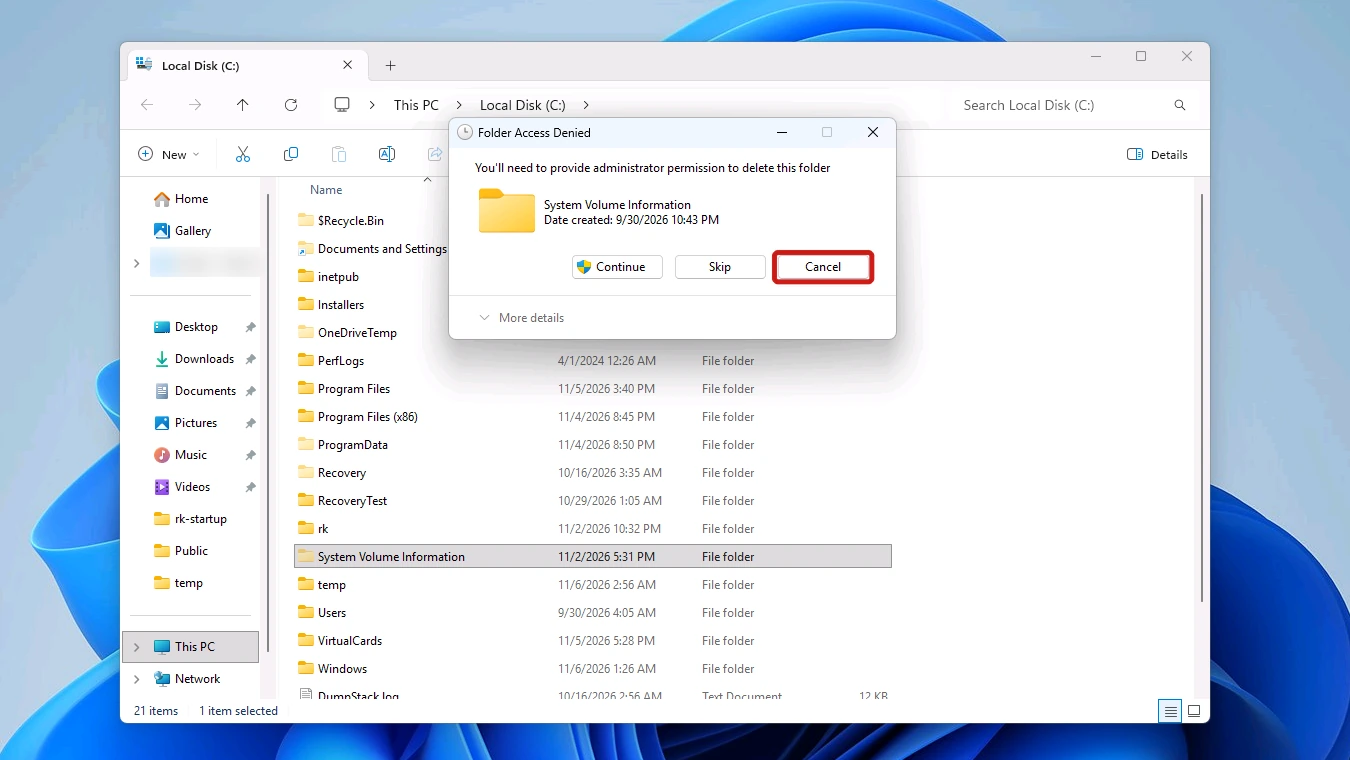
Click Cancel. Pressing Delete on the folder brought up a Folder Access Denied prompt saying “You’ll need to provide administrator permission to delete this folder”, with Continue, Skip and Cancel. We clicked Cancel and never tried Continue. Don’t take ownership of the folder to force your way in; the methods below shrink it safely.
How Big Is the System Volume Information Folder?
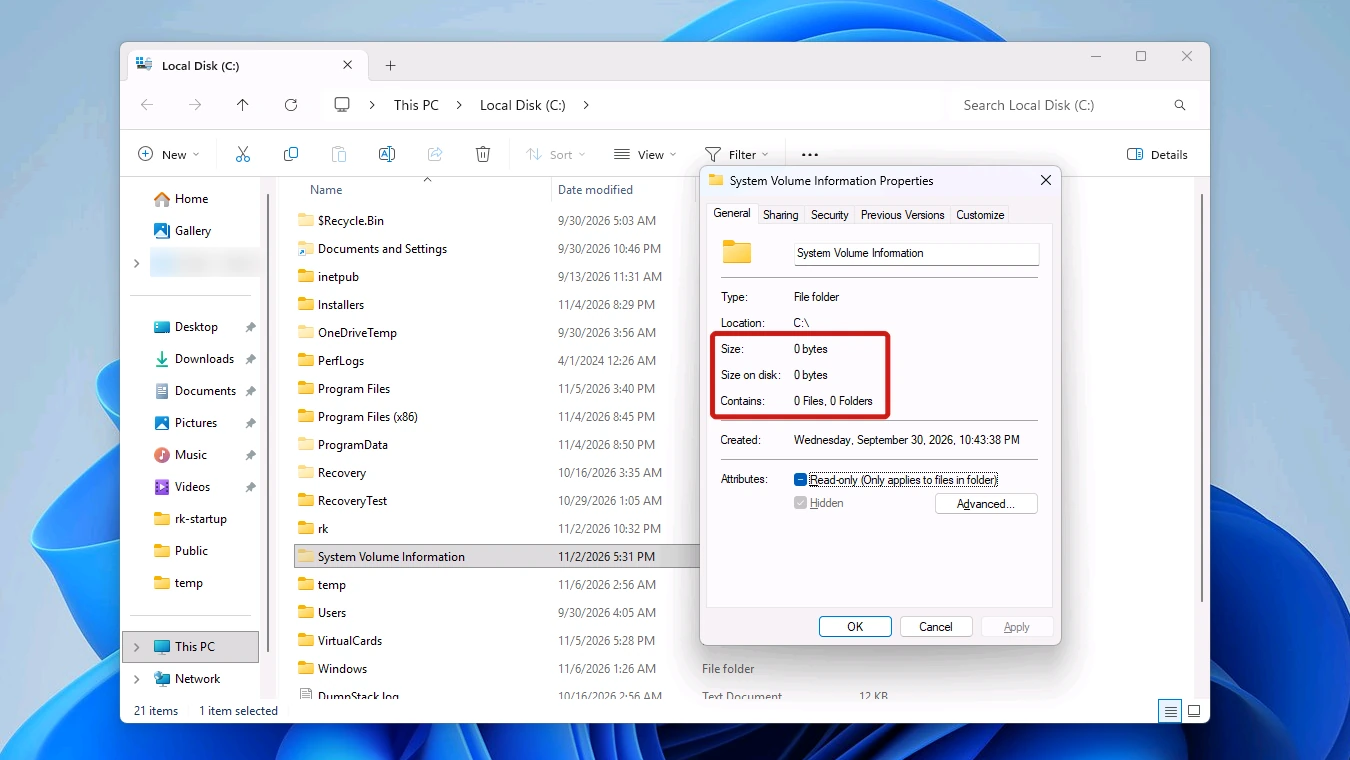
File Explorer can’t tell you. In our test, its Properties window showed a Size of 0 bytes, 0 bytes on disk, and 0 files in 0 folders, which is not the real size.
The figure that matters, the space your restore points take up, comes from vssadmin, a built-in command that reports how much space shadow copies use on a drive. Open Command Prompt or Terminal as administrator, which is how we ran it, then enter:
vssadmin list shadowstorage
With one restore point on the drive, it reported three figures:
| Field | Our test PC with one restore point |
|---|---|
| Used Shadow Copy Storage space | 17.8 MB (0%) |
| Allocated Shadow Copy Storage space | 320 MB (0%) |
| Maximum Shadow Copy Storage space | 3.95 GB (5%) |
Used is what the shadow copies take up now. Maximum is the cap set by System Protection’s Max Usage slider: we had set ours to 5% (3.95 GB) of a 78.9 GB drive, and vssadmin reported the same figure. To list the copies themselves, run this command, which showed one shadow copy for us:
vssadmin list shadows
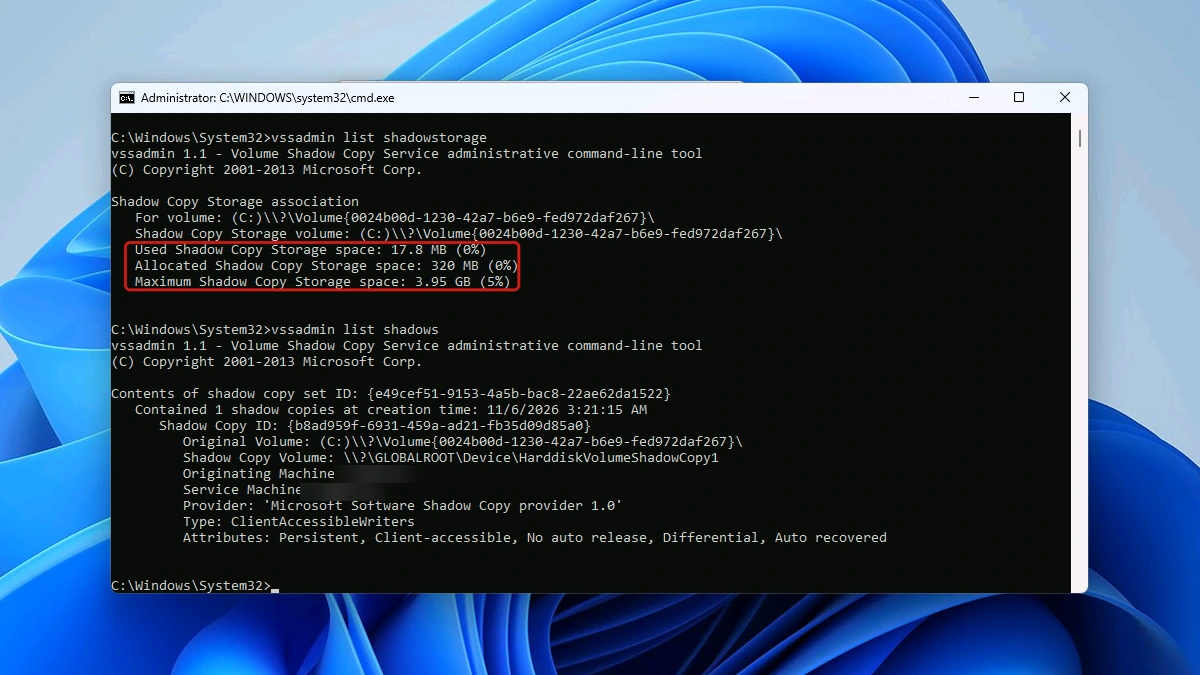
How much space you can win back depends on how many restore points your PC keeps; ours used about 18 MB. If Used is close to Maximum, the methods below free real space. If it’s only a few MB, restore points aren’t what’s filling your drive, so skip to the other folders at the end.
How to Shrink the System Volume Information Folder Safely
You can’t delete the folder, but you can control how much space restore points take inside it with three methods built into Windows. The steps below use the C: drive. Windows already deletes the oldest restore points to make room for new ones once that space fills.
Check that protection is on first. When we looked, System Protection was Off for every drive and Create… was greyed out. Microsoft says it isn’t on by default, so look at yours before you hunt for space here.
Start with Method 1: it keeps your newest restore points and only drops older ones as the lower cap fills. Method 3 keeps only the latest, and Method 2 removes them all.
Method 1: Lower Max Usage in System Protection
The Max Usage slider in System Protection sets the most disk space restore points can use on a drive.
- Open Start, type Create a restore point and open the result. System Properties opens on the System Protection tab.
- Select Local Disk (C:) (System), then select Configure. The System Protection for Local Disk (C:) dialog opens.
- Drag the Max Usage slider to a lower value. Once the slider is above its minimum, the label below it shows the share of the drive and the size in GB.
- Select Apply, then OK to save the new limit.
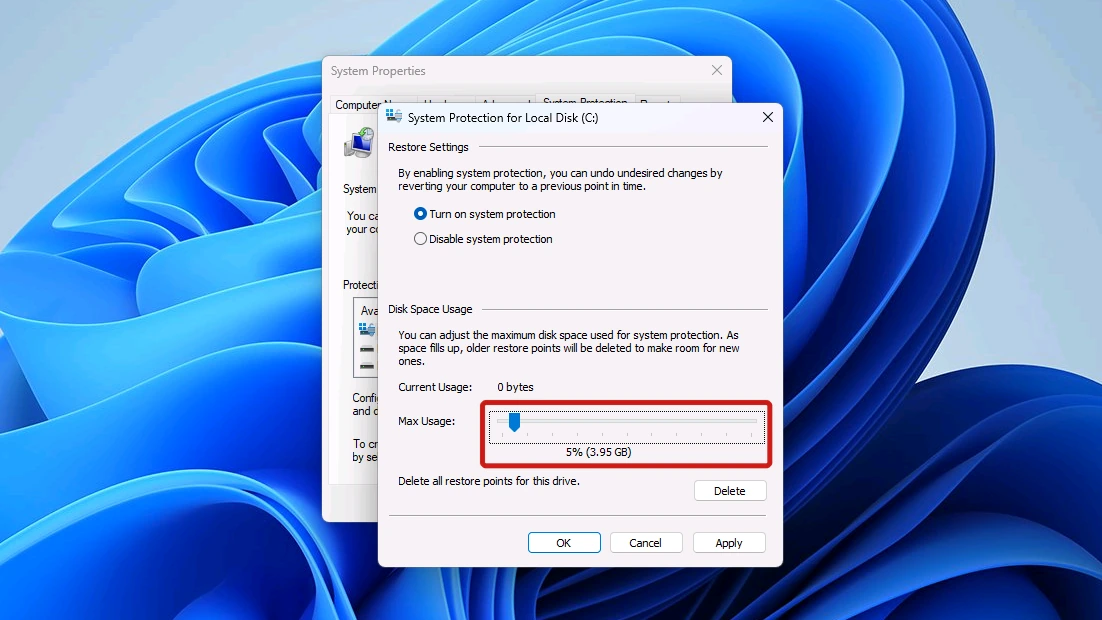
The dialog spells out the cost: “As space fills up, older restore points will be deleted to make room for new ones.” A lower cap therefore keeps fewer of them.
Method 2: Delete All Restore Points for the Drive
The same Configure dialog has a Delete button beside the line “Delete all restore points for this drive.”
- Open Configure for Local Disk (C:) (System), as in Method 1.
- Select Delete on that line. A confirmation dialog appears.
- Read the warning, then select Continue if you accept losing all of them.
The confirmation dialog shows this warning:
“You will not be able to undo unwanted system changes on this drive. Are you sure you want to continue?” and “This will delete all restore points on this drive. This might include older system image backups.”
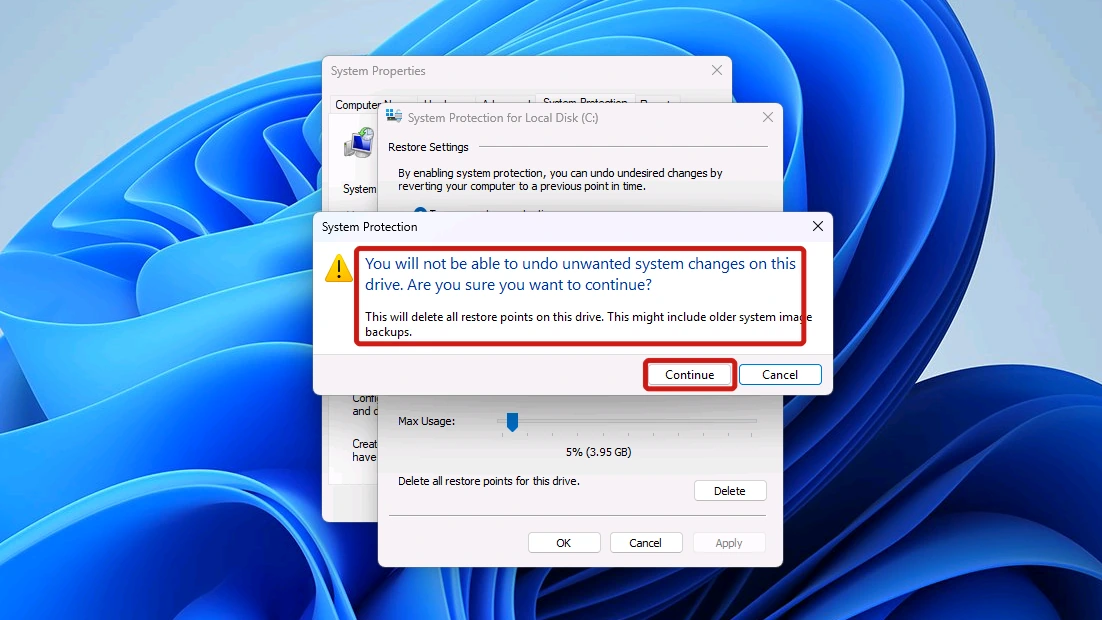
There is no undo. This removes every restore point on the drive, not just the old ones, and Microsoft warns that a deleted shadow copy can’t be recovered.
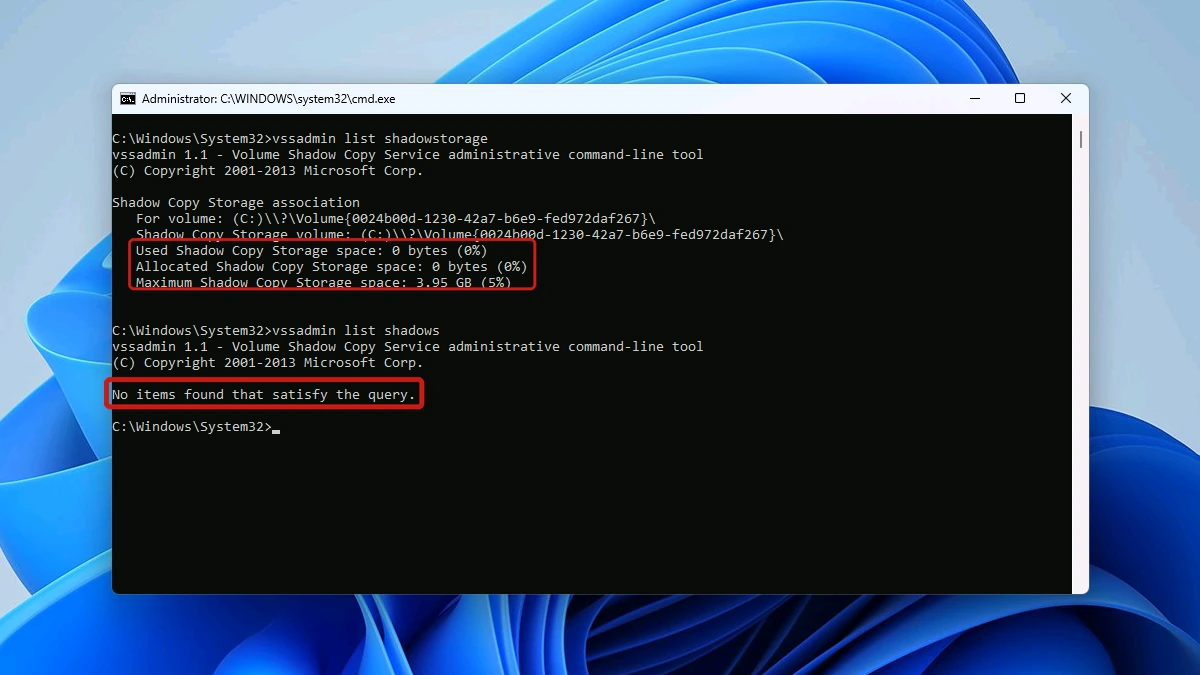
Windows then confirmed “The restore points were deleted successfully.” The dialog still showed 18.98 MB of current usage until we reopened it. Afterwards, vssadmin list shadowstorage showed 0 bytes used and 0 bytes allocated, with the maximum unchanged at 3.95 GB, and vssadmin list shadows returned “No items found that satisfy the query.”
To get a safety net back, select Create… on the System Protection tab and name a new restore point.
Method 3: Keep Only the Latest Restore Point With Disk Cleanup
Disk Cleanup has an option that removes all but your most recent restore point.
- Press Windows key + R, type cleanmgr /d C and press Enter. Disk Cleanup opens straight on drive C:.
- Select Clean up system files and approve the UAC prompt.
- Open the More Options tab.
- Select Clean up… under System Restore and Shadow Copies.
The section’s description reads:
“You can free more disk space by removing all but the most recent restore point. In some editions of Windows, the disk might include file shadow copies and older Windows Complete PC Backup images as part of restore points. This information will also be deleted.”
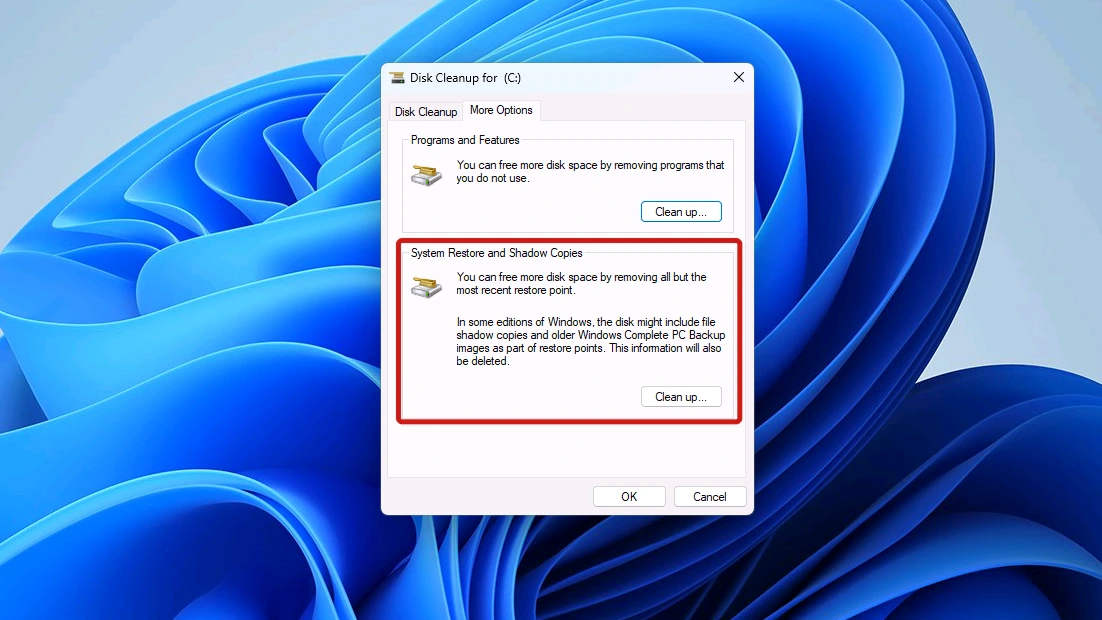
We didn’t run it, because our test PC had no restore points left after Method 2.
Should You Turn Off System Protection?
Not as a way to free space. Microsoft recommends turning System Protection on, and without restore points System Restore has nothing to go back to. The Configure dialog does offer a Disable option, but lowering Max Usage in Method 1 gets you space and keeps a way back.
Other System Folders That Take Up Space
If restore points aren’t what is filling your drive, these are the next places we’d look:
- WinSxS: the component store shrinks with Windows’ own cleanup tools, and we measured how much each one gave back.
- SoftwareDistribution: unlike this folder, the update cache is safe to clear once the right services are stopped, in the order we lay out.
- Routine clean-up: our update routine sets up Storage Sense and Disk Cleanup, the scheduled and the one-off ways to keep space free.
Conclusion
No. Don’t delete the System Volume Information folder in Windows 11. The folder holds the data behind your restore points, so emptying it removes your way back, and when we tested it, only Windows’ SYSTEM account could get inside. To free space, open System Protection, select Configure, and lower Max Usage or delete the restore points, or let Disk Cleanup keep only the latest.
Check how much space restore points use with vssadmin list shadowstorage first, since File Explorer shows 0 bytes.