Windows asks for permission before it opens the Windows Temp folder at C:\Windows\Temp, and it is not obvious what you can remove inside it. On our Windows 11 machine, selecting the files in File Explorer and pressing Delete worked once we clicked Continue at that prompt. We also cover what the folder held, the Continue and Skip prompts, and what Settings did to it.
Prefer to watch? See the video guide.
What the Windows Temp Folder Is
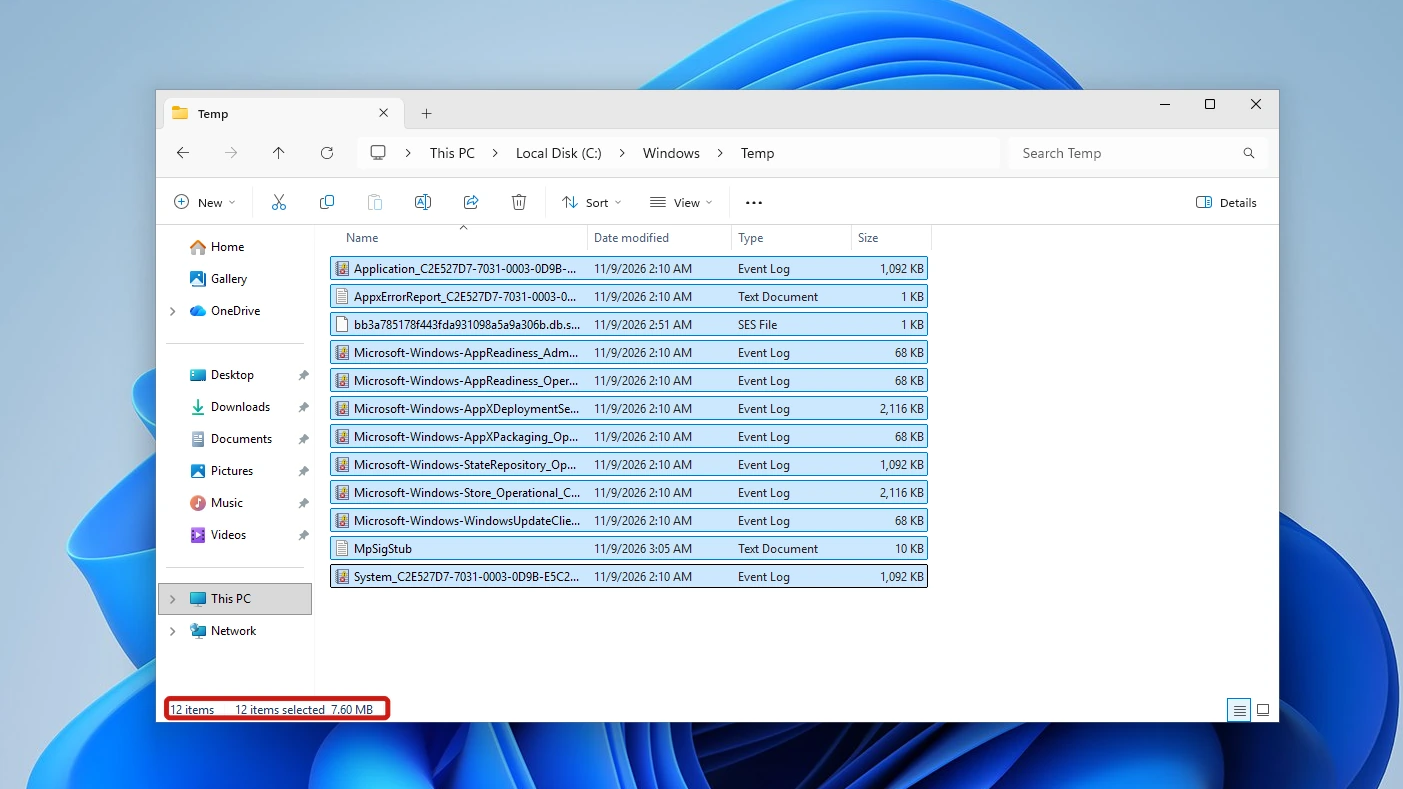
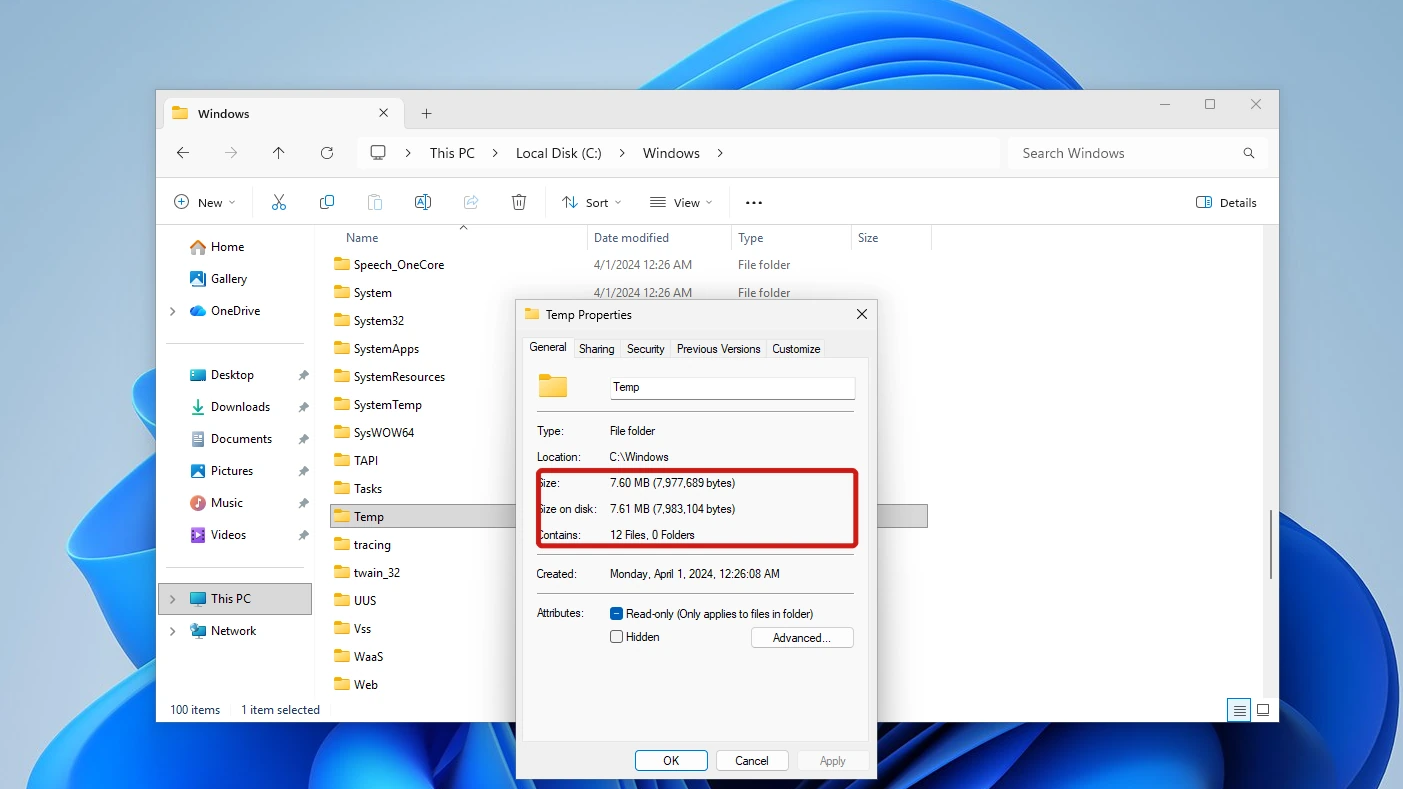
The Windows Temp folder is the folder at C:\Windows\Temp, a system location where Windows and the programs it runs can leave working files. Ours held 12 files and no subfolders, totaling 7.60 MB.
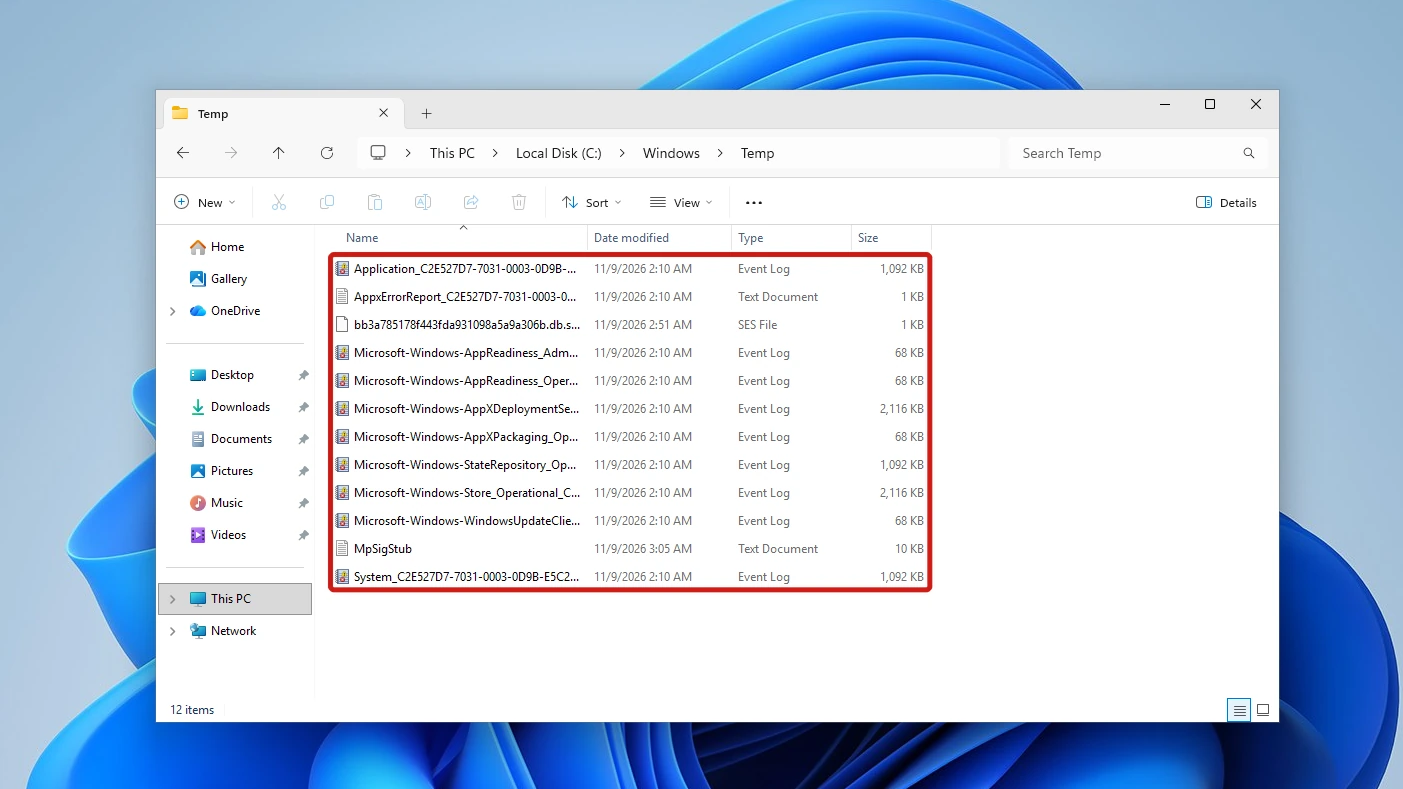
All 12 files carried a date of 11/9/2026. Your own folder will hold different files, because they depend on what your PC has done. Here is what ours held:
| What you see | What it is |
|---|---|
| 9 files named like Application_…, System_… or Microsoft-Windows-AppReadiness_… (68 KB to 2,116 KB) | Event Log files, with names that read like Windows log names |
| AppxErrorReport_… (1 KB) | A Text Document, named like an error report |
| MpSigStub (10 KB) | A Text Document; Windows rewrote a file of this name within a minute of our clearing |
| bb3a785178f443fda931098a5a9a306b.db.ses (1 KB) | An SES file; we did not identify the program that wrote it |
C:\Windows\Temp Versus SystemTemp
Windows 11 also keeps a separate SYSTEM-only folder, C:\Windows\SystemTemp,. Microsoft’s documentation for the newer temporary-path call says it is the temporary folder for processes running as SYSTEM and is inaccessible to non-SYSTEM processes, from Windows 11 build 22000 onward. Leave it alone. Our post on the separate SystemTemp folder, which Windows 11 keeps for SYSTEM-level programs explains why Windows asks for permission there.
Your own %TEMP% folder, the temporary folder for your user account, is a different folder again, with its own permissions. This article does not cover it.
Is It Safe to Clear the Windows Temp Folder?
Yes, the files inside the Windows Temp folder cleared without trouble on our machine. They were Event Log files, two Text Documents and one SES file. Delete removed all 12 in under 3 seconds with no warning, and the only file to return was MpSigStub.log, which Windows rewrote itself about a minute later.
We found no Microsoft page that says this folder is safe to clear, so we are going on what we saw: the files were Event Log files, two text files and one SES file we could not identify, and Windows rewrote MpSigStub.log without being asked. Clear what is inside the folder, not the folder itself, which this guide does not touch.
- Safe to clear, as we saw it: the files inside C:\Windows\Temp.
- Leave alone: the separate C:\Windows\SystemTemp folder.
- Leave alone: any file Windows says is in use. Click Skip and it stays.
- Leave alone: any folder that will not open after you click Continue. We met none.
Continue is the one permission step in this guide. The prompt itself says it gives you permanent access to the folder, so click it only for this folder.
How to Clear the Windows Temp Folder in Windows 11
There are two routes. Method 1 uses File Explorer and is the one that empties the folder. Method 2 uses Settings, and we cover it second because it left this folder untouched.
Method 1: Clear the Windows Temp Folder in File Explorer
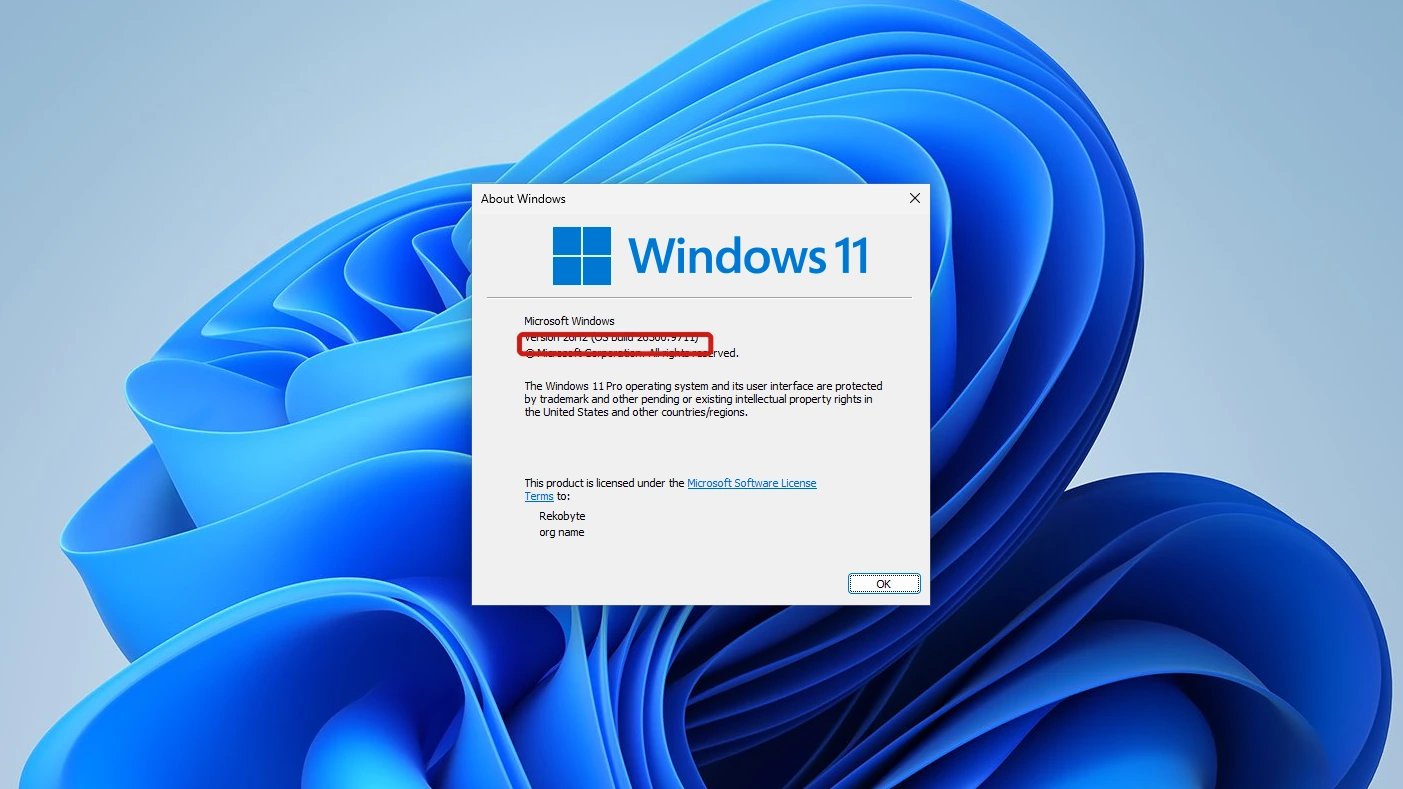
Method 1 takes six steps in File Explorer. Our machine ran Version 26H2 (OS Build 26300.9711), which you can read on your own PC by right-clicking Start, clicking Run, typing winver and pressing Enter.
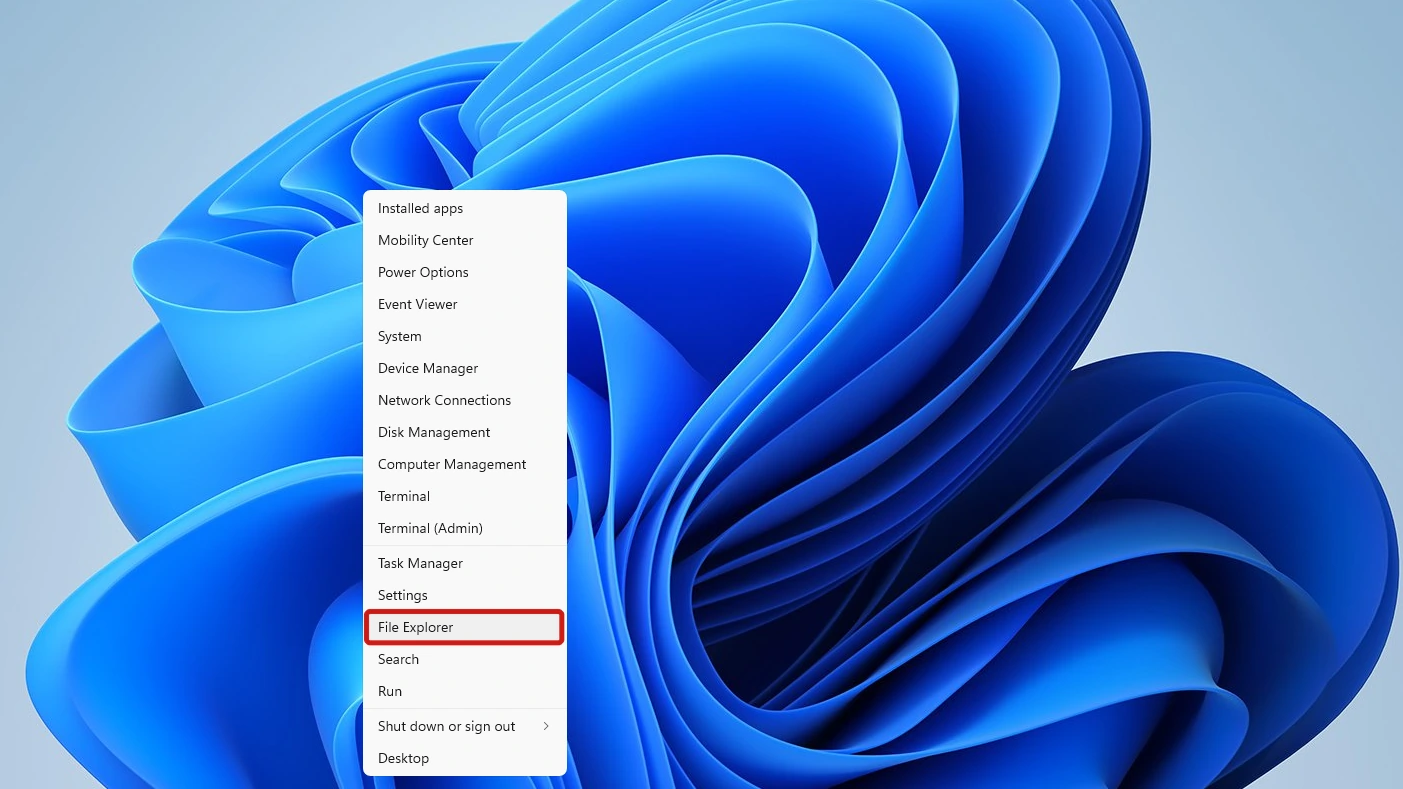
- Right-click Start, then click File Explorer. The Start menu lists it between Settings and Search.
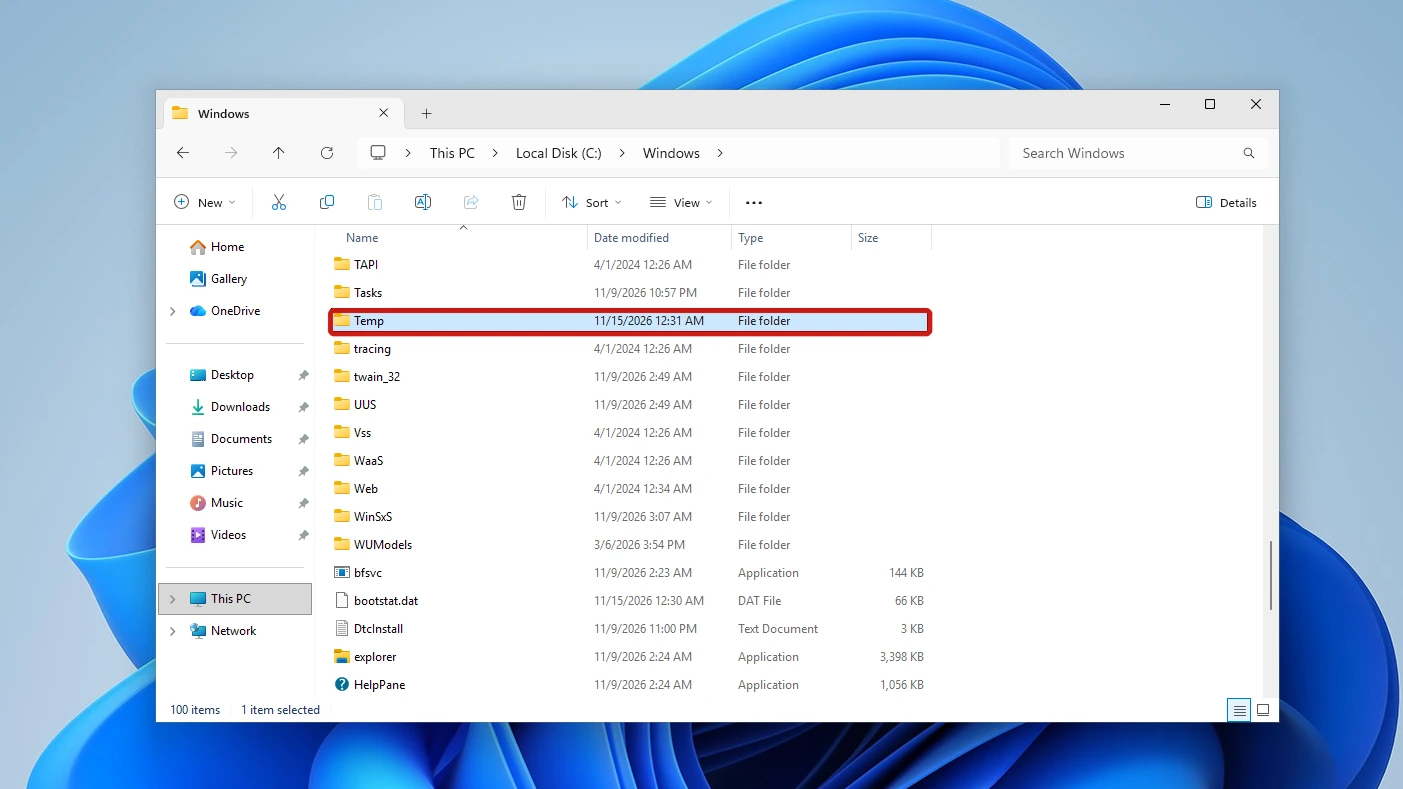
- Click This PC, then Local Disk (C:), then Windows, and double-click Temp. The folder was visible with default View settings, so we did not need to show hidden files.
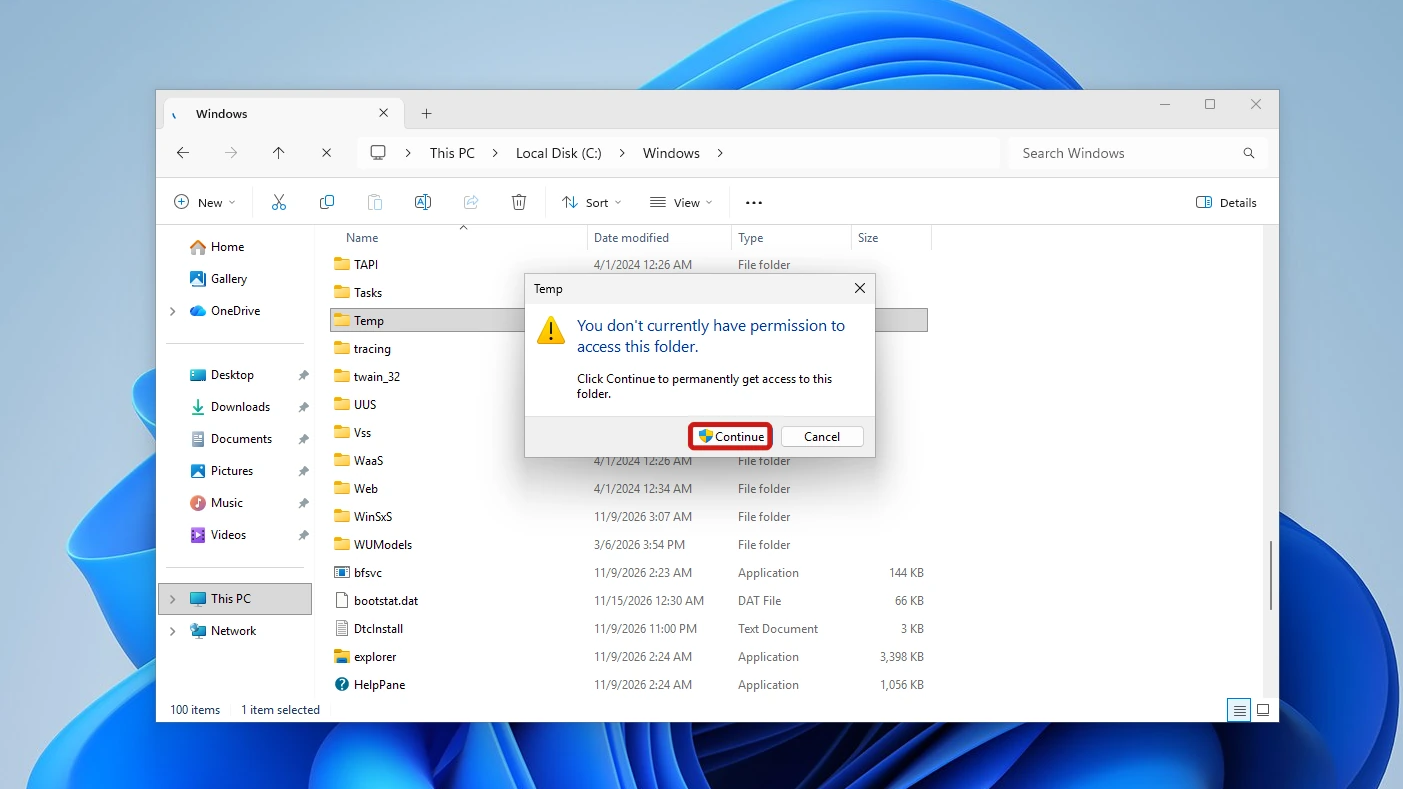
- Click Continue when Windows shows the permission prompt. It is titled Temp and says “You don’t currently have permission to access this folder. Click Continue to permanently get access to this folder.” On our admin account it appeared once, on opening the folder, with no second prompt. We did not open the Security tab or change any permissions, and we only tried an admin account.
- Click inside the folder, press Ctrl+A to select every file, then press Delete. The status bar read “12 items selected 7.60 MB” before we pressed Delete, and no prompt appeared after it. If Windows shows File In Use instead, see the section on a file Windows will not delete, below.
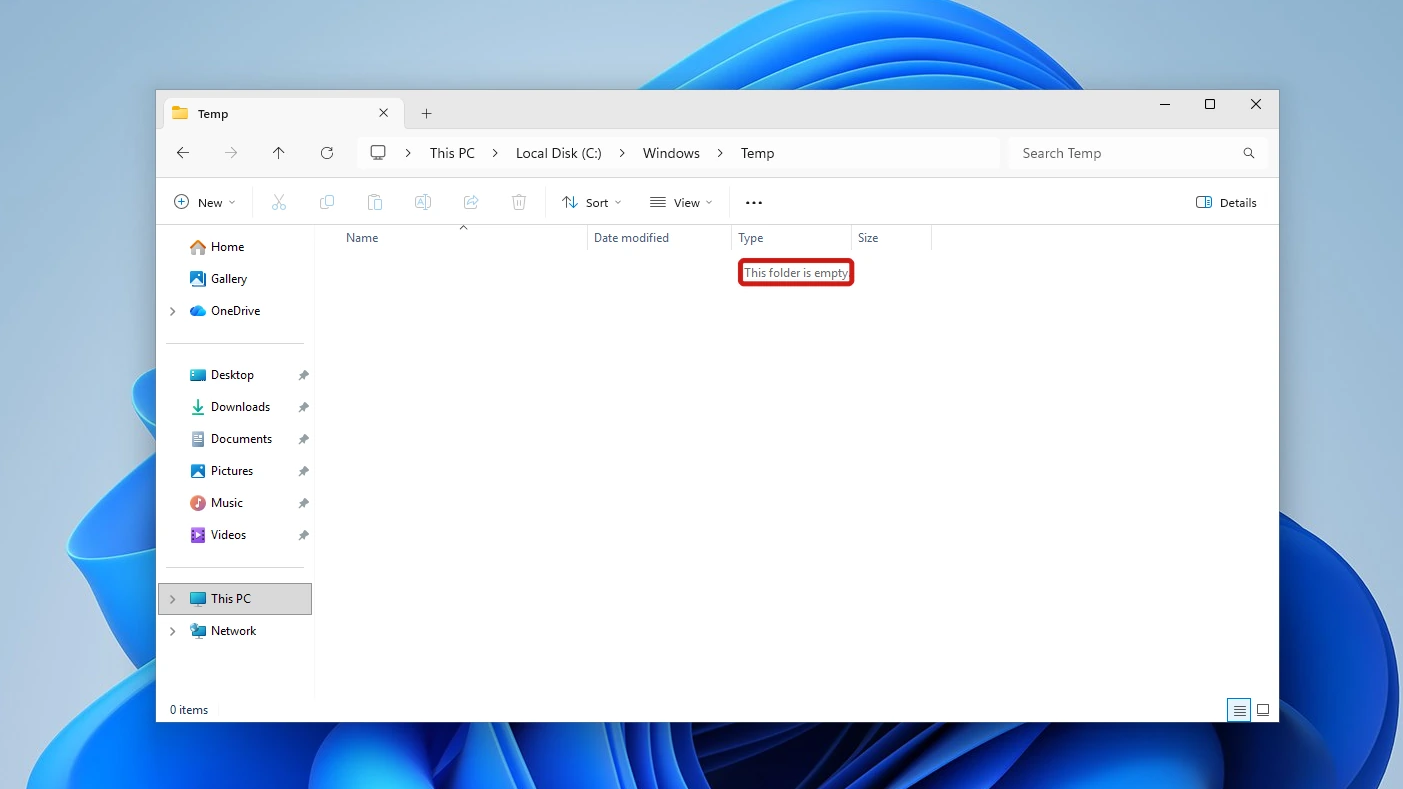
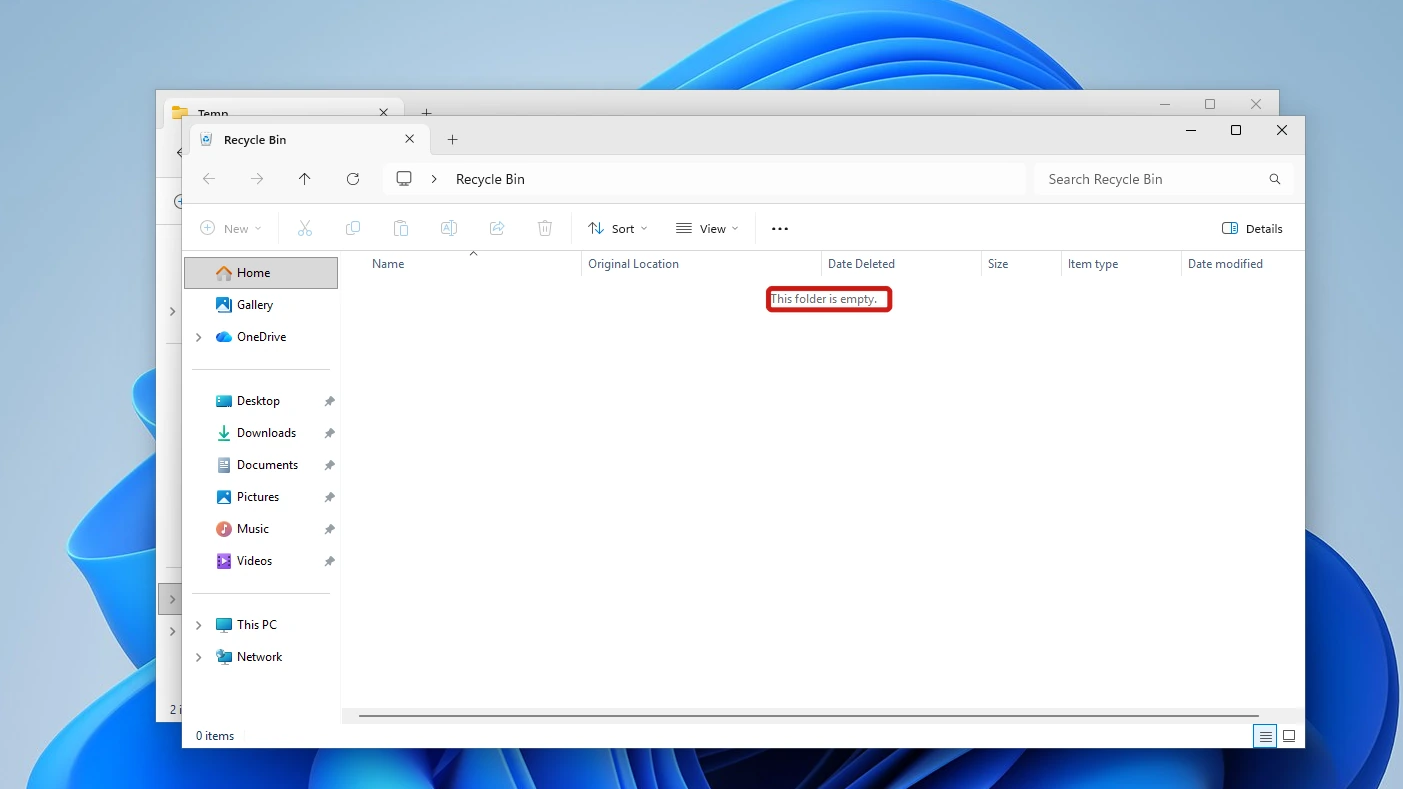
- Read the folder again to see what is left. Ours showed “This folder is empty.” and “0 items”.
- Double-click Recycle Bin on the desktop, click Empty Recycle Bin, then click Yes. Delete sent the files to the Bin (12 items, Original Location C:\Windows\Temp), so the space is not freed until the Bin is emptied. The dialog Delete Multiple Items asks “Are you sure you want to permanently delete these 12 items?”
To check how much you cleared, right-click Temp in the Windows list, click Properties and read the General tab before step 4. It showed 0 bytes until we clicked Continue, then 7.60 MB across 12 files.
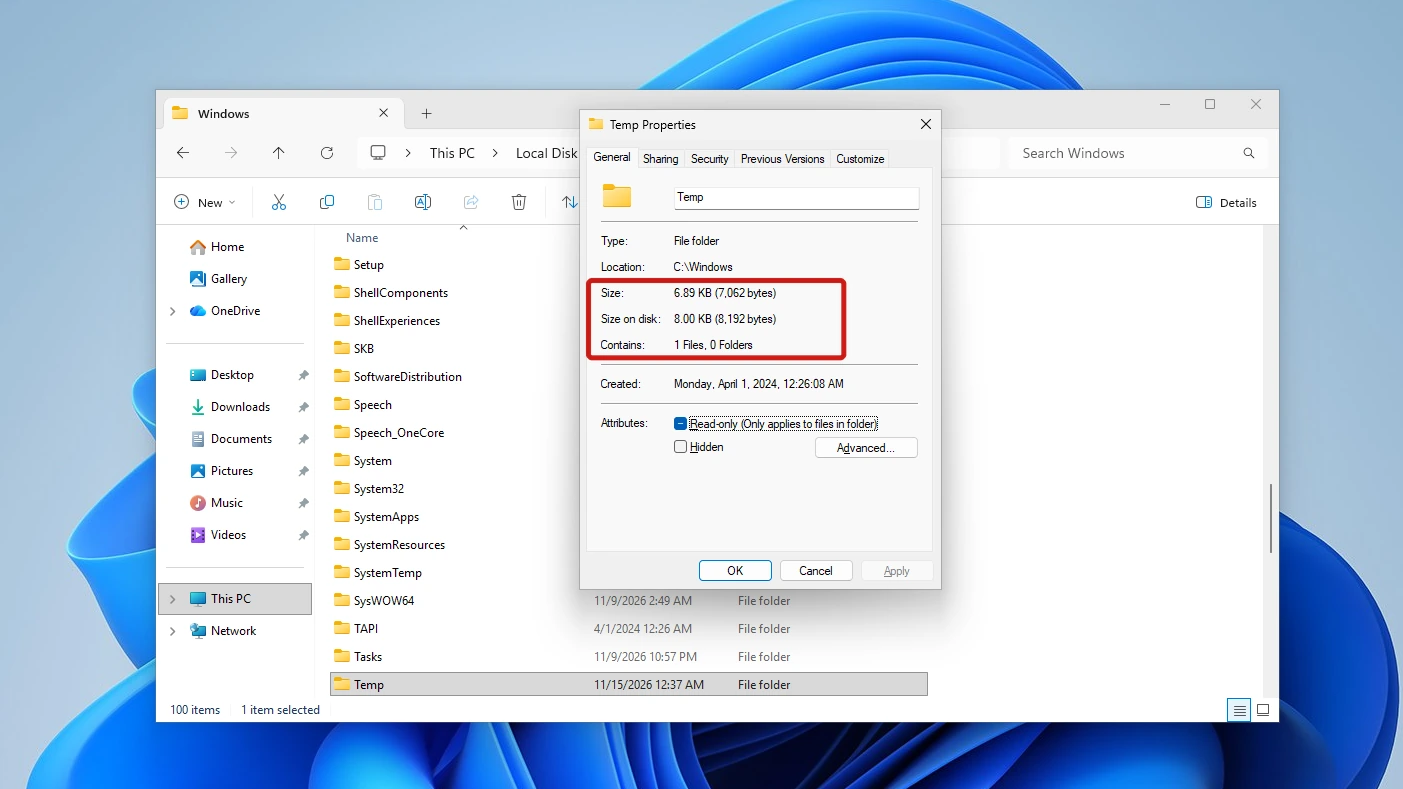
Read it again after step 5. About a minute after clearing, ours showed 1 file of 6.89 KB: Windows had rewritten MpSigStub.log on its own, with no restart.
Note: If a folder inside Temp still will not open after you click Continue, leave it alone and clear only the files.
Method 2: Check Temporary Files in Settings
Microsoft’s guide to freeing up drive space lists Temporary files and the Recycle Bin caveat but does not say which folders that category covers, so we ran it and checked whether it changed the Windows Temp folder. It did not, and these are the steps we took. Do not repeat them to clear this folder.
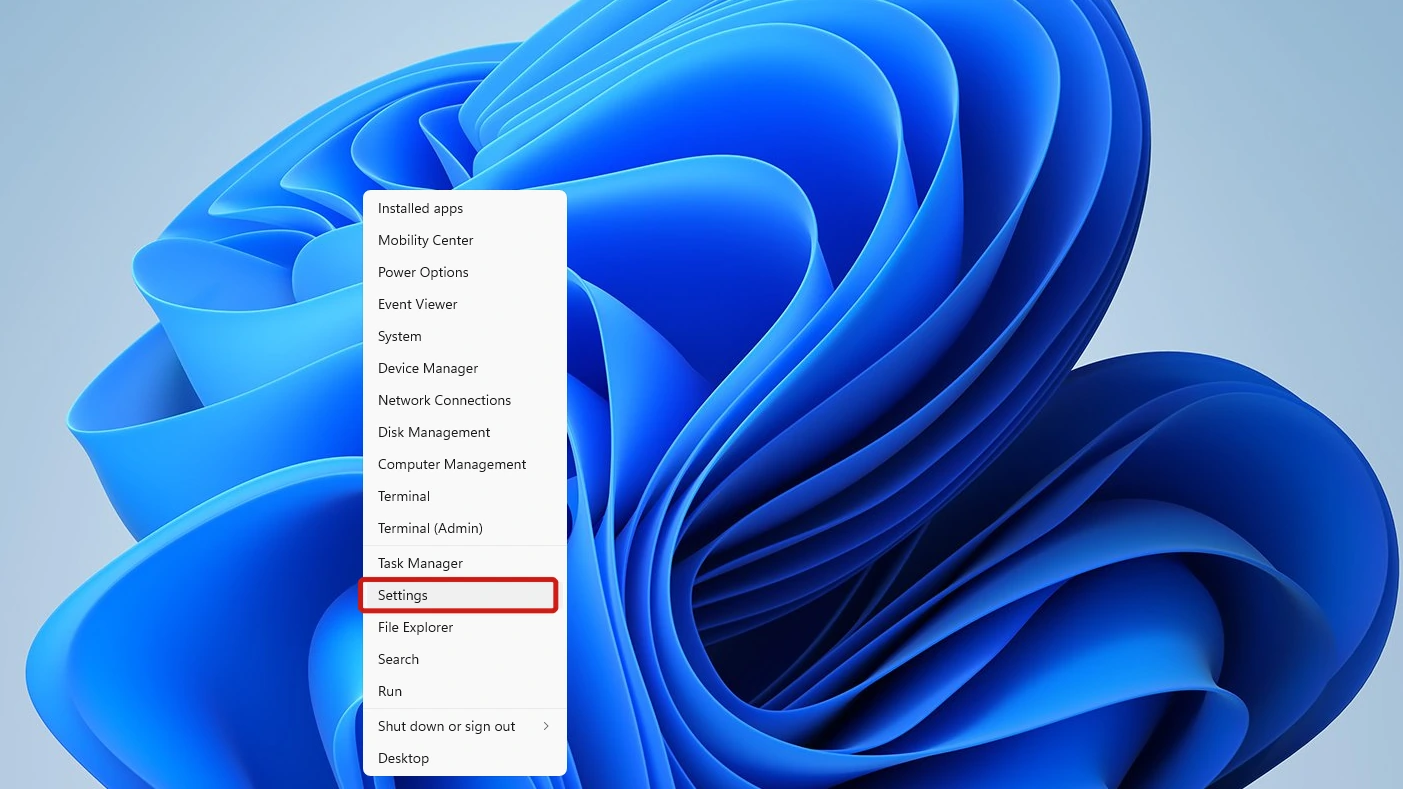
- We right-clicked Start, then clicked Settings.
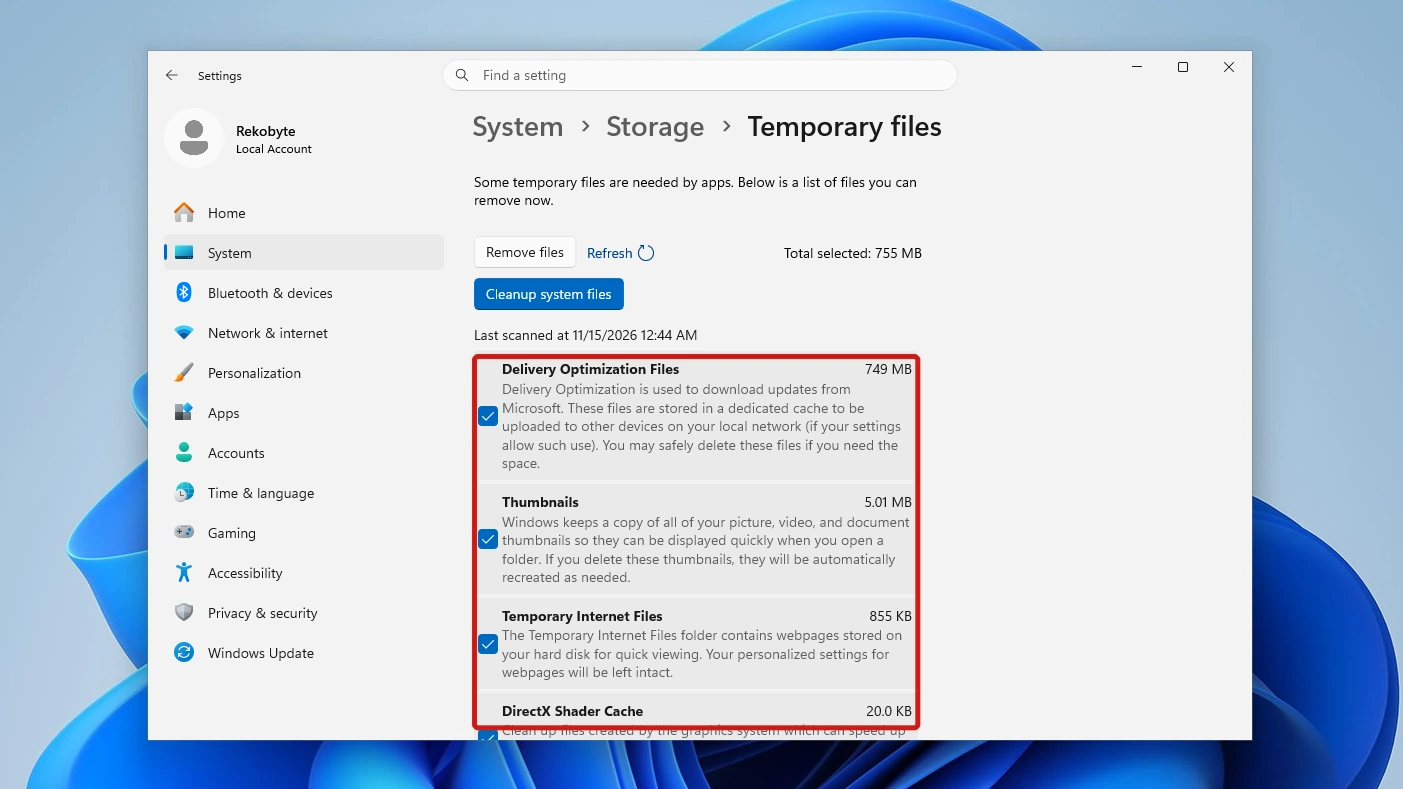
- We clicked System, then Storage, waited for the scan to finish because the page layout shifts when it ends, and clicked Temporary files. The list showed Delivery Optimization Files 749 MB, Thumbnails 5.01 MB, Temporary Internet Files 855 KB and DirectX Shader Cache 20.0 KB, with a total of 755 MB selected. No row names the Windows Temp folder.
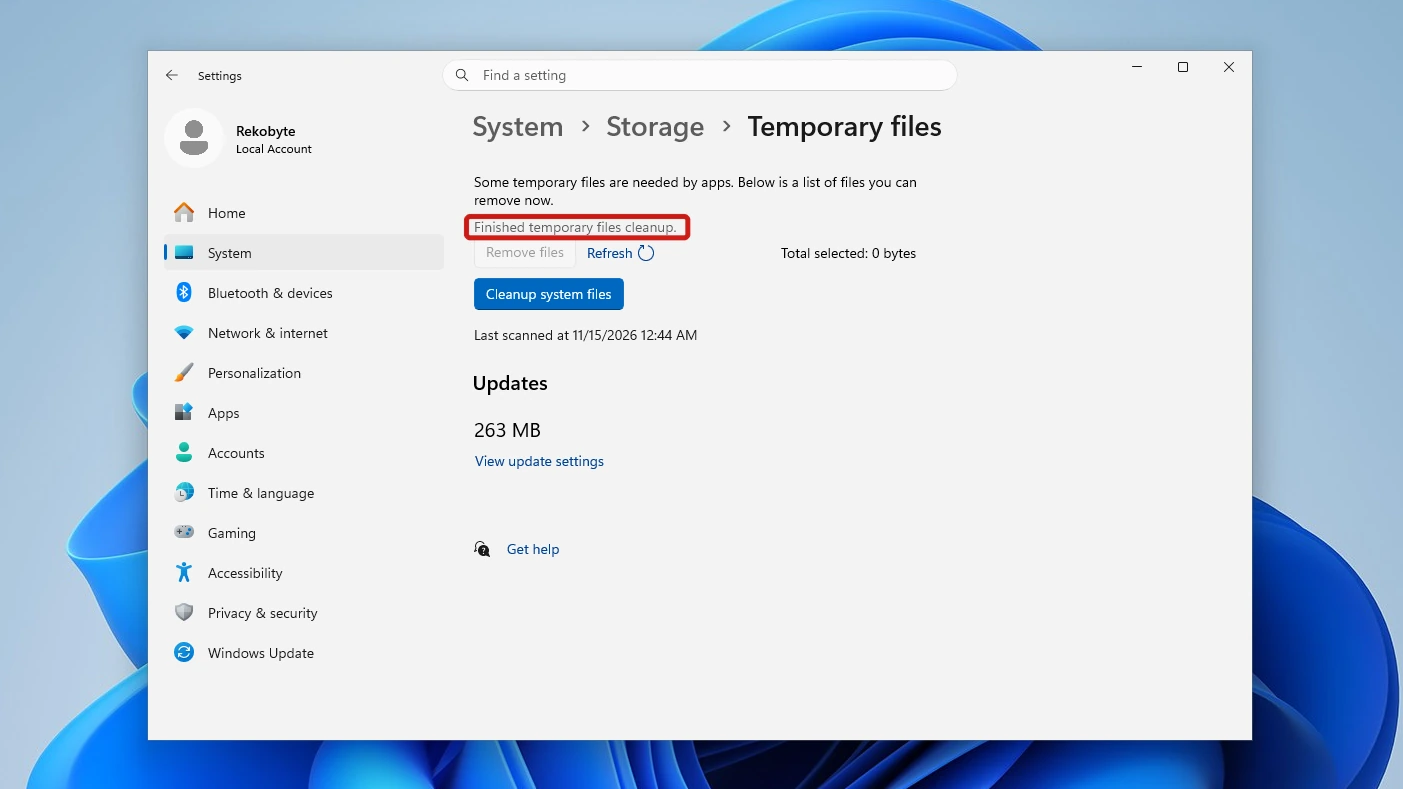
- We clicked Remove files, then Continue in the Remove files dialog. After about 20 seconds Settings said “Finished temporary files cleanup.” and the selected total fell to 0 bytes.
- We right-clicked Temp in the Windows folder in File Explorer and clicked Properties. It still read 7.60 MB across 12 files, identical to before.
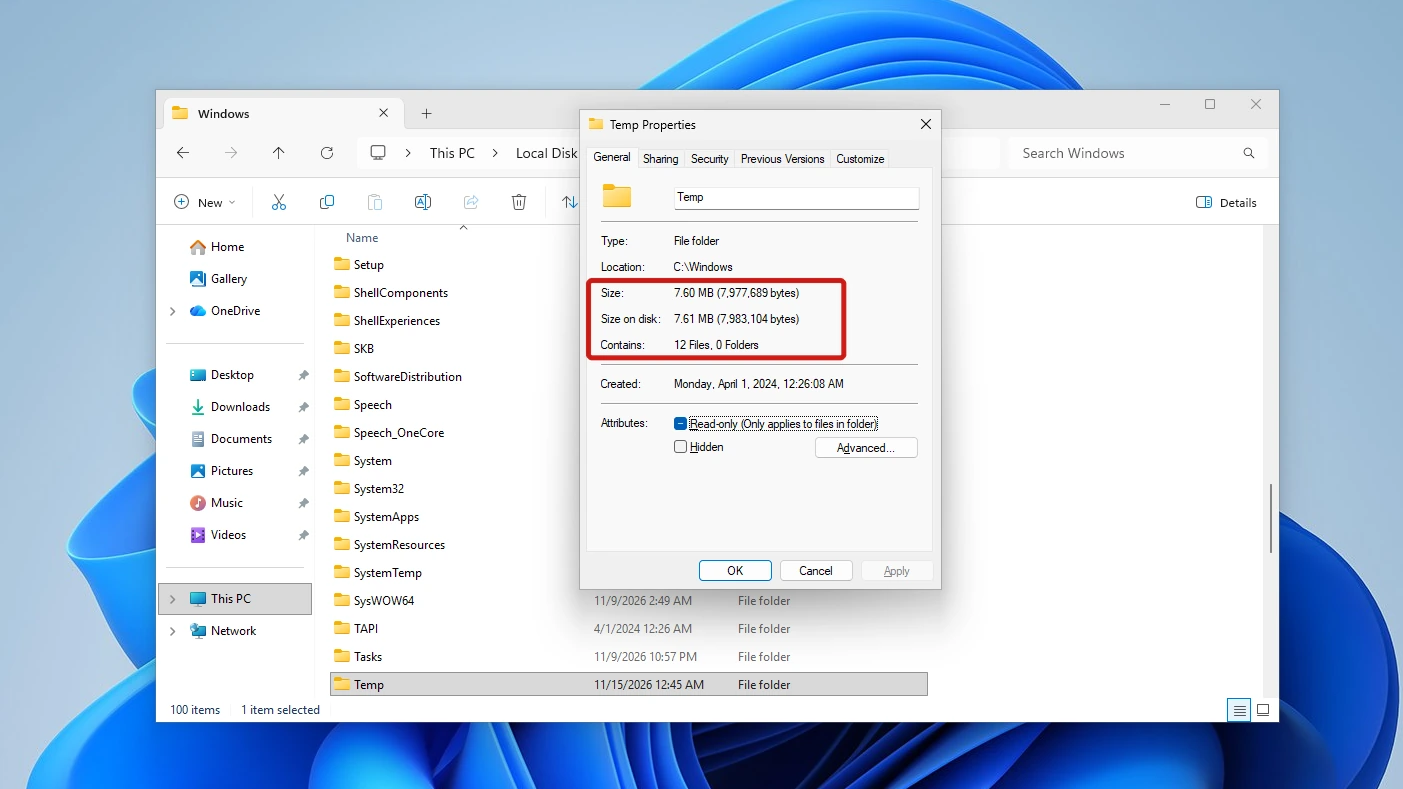
Settings reported its cleanup and left C:\Windows\Temp unchanged. For the biggest row, see what Delivery Optimization Files holds and how Settings clears it. The Package Cache folder, about the same size, was likewise left untouched by Disk Cleanup and Settings, though we did not run Disk Cleanup here. Use Method 1 for this folder.
When the Windows Temp Folder Will Not Let You Delete a File
In the Windows Temp folder, a file that a program has open is where Delete stops and asks. Our plain run never showed that: Ctrl+A and Delete raised no File In Use prompt. So on a second run we held one extra file open ourselves with a program we started, then pressed Ctrl+A and Delete again. Everything else vanished at once and one dialog appeared:
File In Use
The action can't be completed because the file is open in [program name]
Close the file and try again.
The dialog showed a card with the file’s name, type, size and date modified, a checkbox labeled Do this for all current items, and three buttons: Try Again, Skip and Cancel. We clicked Skip. The dialog closed and the run finished with no more prompts, and it skipped only that file.
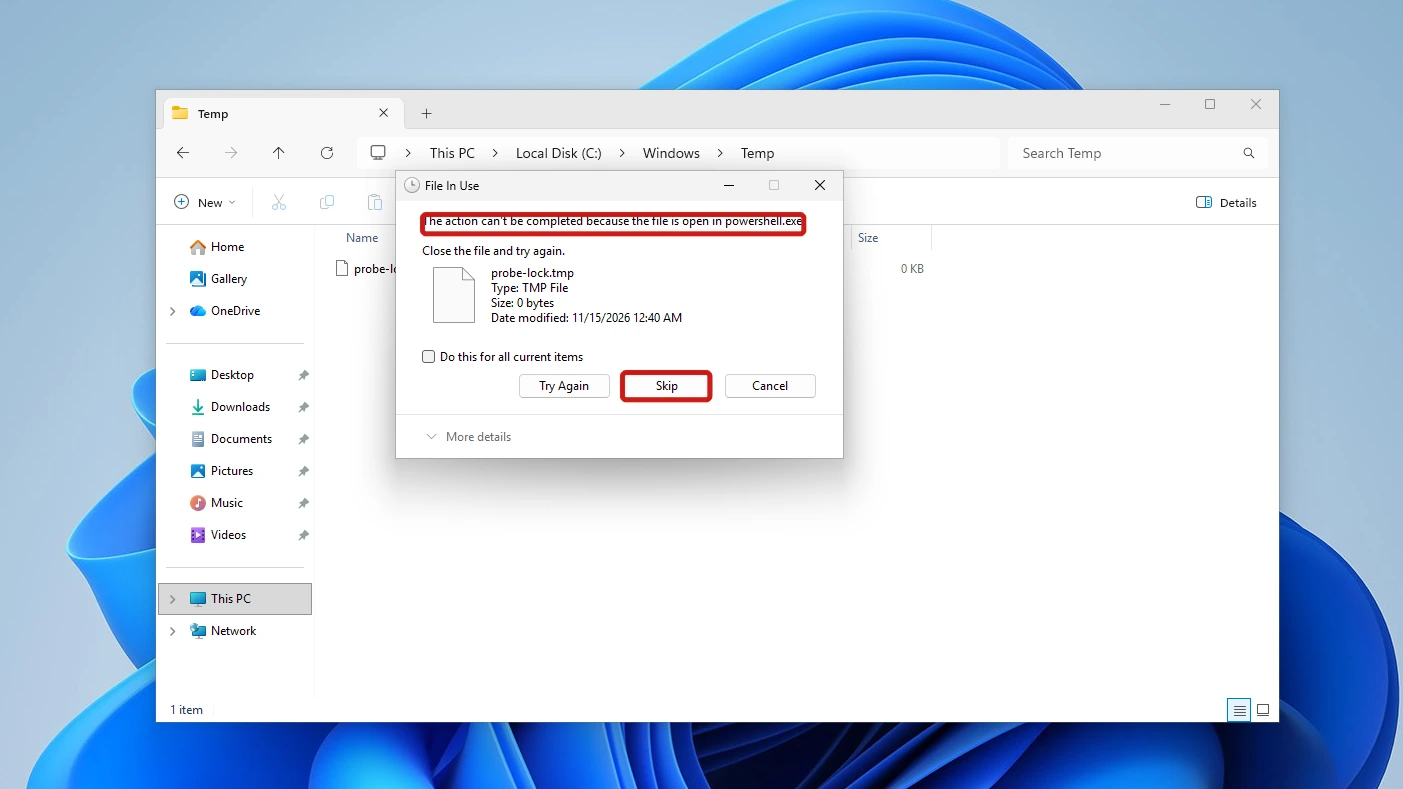
The folder then held that one file, listed as a TMP File of 0 KB, with “1 item” in the status bar. The dialog names the program that has the file open, and what your own folder does may differ from this one run.
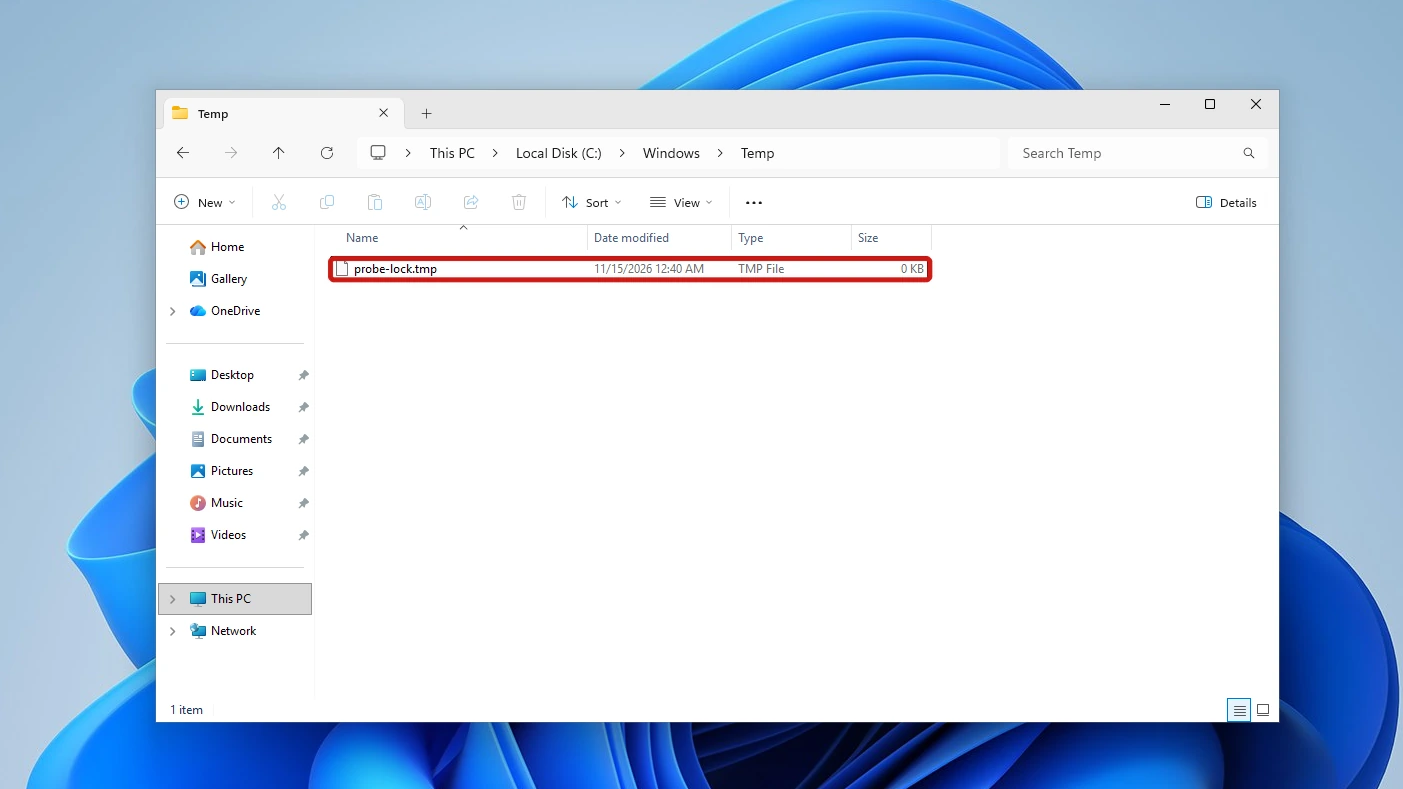
Leave that file alone. This guide does not cover taking ownership, Safe Mode or forcing a delete.
Conclusion
On our Windows 11 machine, clearing the files inside the Windows Temp folder worked. Click Continue at the permission prompt, press Ctrl+A and Delete, and click Skip on any File In Use prompt, which leaves that file where it is. Empty the Recycle Bin to free the space, and leave the separate SystemTemp folder alone.
Storage Sense has its own entry on the Storage page, apart from the Temporary files screen we ran in Method 2. Our update-and-maintenance guide shows how to set up Storage Sense in Settings, though we did not test whether it empties C:\Windows\Temp.
Video Guide
Watch the folder opened, the Continue prompt accepted and the files cleared on screen.