Blank white squares, generic icons or an app’s old picture on your desktop, taskbar or in File Explorer usually mean it is time to rebuild the icon cache in Windows 11. Windows keeps copies of the icons it shows, and once that store is damaged, the wrong pictures keep coming back. We ran and captured every fix below on a Windows 11 machine, from a one-line refresh to deleting the cache files.
We start with what the icon cache in Windows 11 is and where its files live, then cover three methods in order: a one-command refresh, a manual delete from Command Prompt, and a batch file that does the delete in one double-click. Then we answer whether ie4uinit.exe is safe, whether the old IconCache.db file still does anything, and when the icon cache is not the problem.
What Is the Icon Cache in Windows 11?
The icon cache in Windows 11 is a set of database files where File Explorer stores the icon images it has already drawn, so it does not have to build every icon from the app or file each time it shows one.
Apps that register a new file type or icon handler are meant to tell the Shell to invalidate its icon and thumbnail cache. When one skips that step, or the cache itself is damaged, the stored images fall out of step with the real ones and you get one of these:
- Blank white icons where an app or file icon should be
- Generic icons in place of an app’s own icon
- An icon that still shows an app’s old picture
Icon Cache Location in Windows 11
Windows 11 keeps the icon cache in your own user profile, in the Explorer folder under Local AppData, next to the thumbnail cache. The files are not hidden, so File Explorer shows them with its default settings.
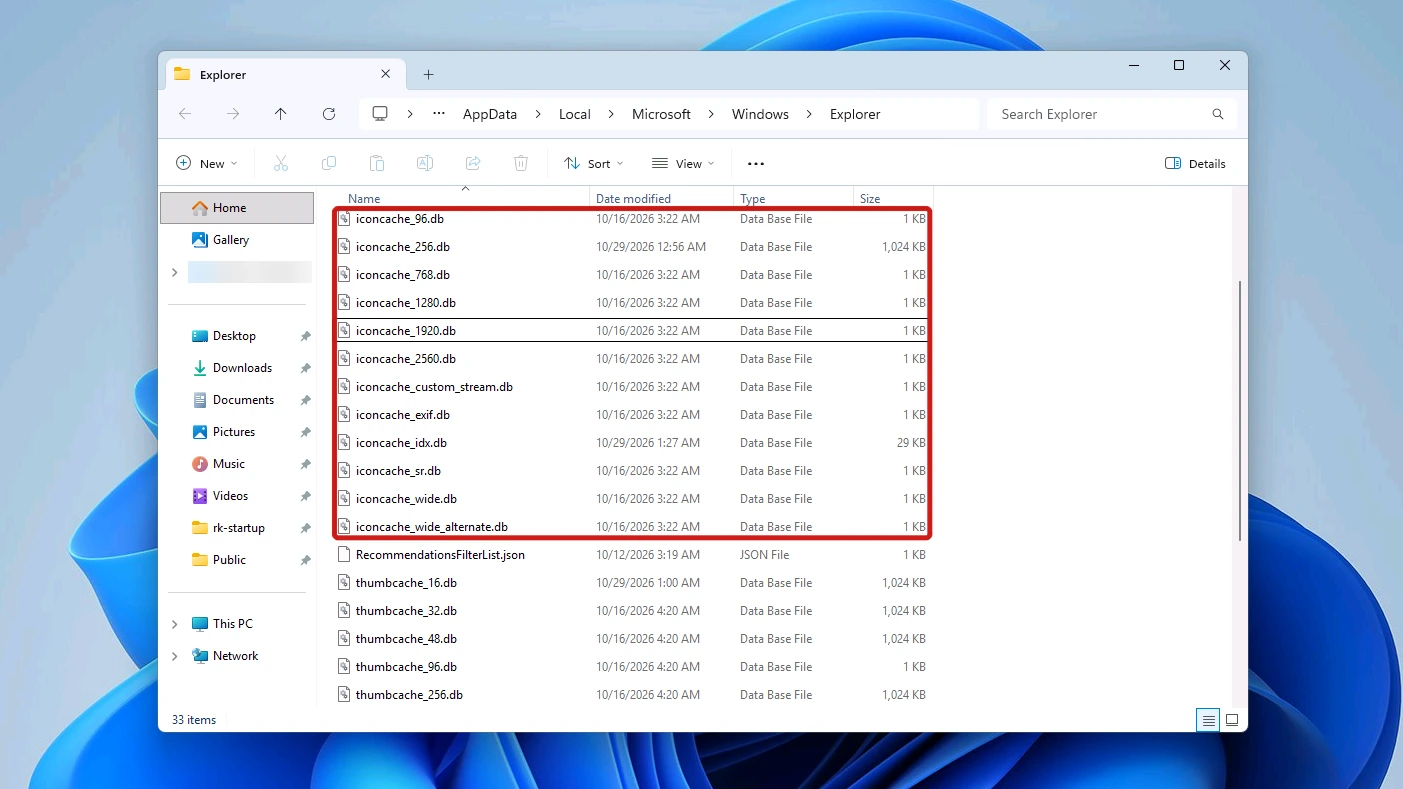
To go straight there, paste this path into the File Explorer address bar and press Enter:
%LocalAppData%\Microsoft\Windows\Explorer
%LocalAppData% stands for the AppData\Local folder in your own profile, so every account on the PC has its own icon cache and a rebuild fixes only the account you are signed in to.
Most of the files are named by pixel size, such as iconcache_96.db and iconcache_256.db. Beside them sit an index file, iconcache_idx.db, and a few others such as iconcache_wide.db. Our test PC had 15 in all. Most were tiny, and a few of the size files were 1 to 2 MB.
Icons and Thumbnails Use Separate Caches
The same folder also holds thumbcache_*.db files. Those store the previews File Explorer shows for images and videos, and they are a separate cache: rebuilding the icon cache leaves your previews alone, and deleting the thumbcache files leaves your icons alone. If your previews are the blurry or outdated ones, clearing the thumbnail cache covers the Disk Cleanup option and the thumbcache files this page does not touch.
How to Rebuild the Icon Cache in Windows 11
There are three ways to rebuild the icon cache in Windows 11, and they work best in order. Start with the one-line refresh in Method 1. If your icons stay wrong, delete the icon cache files with Method 2, and use the batch file in Method 3 when you want that same delete in one double-click.
Method 1: Refresh Icons With ie4uinit -show
The quickest fix is a soft refresh with the built-in ie4uinit tool, run from the Run dialog. Press Win + R to open it.
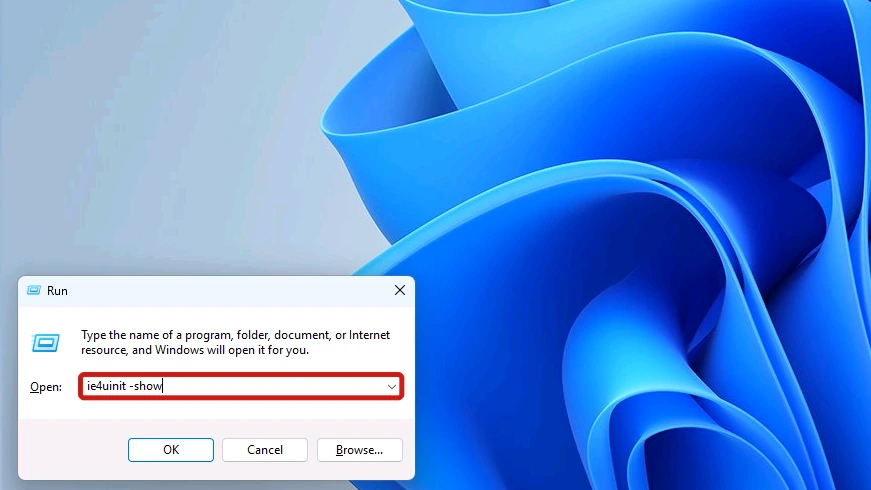
- Type ie4uinit -show in the Open box. Leave a space before the hyphen.
- Select OK or press Enter. The command runs without opening a window.
Give your icons a minute to redraw. If they are still wrong, move on to Method 2, because a soft refresh does not fix every case.
Older guides give ie4uinit -ClearIconCache, which was the Windows 7 form of the command. On Windows 11, use -show.
Method 2: Delete the Cache Files From Command Prompt
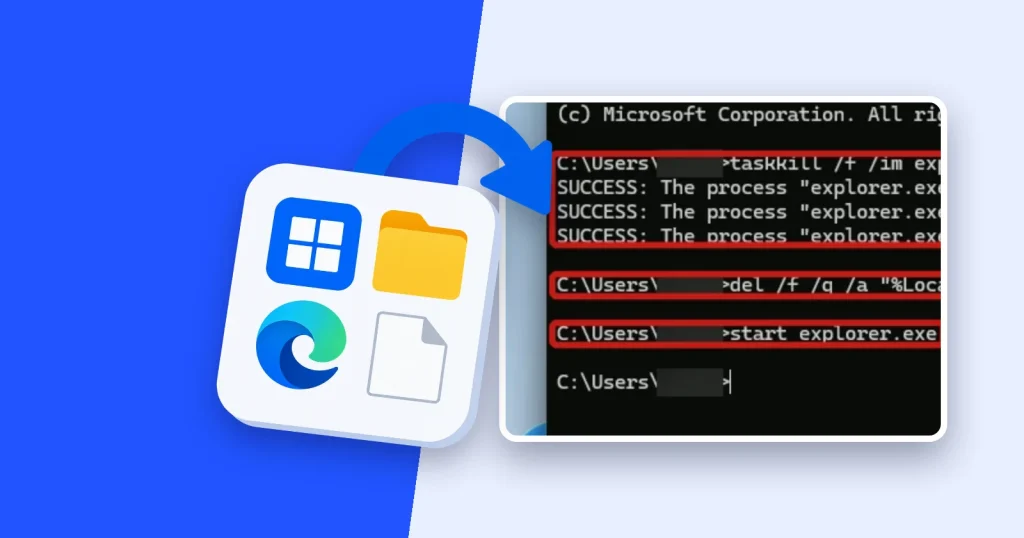
Deleting the files makes Windows write a fresh icon cache. File Explorer holds the files open while it runs, so you end it first, delete the files, then start it again. Ending it also closes every open folder window, so let any file copy or move finish before you start. You do not need administrator rights: we ran every command below from an ordinary Command Prompt.
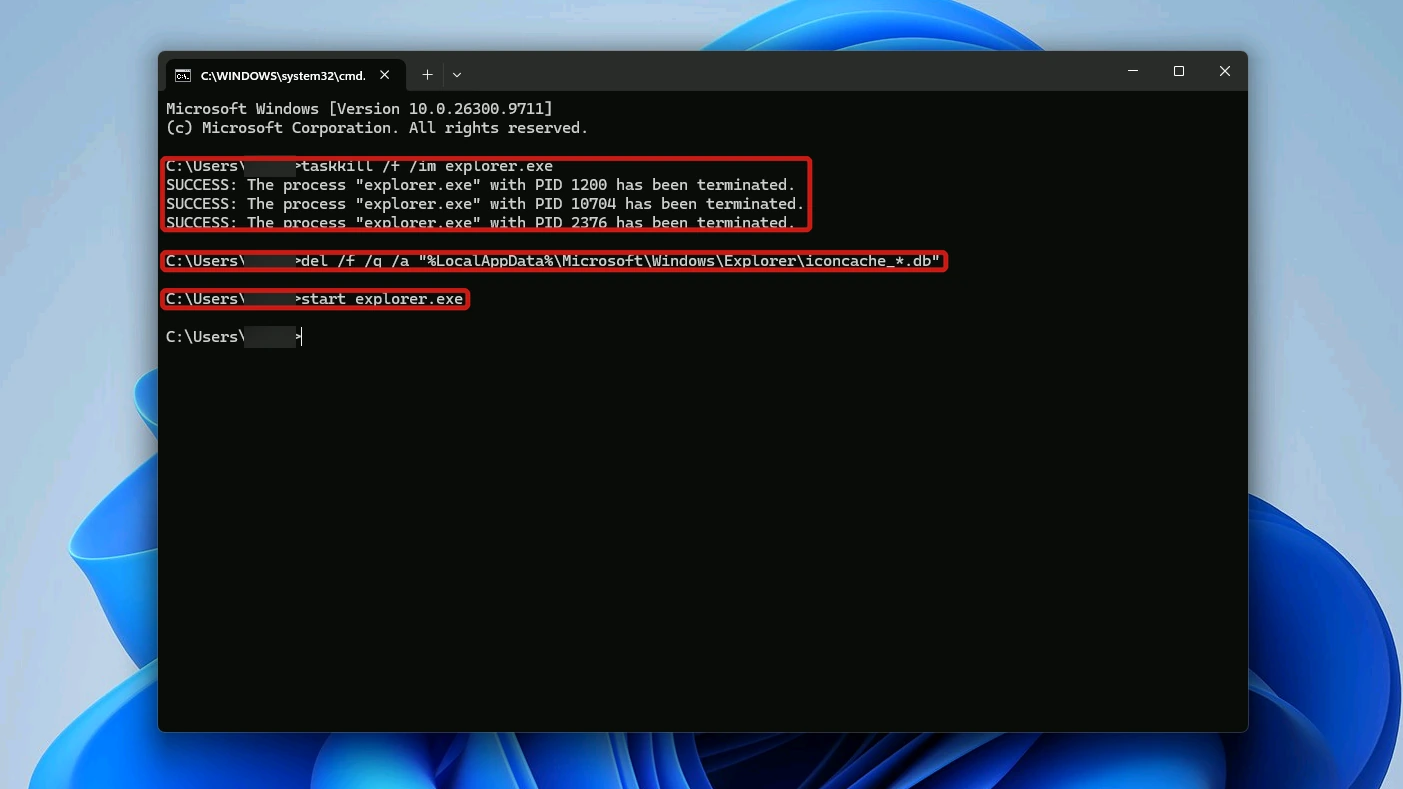
These are the three commands, in the order you run them:
taskkill /f /im explorer.exe
del /f /q /a "%LocalAppData%\Microsoft\Windows\Explorer\iconcache_*.db"
start explorer.exe
- Open Command Prompt by selecting Start, typing cmd and pressing Enter. Keep this window open, because the next step removes the taskbar.
- Type taskkill /f /im explorer.exe and press Enter. The desktop and taskbar disappear, which is expected, and Command Prompt prints a SUCCESS line for each Explorer process it ends.
- Paste the del command from the block above and press Enter. It prints nothing when it works.
- Type start explorer.exe and press Enter. The taskbar and desktop come back within a few seconds, and Windows writes a new set of icon cache files.
Microsoft’s references for taskkill and del list every other switch the two commands accept.
- /im tells taskkill which process to end, here explorer.exe.
- /f on taskkill forces the process to end.
- /f on del also deletes files marked read-only.
- /q skips the delete confirmation.
- /a selects files by attribute.
The index file, iconcache_idx.db, went with the others when we ran it, and Windows recreated the full set when Explorer started again.
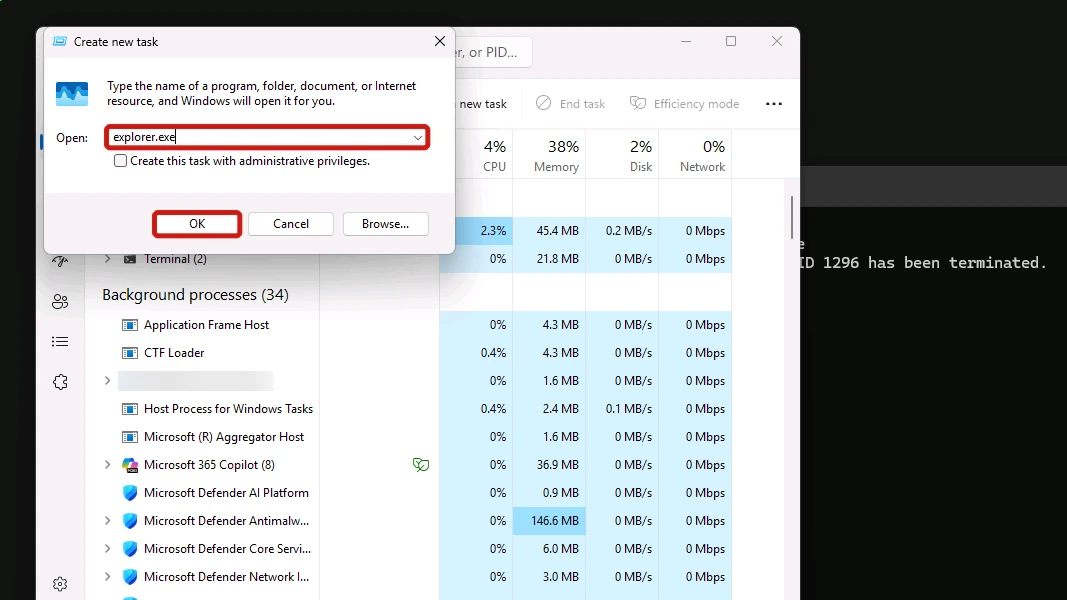
Tip: If the taskbar does not come back, press Ctrl + Shift + Esc to open Task Manager and select Run new task. In the Create new task box, type explorer.exe and select OK. If that shortcut does nothing, type start explorer.exe again in the Command Prompt window you kept open in step 1.
Task Manager opens over the black screen even with Explorer stopped.
Method 3: Reset the Windows 11 Icon Cache With a Batch File
A batch file lets you reset the icon cache in Windows 11 in one double-click. It runs the three Method 2 commands for you, waits a few seconds, then lists the files Windows has just recreated, so you can see that the rebuild worked.
Here is the script:
@echo off
taskkill /f /im explorer.exe
del /f /q /a "%LocalAppData%\Microsoft\Windows\Explorer\iconcache_*.db"
start explorer.exe
timeout /t 5 /nobreak
dir /a "%LocalAppData%\Microsoft\Windows\Explorer\iconcache_*.db"
pause
Each line does one job, and the wait on line five is there because our first test run failed without it:
| Line | What it does |
|---|---|
| @echo off | Hides the commands themselves, so the window shows only their results. |
| taskkill /f /im explorer.exe | Ends File Explorer, which takes the taskbar and desktop with it and releases the cache files. |
| del /f /q /a “…\iconcache_*.db” | Deletes every iconcache file in the cache folder without asking. The thumbcache files are not touched. |
| start explorer.exe | Starts File Explorer again, which brings the taskbar back and writes a new set of icon cache files. |
| timeout /t 5 /nobreak | Waits five seconds and ignores key presses. Without it, the next line ran before Explorer had written the new files and reported File Not Found. |
| dir /a “…\iconcache_*.db” | Lists the new iconcache files with the date and time each was written. |
| pause | Keeps the window open until you press a key, so you can read the list. |
To save the script as a batch file, open Notepad from Start, paste the script into a new file and select File > Save as.
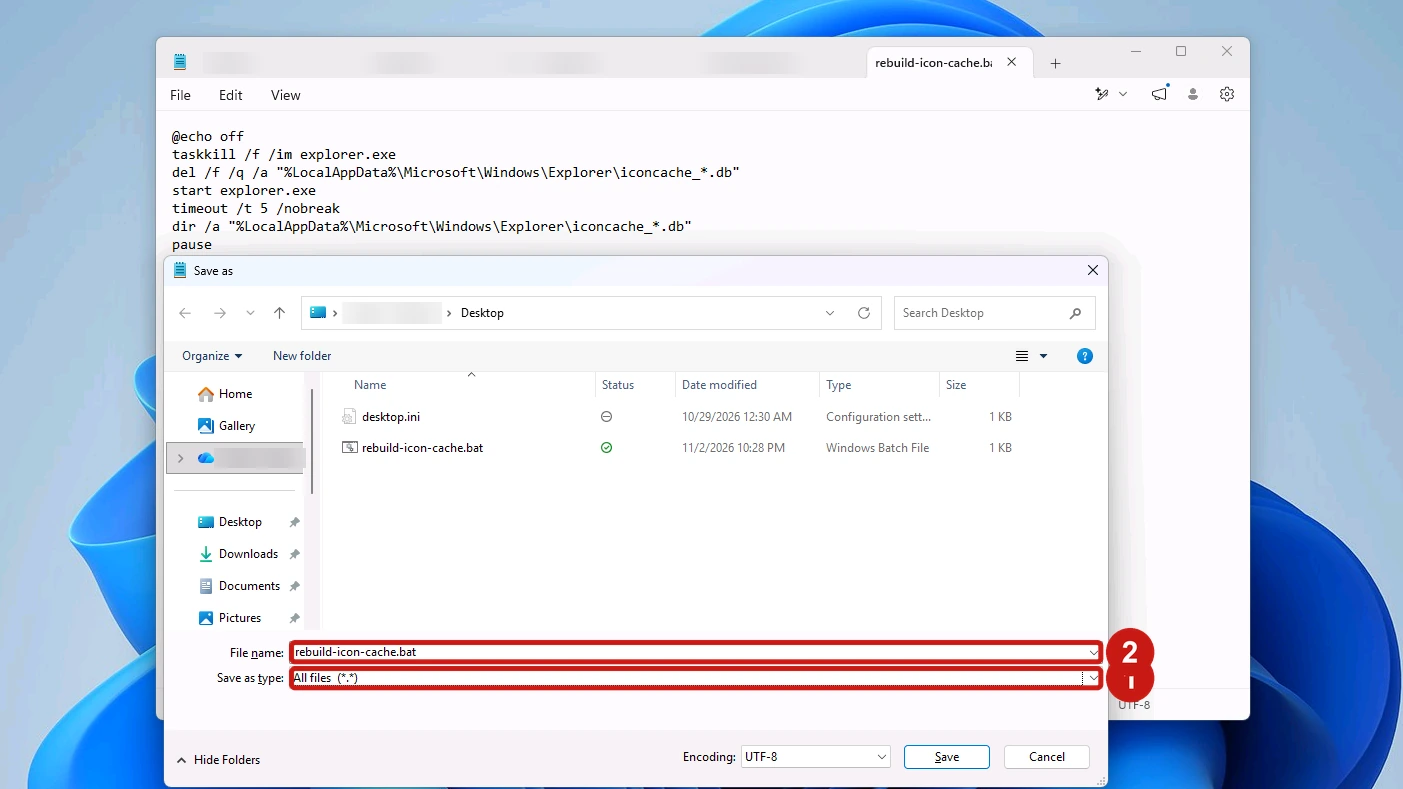
- Set Save as type to All files (*.*).
- Type rebuild-icon-cache.bat in File name and select Save. File Explorer then lists the file as a Windows Batch File.
- Double-click rebuild-icon-cache.bat to run it. A Command Prompt window opens and the taskbar disappears for a few seconds.
Heads up: Like Method 2, the script shuts every File Explorer window, so wait for any copy or move to finish before you double-click it.
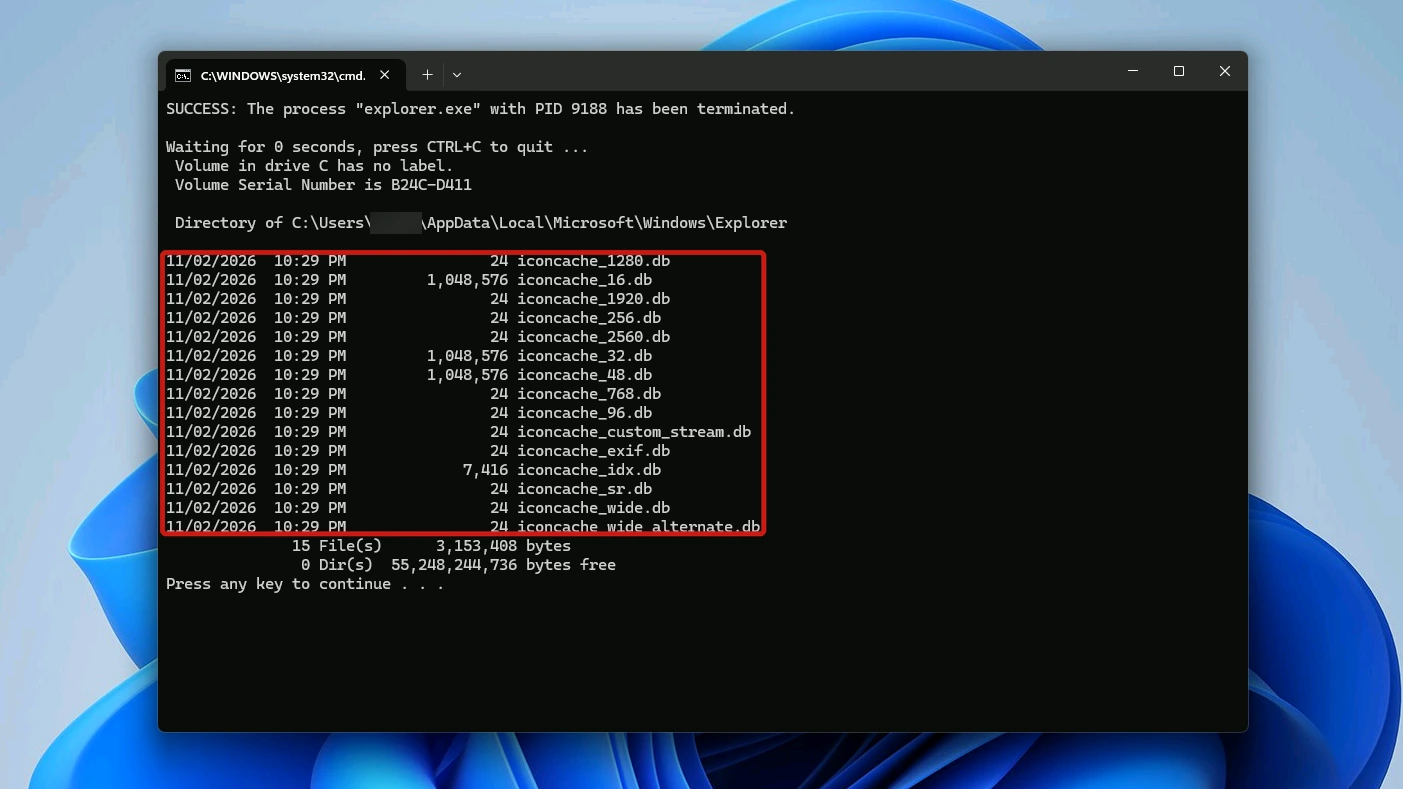
When it finishes, the window lists the rebuilt iconcache files, each stamped with the time the script ran. That timestamp is your proof that Windows wrote a fresh cache. Press any key to close the window.
Is ie4uinit.exe Safe to Run?
Yes, when it is the copy in System32. The ie4uinit.exe that Windows 11 uses lives at the path below, and on the machine we tested it was a Microsoft file carrying a valid Microsoft signature.
C:\Windows\System32\ie4uinit.exe
To check yours, open that folder in File Explorer, right-click ie4uinit.exe, choose Properties and select the Details tab. It should show IE Per-User Initialization Utility as the file description, Internet Explorer as the product name and a Microsoft Corporation copyright. The Internet Explorer name is a holdover, not a sign of an old file: ours showed file version 11.0.26100.9549.
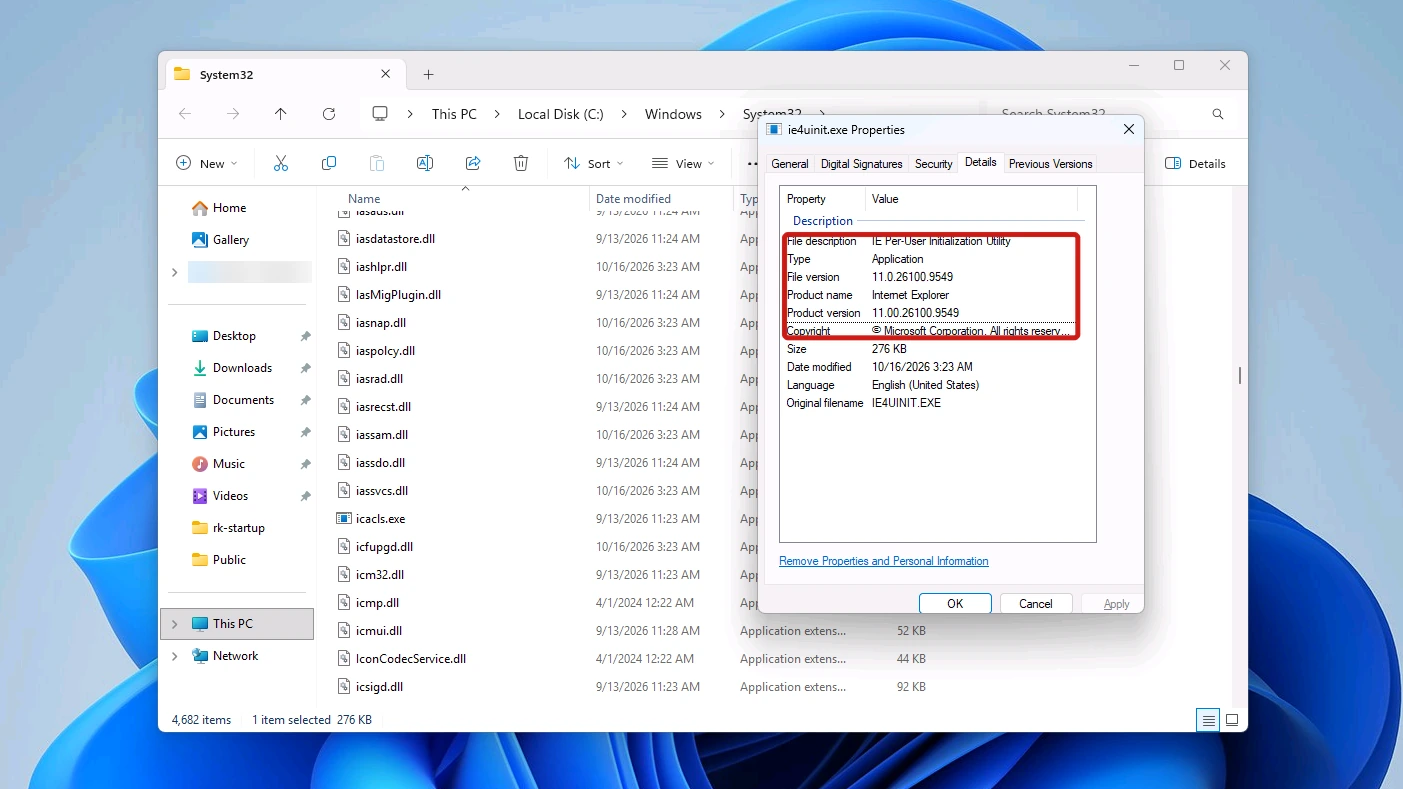
The Details tab only tells you which file you are looking at; the System32 location is what marks it as the Windows copy. A copy of ie4uinit.exe in any other folder is worth scanning with your antivirus before you run it.
Is IconCache.db Still Used in Windows 11?
No. IconCache.db is left over from older versions of Windows, and the live icon cache in Windows 11 is the set of iconcache files in the Explorer folder covered above. You can delete IconCache.db without harm, but it will not fix your icons.
The file sits in the root of Local AppData. It is hidden, so turn on hidden items in File Explorer before you look for it; the linked steps cover both the View menu and File Explorer Options.
%LocalAppData%\IconCache.db
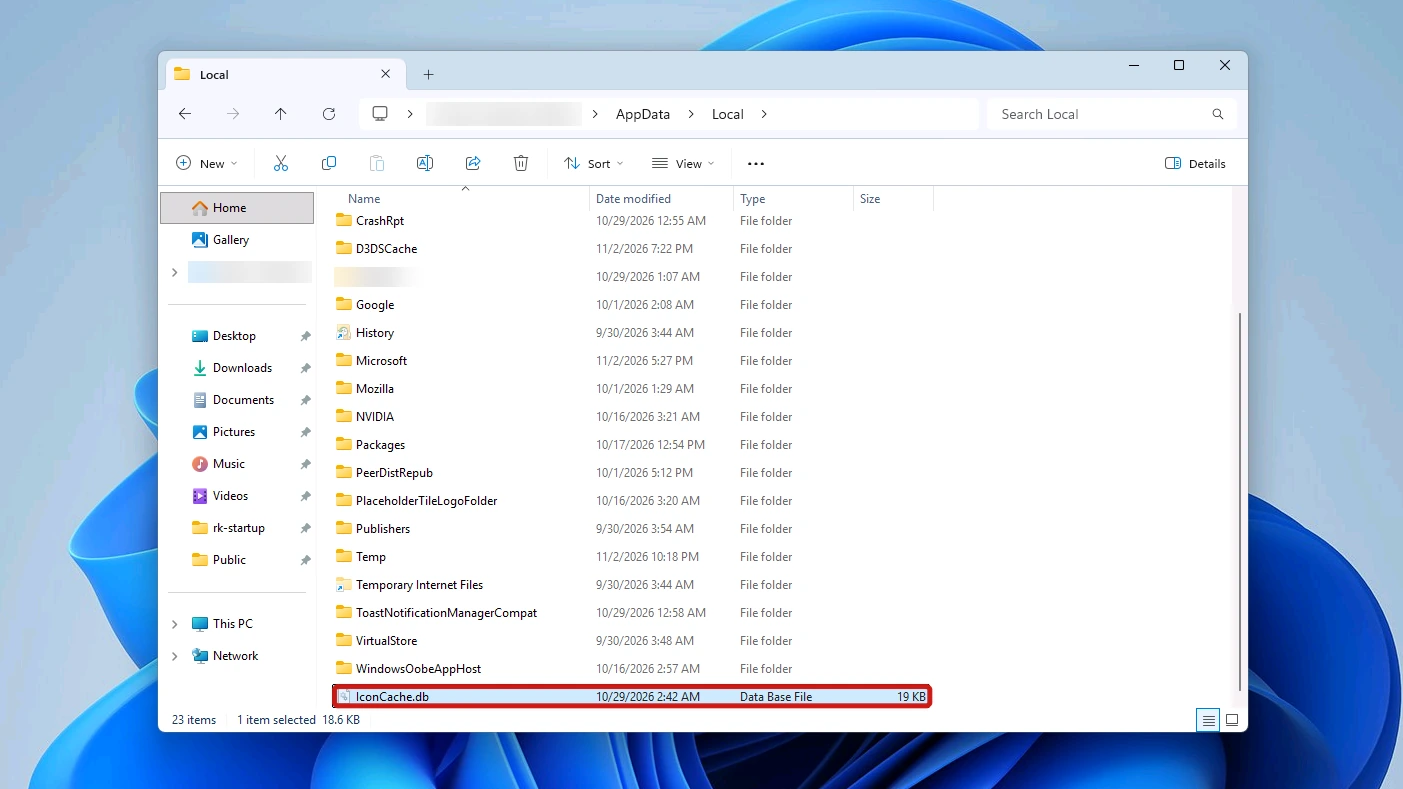
On our test PC (Windows 11 Pro, build 26300), it had an older modified date than the live iconcache files. We deleted it, restarted Explorer and opened four folders. IconCache.db did not come back, and all 15 iconcache files kept the same sizes and times.
When Rebuilding the Icon Cache in Windows 11 Will Not Help
A rebuild only replaces stored icon images, so it cannot fix an icon whose fault sits somewhere else. If your icons are still wrong after all three methods, check these two cases before anything else:
- Blurry or outdated previews: image and video previews come from the thumbnail cache, a separate set of files, so clear that instead.
- A shortcut whose target moved or was deleted: the shortcut shows a generic icon because the file it points to is gone. In our test we moved an app and rebuilt the cache, and the shortcut showed a generic icon afterwards. Point the shortcut at the new location or recreate it.
Conclusion
To rebuild the icon cache in Windows 11, press Win + R and run ie4uinit -show for a quick refresh. If icons stay blank or wrong, end Explorer from Command Prompt, delete the iconcache files in your profile’s Explorer cache folder, then start Explorer again so Windows writes a fresh set. No administrator rights are needed.
To run that delete in one go next time, keep the rebuild-icon-cache.bat file from Method 3 and double-click it whenever your icons go wrong again.