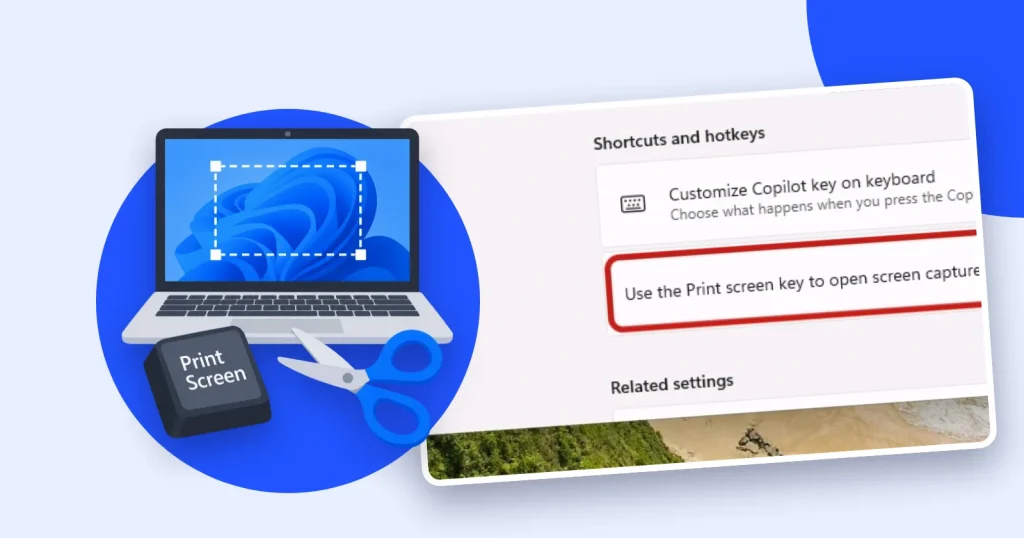
The usual answer to how to take a screenshot on Windows 11 is the Print Screen key, but since update KB5027303 in June 2023, that key opens the Snipping Tool by default. Which shortcut to use instead depends on where you want the image to end up: three of them save a file, while Alt + Print Screen only copies to the clipboard.
Below, we cover the five main shortcuts to take a screenshot on Windows 11, including one for keyboards with no Print Screen key. After them come the Settings switch that decides what Print Screen does and two Snipping Tool features: a capture delay and copying text out of an image. The last section shows where each capture lands and what OneDrive folder backup changes. This page covers still images only, not screen recording.
Five Ways to Take a Screenshot on Windows 11 at a Glance
The methods below run from the most flexible Windows 11 screenshot shortcut to the most specialized. Two are Snipping Tool shortcuts, and two pair Print Screen with a modifier. The fifth is for keyboards without a Print Screen key at all.
| Shortcut | What it captures | Where the image goes |
|---|---|---|
| Windows + Shift + S | Opens the Snipping Tool capture overlay: Rectangle, Window, Full screen or Freeform | The clipboard, and your Screenshots folder by default |
| Print Screen | Opens the Snipping Tool by default (since build 22621.1928) | The clipboard, and your Screenshots folder by default |
| Windows + Print Screen | The full screen | Saved as a file in the Screenshots folder inside Pictures |
| Alt + Print Screen | The active window only | The clipboard, with no file saved |
| Fn + Windows logo key + Space Bar | Alternative for devices with no Print Screen key | Not documented by Microsoft |
These keys are only one group of the Windows shortcuts worth learning first. That guide puts window management and app switching in the order a beginner should pick them up, which is ground this page leaves out.
Method 1: Windows + Shift + S Snips Any Part of the Screen
Pressing Windows + Shift + S is the most flexible way to take a screenshot on Windows 11. It opens the Snipping Tool’s capture overlay directly, so you choose the shape of the capture before you make it rather than cropping afterward. The overlay sits over whatever is on screen, so arrange the window you want before you press the keys.
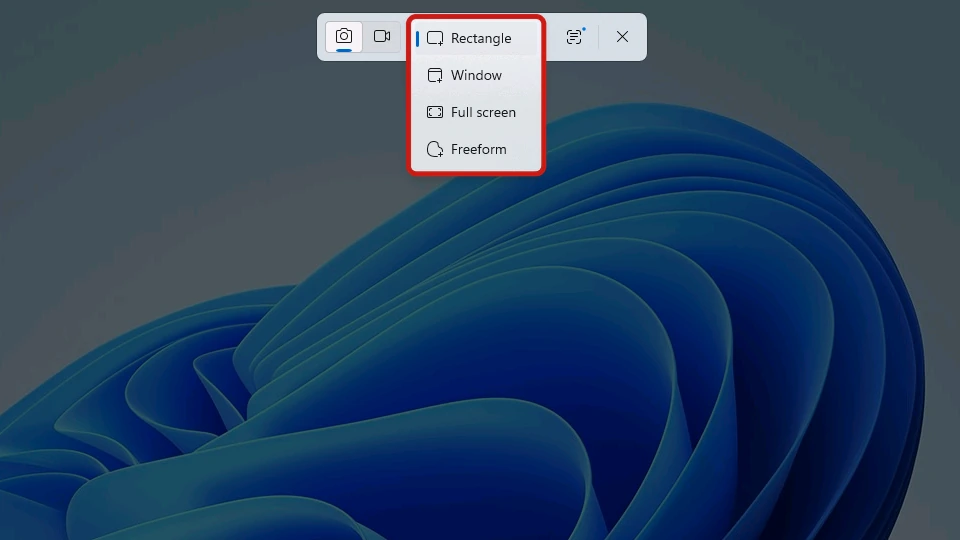
The mode menu on the capture bar offers four modes:
- Rectangle: drag a box around the area you want.
- Window: pick one open window to capture on its own.
- Full screen: capture everything on the screen.
- Freeform: draw any shape around the area you want.
Whichever mode you pick, the Windows 11 Snipping Tool copies the capture to the clipboard and, by default, saves it to your Screenshots folder, so there is nothing to save by hand.
Method 2: Print Screen Opens the Snipping Tool
If you press Print Screen to take a screenshot on Windows 11 and the Snipping Tool opens, the key is working as designed. This default reached general release in Windows 11 22H2, OS Build 22621.1928 (KB5027303), on June 27, 2023. To finish the capture, pick a snip mode as you would in Method 1, and the image is copied and saved just as it is there.
Note: If Print Screen behaves differently on your PC, the toggle in the next section is where to look.
There is one exception, set out in the KB5027303 release notes: if you had already changed the Print Screen setting before the update arrived, Windows kept your earlier choice instead of switching it. The setting can also have been changed at any point since.
How to Stop Print Screen Opening the Snipping Tool
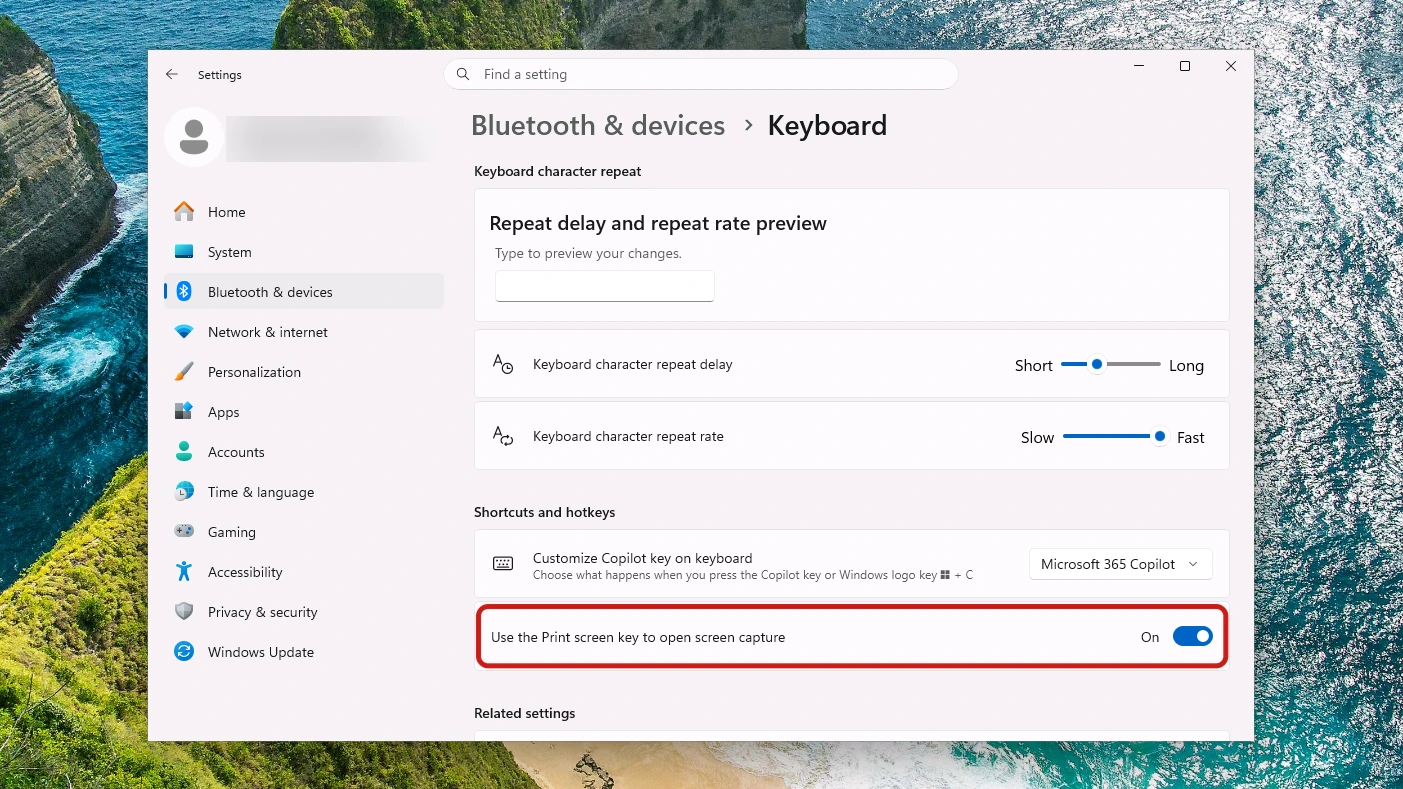
A single toggle in Settings controls what the Print Screen key does. Look first under Settings > Bluetooth & devices > Keyboard. Older releases, including the 2023 update that made the change, kept it under Settings > Accessibility > Keyboard, so check there if your PC has not been updated in a while.
- Open Settings from the Start menu.
- Select Bluetooth & devices, then select Keyboard.
- Turn off the Print Screen toggle to stop the key opening the Snipping Tool. Switching it back on later restores the Windows default.
If what you wanted was a capture without the Snipping Tool window, the next two methods pair Print Screen with a modifier key and send the image straight to a file or to the clipboard.
Method 3: Take a Full-Screen Screenshot on Windows 11 With Windows + Print Screen
Press Windows + Print Screen to capture the full screen and save it as a file in one step. According to Microsoft’s list of Windows keyboard shortcuts, the file goes into the Screenshots folder inside Pictures:
Pictures\Screenshots
Because nothing asks where to save, this is the shortcut for a run of captures you want gathered in one folder to sort later. Full screen means everything visible, so close or move anything private before you press the keys. Moving that folder somewhere else is not covered on this page.
Method 4: Alt + Print Screen Copies Just the Active Window
When you only need the window you are working in, and you plan to paste it rather than keep it, press Alt + Print Screen. It copies the active window to the clipboard and creates no file, so paste the image into a document, a chat message or an image editor next.
Window mode in Method 1 also isolates one window, but it saves a file as well.
For key combinations outside screenshots, our searchable Windows keyboard shortcut reference puts every one in a single lookup, so you can check what a combination does without reading a full guide.
Method 5: Take a Screenshot on a Windows 11 Laptop With No Print Screen Key
On a laptop keyboard with no Print Screen key, you can still take a screenshot on Windows 11 with Fn + Windows logo key + Space Bar. Microsoft gives that combination on its keyboard shortcut for print screen page as the alternative for devices without a dedicated Print Screen key.
If reaching for Fn is awkward, Windows + Shift + S needs neither Fn nor a Print Screen key. It opens the same capture overlay as Method 1, with all four snip modes and the same auto-save.
Two Snipping Tool Features That Help You Take Screenshots on Windows 11
Two Snipping Tool features are worth knowing: a delay that holds the capture for a few seconds, and text actions that pull the words out of the image afterward. Both work inside the app, which you can open by searching for Snipping Tool from the Start menu.
Delay the Capture by 3, 5 or 10 Seconds
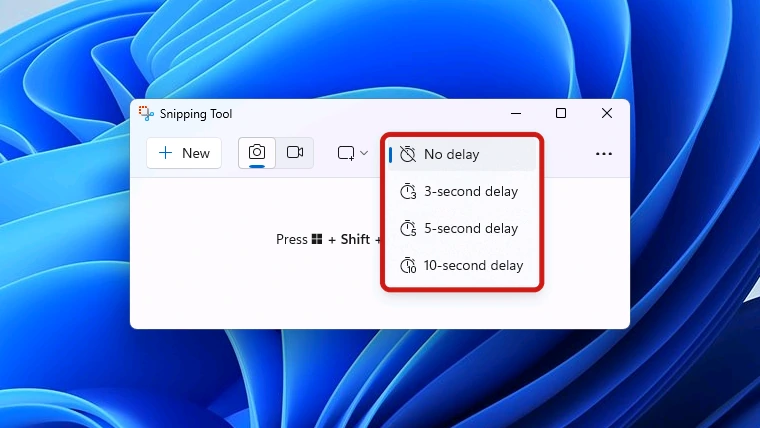
A delay solves one specific problem: menus that close the moment you click somewhere else, such as a right-click menu or the Start menu. The app can wait 3, 5 or 10 seconds before it captures, which gives you time to open the menu first.
- Open the Snipping Tool from the Start menu.
- Select Delay, or press Alt + D, and choose a 3, 5 or 10 second wait.
- Choose a snip mode such as Rectangle or Window, depending on how much of the screen you need.
- Select New to start the countdown.
- Open the menu you want in the image while the countdown runs, and leave it open until the capture happens.
Copy Text Out of a Screenshot With Text Actions
Snipping Tool text actions turn a picture of words into text you can paste, including words inside a photo or a scanned page. The Text actions button runs optical character recognition (software that reads the letters in an image), which the Snipping Tool help page says is performed locally on your device.
To copy the text out, take the capture first, then:
- Select Text actions to run text recognition on the capture.
- Select Copy all text to copy everything it found, then paste it wherever you need it.
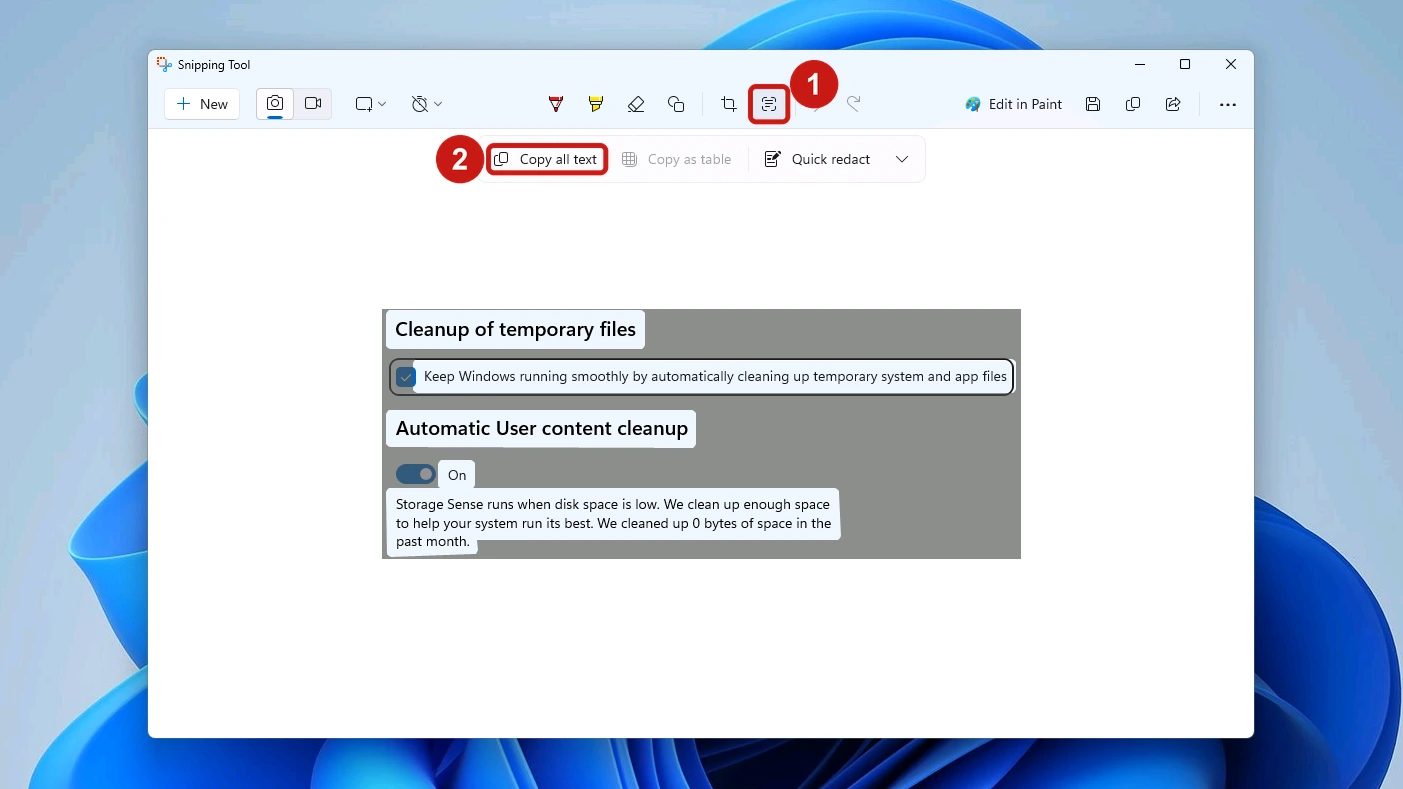
Text actions can also hide email addresses and phone numbers it detects. With text actions on, select Quick redact to cover them, which is worth doing before you share a capture of an inbox or a contact list.
Where Windows 11 Saves the Screenshots You Take
Where the file lands depends on how you take a screenshot on Windows 11, and one of the five methods makes no file at all. Here is the Windows 11 screenshot location for each of the main shortcuts:
- Windows + Print Screen saves a file to the Screenshots folder inside Pictures.
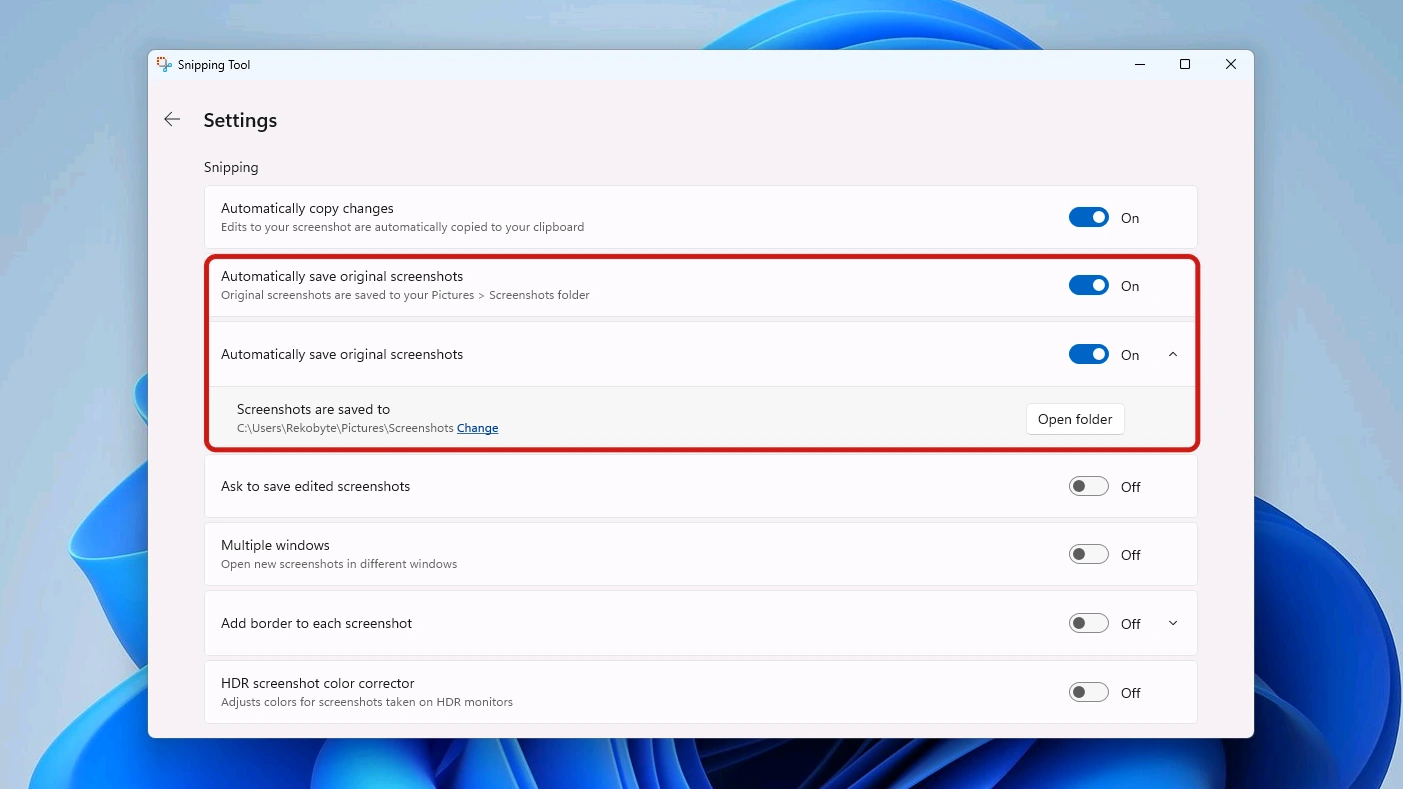
- Windows + Shift + S, and Print Screen at its default setting, copy each capture to the clipboard and save it to your Screenshots folder unless you change the Snipping Tool’s save setting.
- Alt + Print Screen creates no file. The image goes to the clipboard, ready to paste.
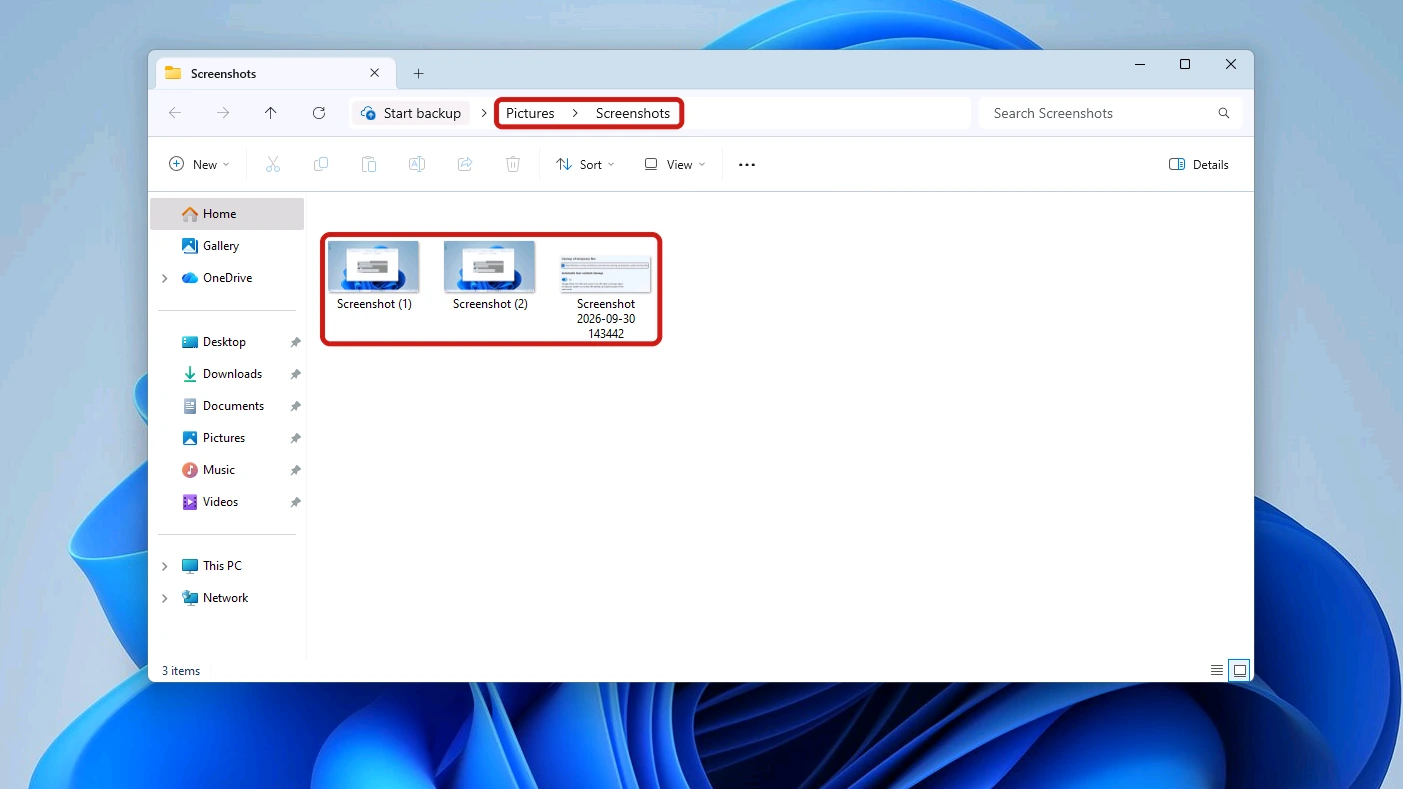
To change that save setting, open the Snipping Tool, select See More, then select Settings. That screen holds the automatic save behavior and the default Screenshots folder, so you can point captures at another folder or change how saving works.
What OneDrive Backup Does to Your Screenshots Folder
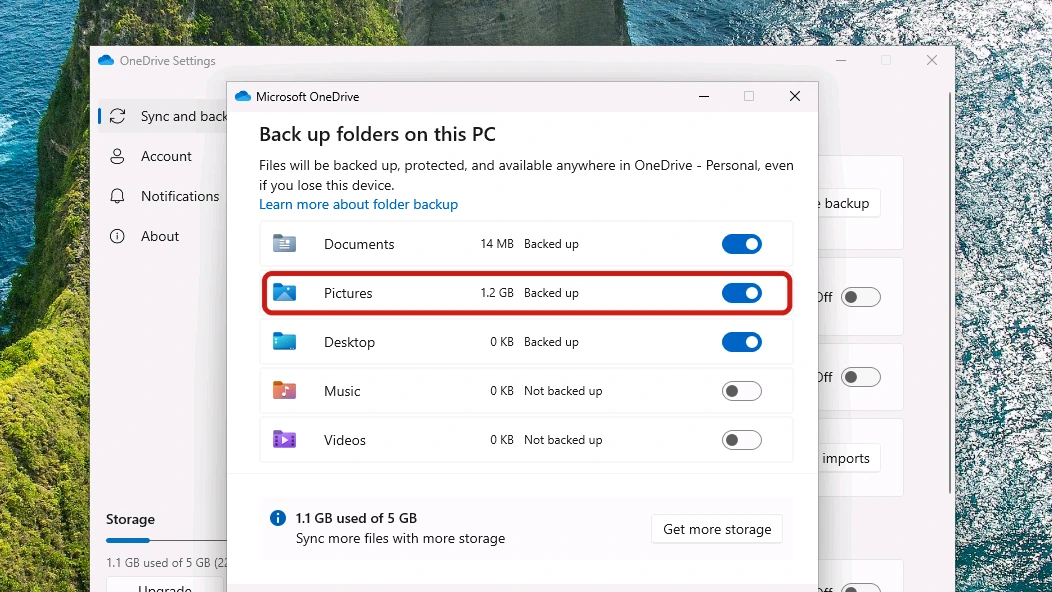
Backing up your Pictures folder to OneDrive moves its contents, Screenshots included, into OneDrive and syncs them, which changes the local path you may be used to opening. That backup is the supported route. OneDrive’s settings may still show a Save screenshots I capture to OneDrive switch, but Microsoft’s page on saving screenshots automatically says that feature is no longer available and advises making sure Pictures is part of your OneDrive instead.
Heads up: Screenshots missing from the Screenshots folder inside Pictures? Check whether OneDrive is backing up Pictures.
You turn backup on in OneDrive’s Settings > Sync and backup > Manage backup, where each folder, Pictures included, has its own switch. If Pictures shows a “folder isn’t selected for syncing” error, the OneDrive folder backup instructions say to select Pictures, Screenshots and Camera Roll together under Choose Folders.
Conclusion
To take a screenshot on Windows 11, press Windows + Shift + S and pick a snipping mode, or press Print Screen, which opens the Snipping Tool by default. Windows + Print Screen saves the whole screen to the Screenshots folder inside Pictures, and Alt + Print Screen copies only the active window to the clipboard.
If the rest of the PC is still new to you, our Windows 11 guide for beginners walks through the desktop and Settings, plus everyday jobs like finding files and installing apps safely. When Print Screen does something you did not expect, the toggle under Settings > Bluetooth & devices > Keyboard is the first thing to check.