Modded Minecraft is memory hungry, and the CurseForge app does not always give a pack enough of it by default. The result is stutter, long loading screens, and out-of-memory crashes on bigger modpacks. This guide shows how to set the RAM allocation in CurseForge two ways, globally for every pack or custom for a single modpack, and how much memory to actually assign for a good balance of speed and stability. The steps below match the current CurseForge app.
Why RAM Allocation Matters in CurseForge
Minecraft’s performance depends heavily on how much memory it can use. Too little RAM causes lag, long loading times, and crashes, especially with large modpacks that load hundreds of extra assets at once. Assigning more memory gives the game room to keep those assets loaded, which smooths out frame drops and world loading.
More is not automatically better, though. Java, which Minecraft runs on, has to manage whatever memory it is given, and handing it far more than a pack needs can add stutter rather than remove it. The aim is enough headroom for the modpack, with plenty left for Windows. The sections below cover both the how and the how much.
How to Set the RAM (Memory) Allocation in CurseForge
There are two ways to control how much memory CurseForge gives Minecraft. The global setting applies the same allocation to every modpack, while a per-profile override sets a custom amount for one pack only. Most players set a sensible global figure first, then override it for the one or two packs that need more.
Method 1: Set the Global Memory Allocation
The global setting sits in the app’s Java options and applies to every modpack that does not have its own custom value. If the app is not set up yet, install CurseForge first.
- Open the CurseForge app. Launch the CurseForge application on the computer.
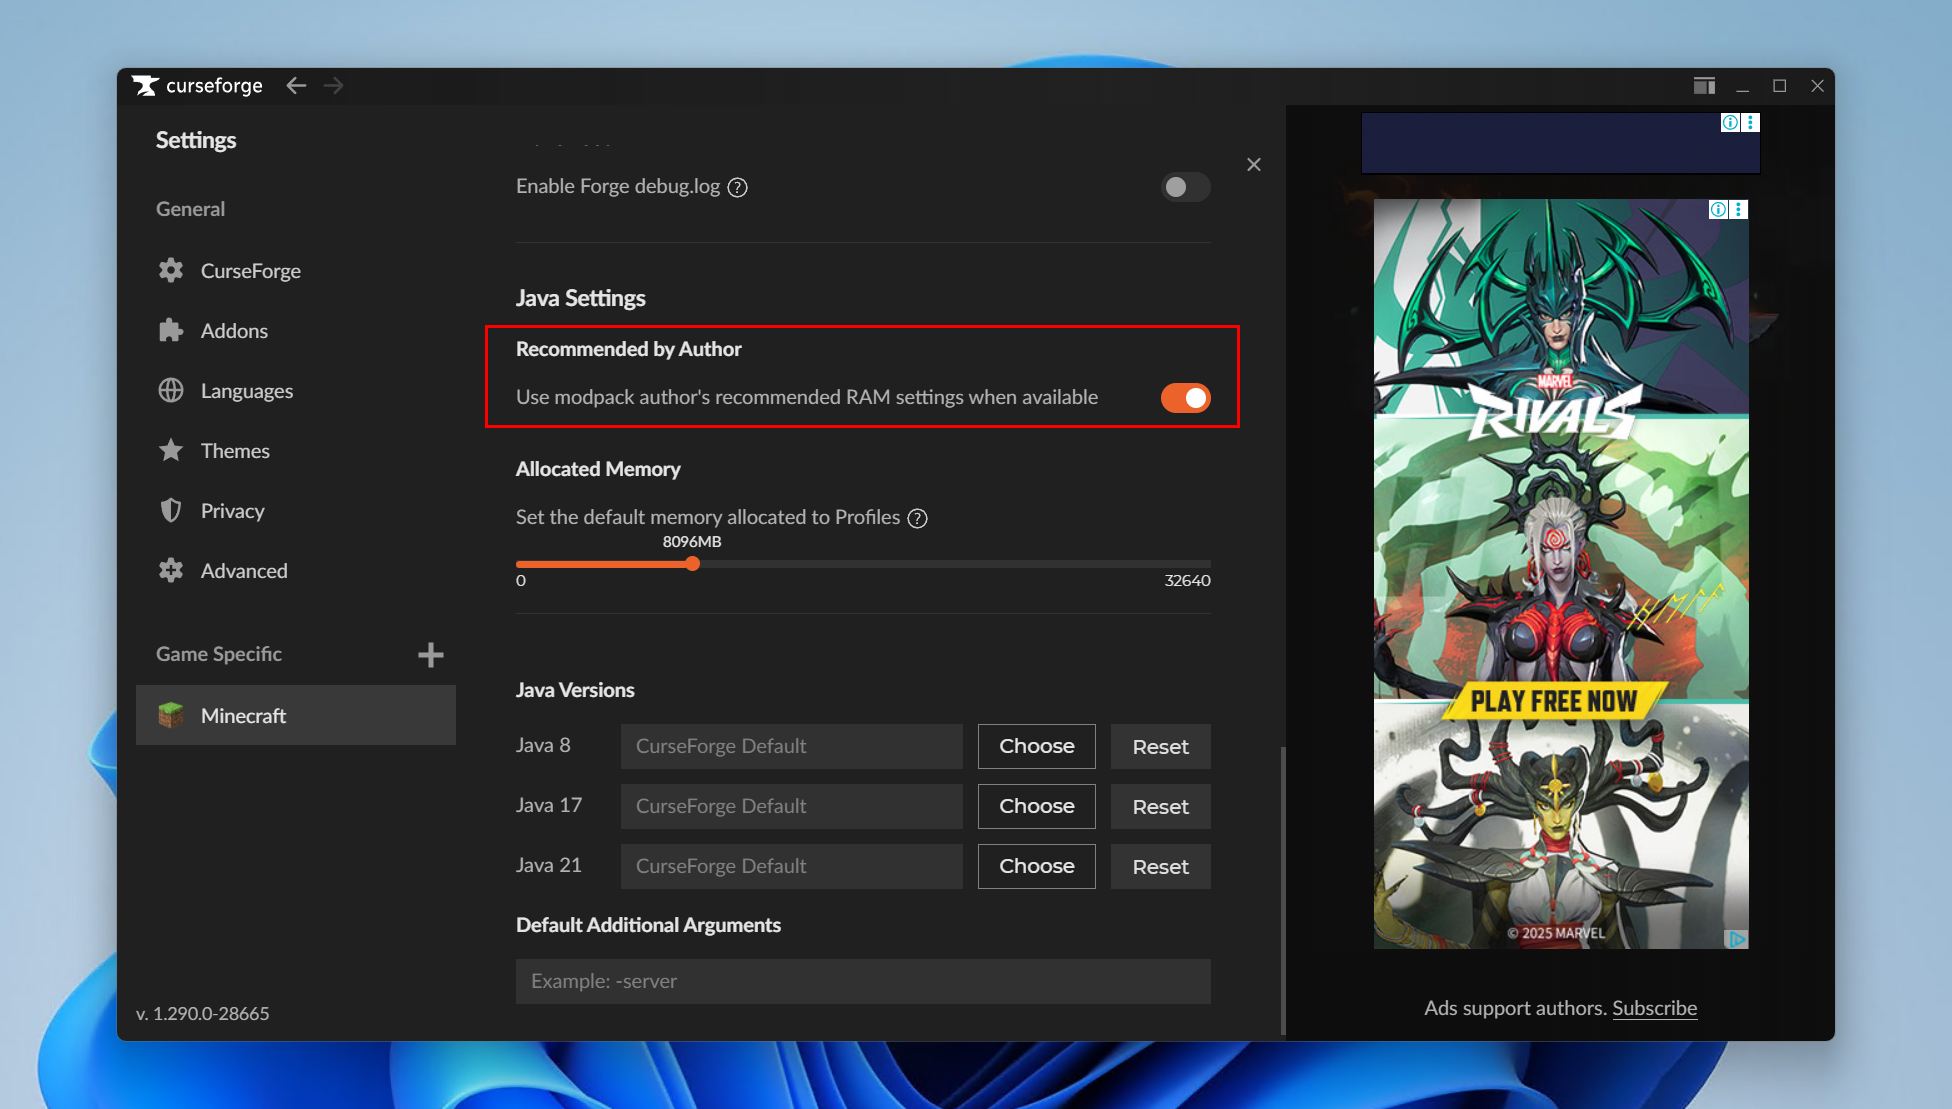
- Open the settings. Click the gear icon in the bottom-left corner to open the settings menu.
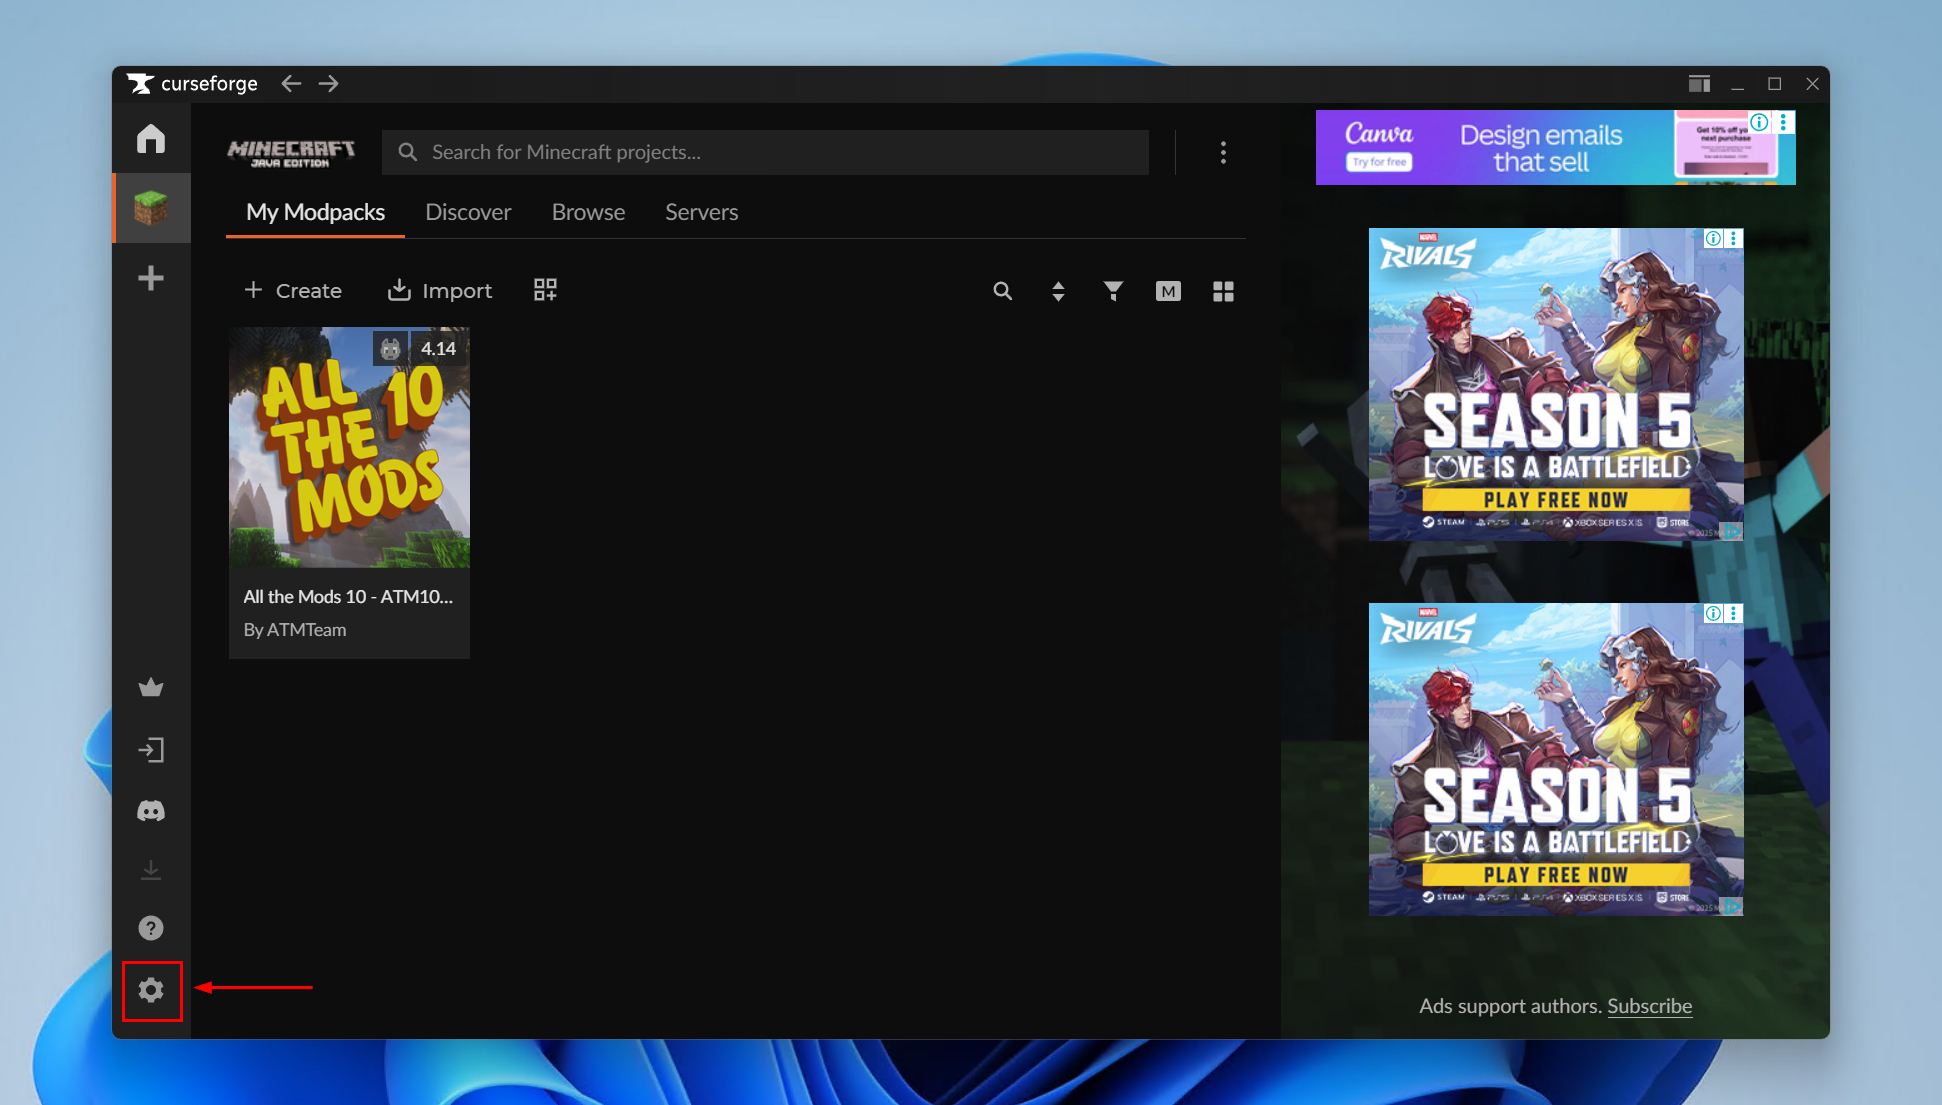
- Go to the Minecraft settings. Select the Minecraft tab under Game Specific settings.

- Move the Allocated Memory slider. Find the Allocated Memory slider under Java Settings and drag it to set the amount of RAM. Check the recommended figures further down before deciding on a number.

- Use the author’s recommended value (optional). Enabling Use the modpack author’s recommended RAM settings lets CurseForge match the amount the pack’s creator suggests, which avoids assigning too much or too little.

This global figure now applies to every modpack launched through CurseForge, unless a pack has its own custom allocation set.
Method 2: Set Custom RAM for a Single Modpack
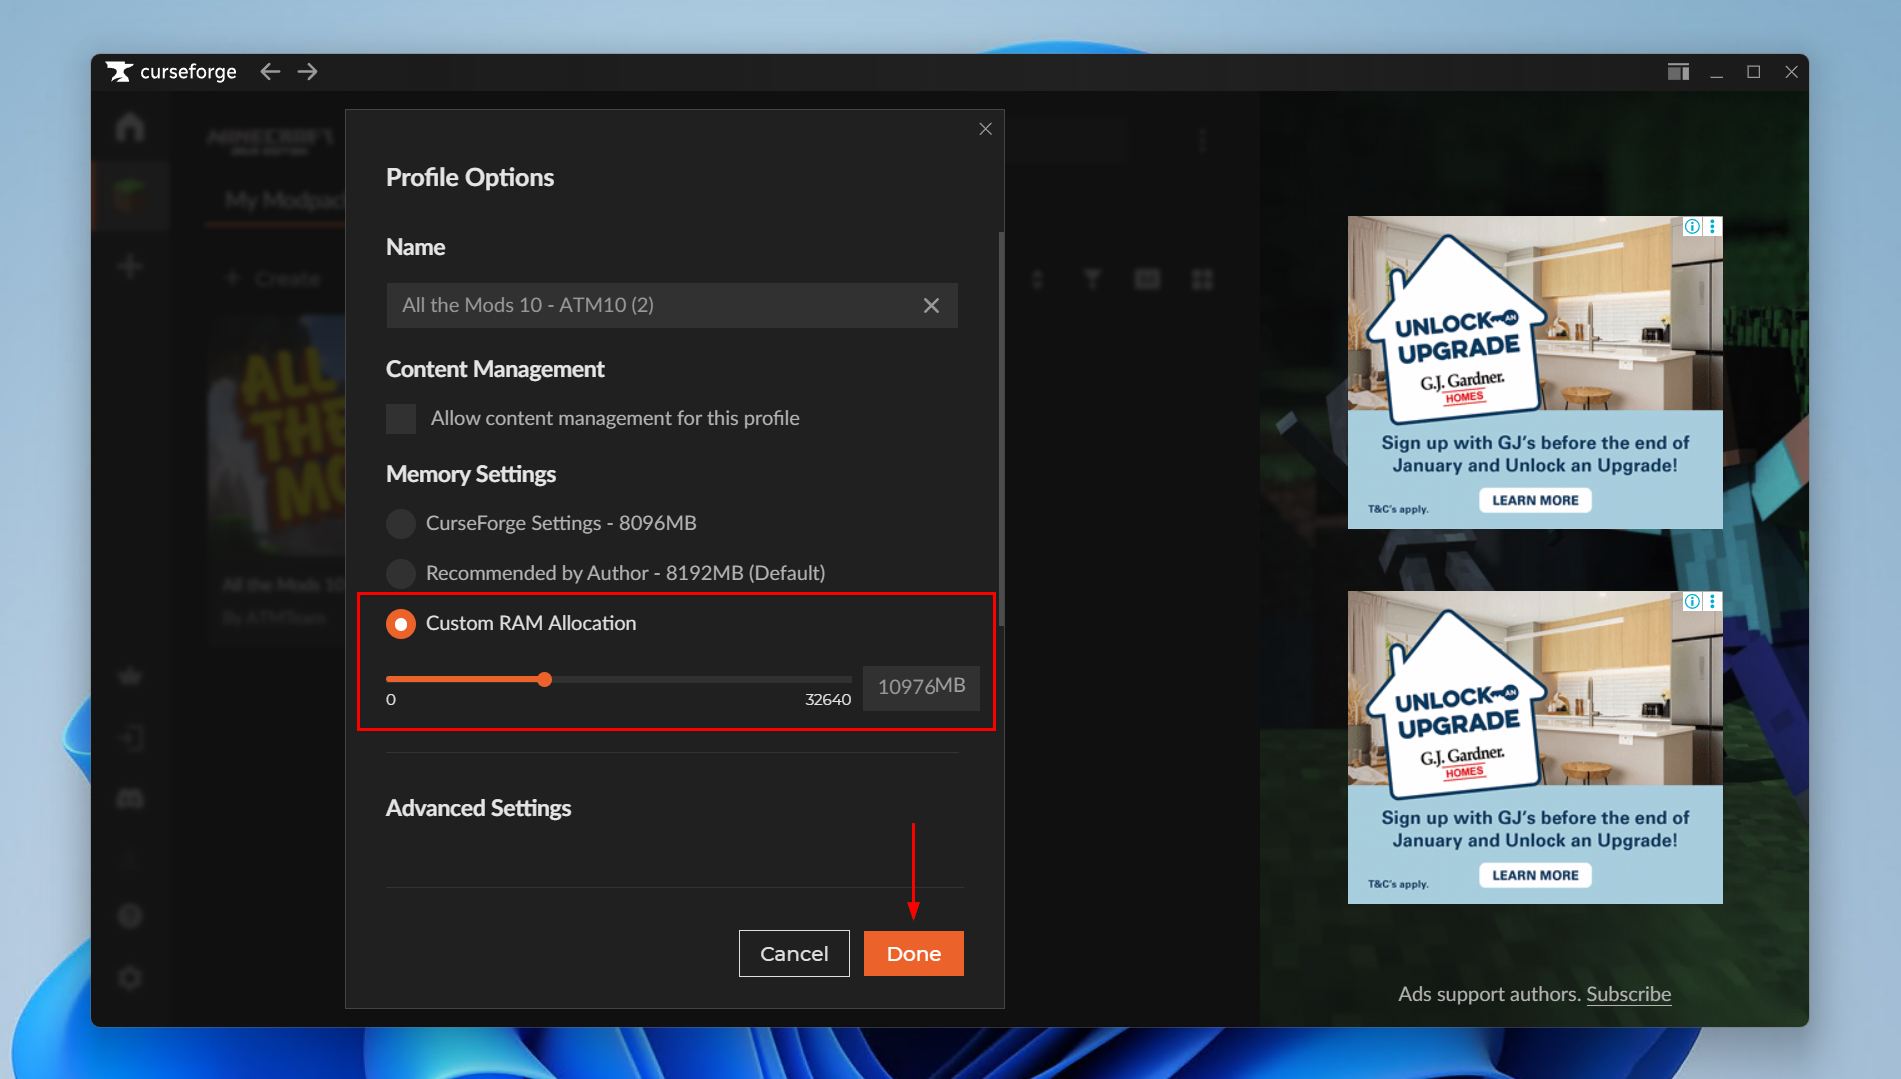
When one pack needs a different amount from the global figure, its memory is set in that pack’s Profile Options. The current app lists three choices under Memory Settings:
- CurseForge Settings: the pack uses the global Allocated Memory from Method 1. This is the option older versions of the app labelled Use System Memory Settings, so anyone following an older guide is looking for this one.
- Recommended by Author: the pack uses the amount its creator suggests. This is the default choice.
- Custom RAM Allocation: a slider to set an exact amount for this pack alone.
To change a single pack:
- Open My Modpacks. Go to the My Modpacks tab and find the pack to change.
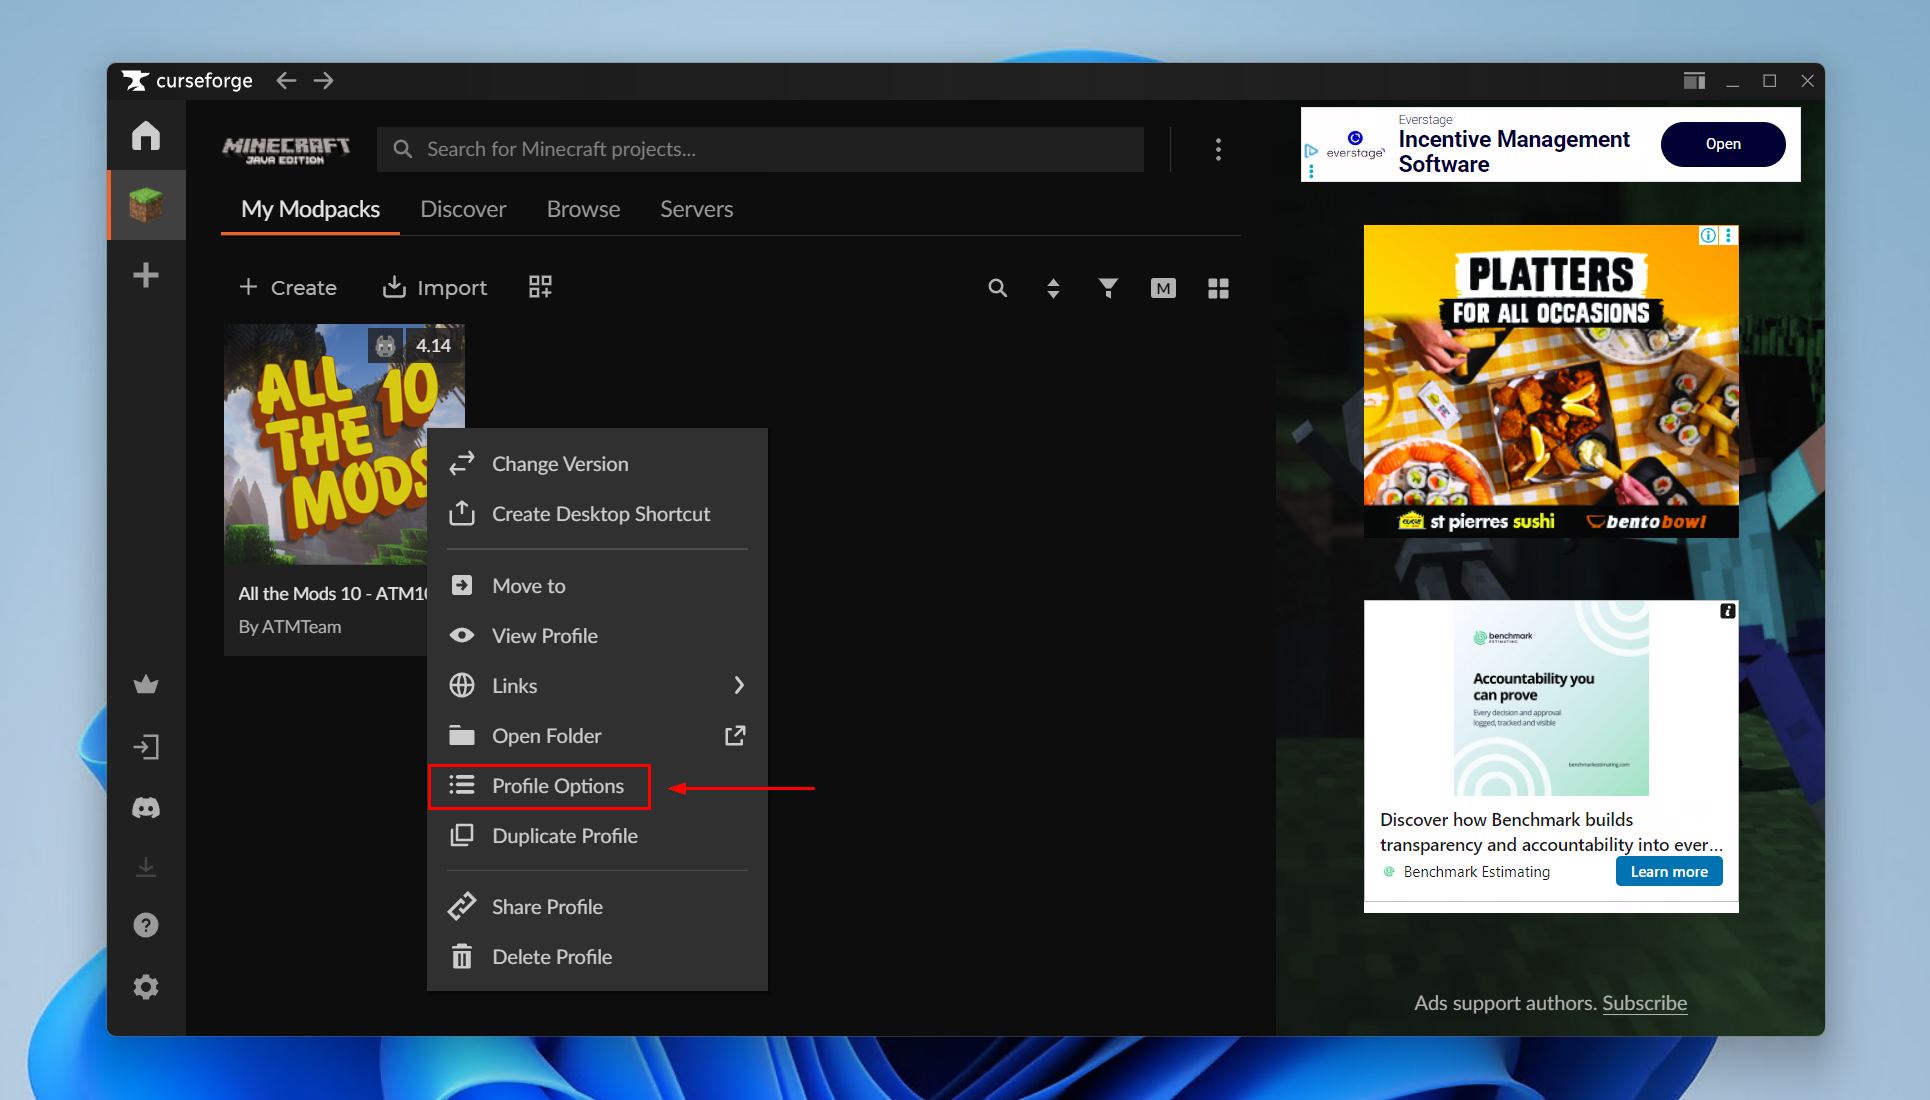
- Open Profile Options. Right-click the pack, or click the three-dot menu next to Play, then choose Profile Options.

- Pick a Memory Settings option. Under Memory Settings, choose one of the three options above. For a specific amount, select Custom RAM Allocation, drag the slider to the desired memory, then click Done.

This tailors performance for a single pack without changing the default that every other modpack uses.
How Much RAM Should Be Allocated in CurseForge?
The right amount depends on the modpack and the computer’s total memory. As a rule, a pack runs best with a little more RAM than it strictly needs, while still leaving enough for Windows and background apps. The starting points below suit most setups.
- Vanilla or lightly modded: 2 GB to 4 GB is plenty for a handful of mods.
- Small to medium modpacks: 4 GB to 6 GB keeps things smooth.
- Large modpacks such as All the Mods 10: 6 GB to 10 GB, leaning to the higher end for big kitchen-sink packs. The All the Mods 10 install guide covers its setup in full.
- Very heavy packs with shaders: up to about 12 GB, but rarely more.
Total system memory sets the ceiling. On a computer with 8 GB of RAM, keep the allocation around 4 GB to 6 GB so Windows still has room to run. On a 16 GB machine, 6 GB to 8 GB is comfortable for most packs. Assigning more than about 12 GB seldom helps, because Java spends longer managing the extra memory and can stutter as a result. At least 2 GB to 3 GB should always stay free for the operating system.
CurseForge RAM Allocation Not Working?
When a new allocation does not seem to take effect, the cause is usually one setting working against another. These checks resolve most cases.
- A per-pack setting is overriding the global one. If a pack’s Memory Settings are on Recommended by Author or Custom RAM Allocation, that pack ignores the global slider. Set it to CurseForge Settings to follow the global figure, or change the amount directly in Profile Options.
- The author’s recommended value is in play. When a pack is set to Recommended by Author, CurseForge holds the allocation at the creator’s suggested amount. Switch to Custom RAM Allocation to set a different value.
- The app was not fully restarted. CurseForge applies memory changes when a pack is launched fresh. Close the running instance, and the app itself if needed, then start the pack again.
- The amount is higher than the system can spare. Setting the slider close to, or above, total installed RAM can stop the game launching or make it crash on load. Drop it back so at least 2 GB to 3 GB stays free for Windows.
Is CurseForge Using Too Much RAM?
The opposite problem is a pack that has been handed far more memory than it needs, which can cause stutter instead of curing it. If CurseForge or Minecraft is using more RAM than expected, lower the allocation rather than raise it. Set the global slider, or the pack’s Custom RAM Allocation, to a figure within the ranges above, restart the pack, and check whether the stutter improves. The app itself also keeps some memory in use while browsing and downloading mods, which is normal and separate from what the game uses in play.
Conclusion
To set RAM in CurseForge, open Settings, choose the Minecraft tab, and drag the Allocated Memory slider under Java Settings, or override a single pack through Profile Options with Custom RAM Allocation. Most modpacks run best on 4 GB to 8 GB, leaving at least 2 GB free for Windows. Getting that balance right keeps modded Minecraft stable without starving the rest of the system, and the same settings carry across every pack CurseForge launches.