Managing partitions, formatting drives, and extending volumes are all tasks that eventually come up for most Windows users. The problem is that Disk Management is not exactly front and center in Windows 10 or 11, and many users are unsure where to find it. Fortunately, there are several quick ways to open it regardless of experience level. This guide covers 6 methods to open Disk Management on Windows 10 and 11, plus a bonus tip for pinning it for faster future access.
How to Open Disk Management on Windows 10/11 (6 Methods)
All six methods below work on both Windows 10 and Windows 11 unless noted otherwise. They range from the fastest two-click option to alternatives for situations where the Start menu or search bar isn’t responding.
Method 1: Right-Click the Start Button (Power User Menu)
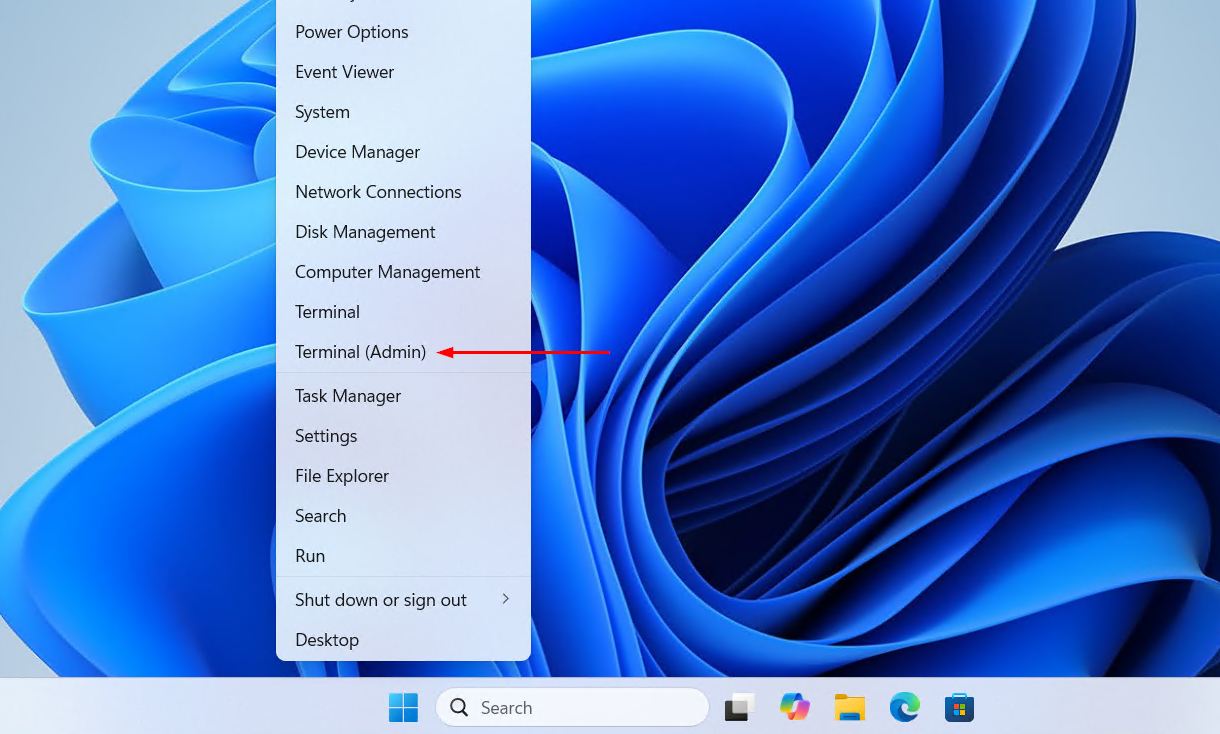
Right-clicking the Start button opens the Power User Menu (also called the WinX menu), which includes a direct shortcut to Disk Management. This is the fastest method available and works reliably on both Windows 10 and Windows 11.
- Right-click the Start button in the taskbar. On Windows 11, the Start button is centered by default; on Windows 10, it sits in the bottom-left corner.
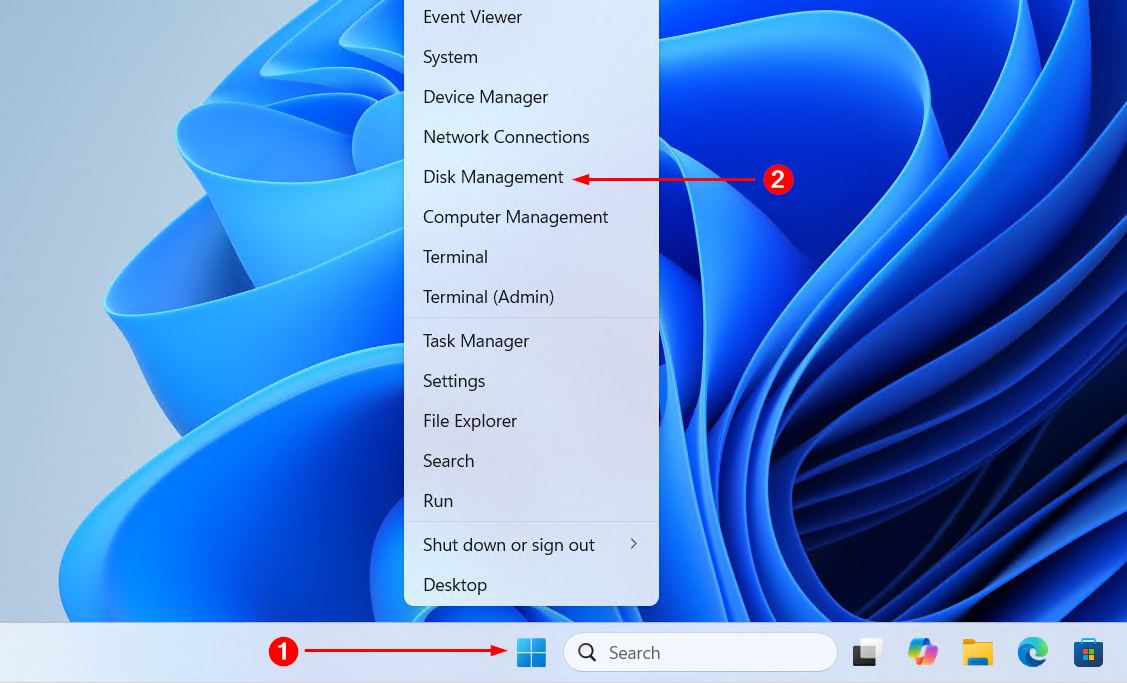
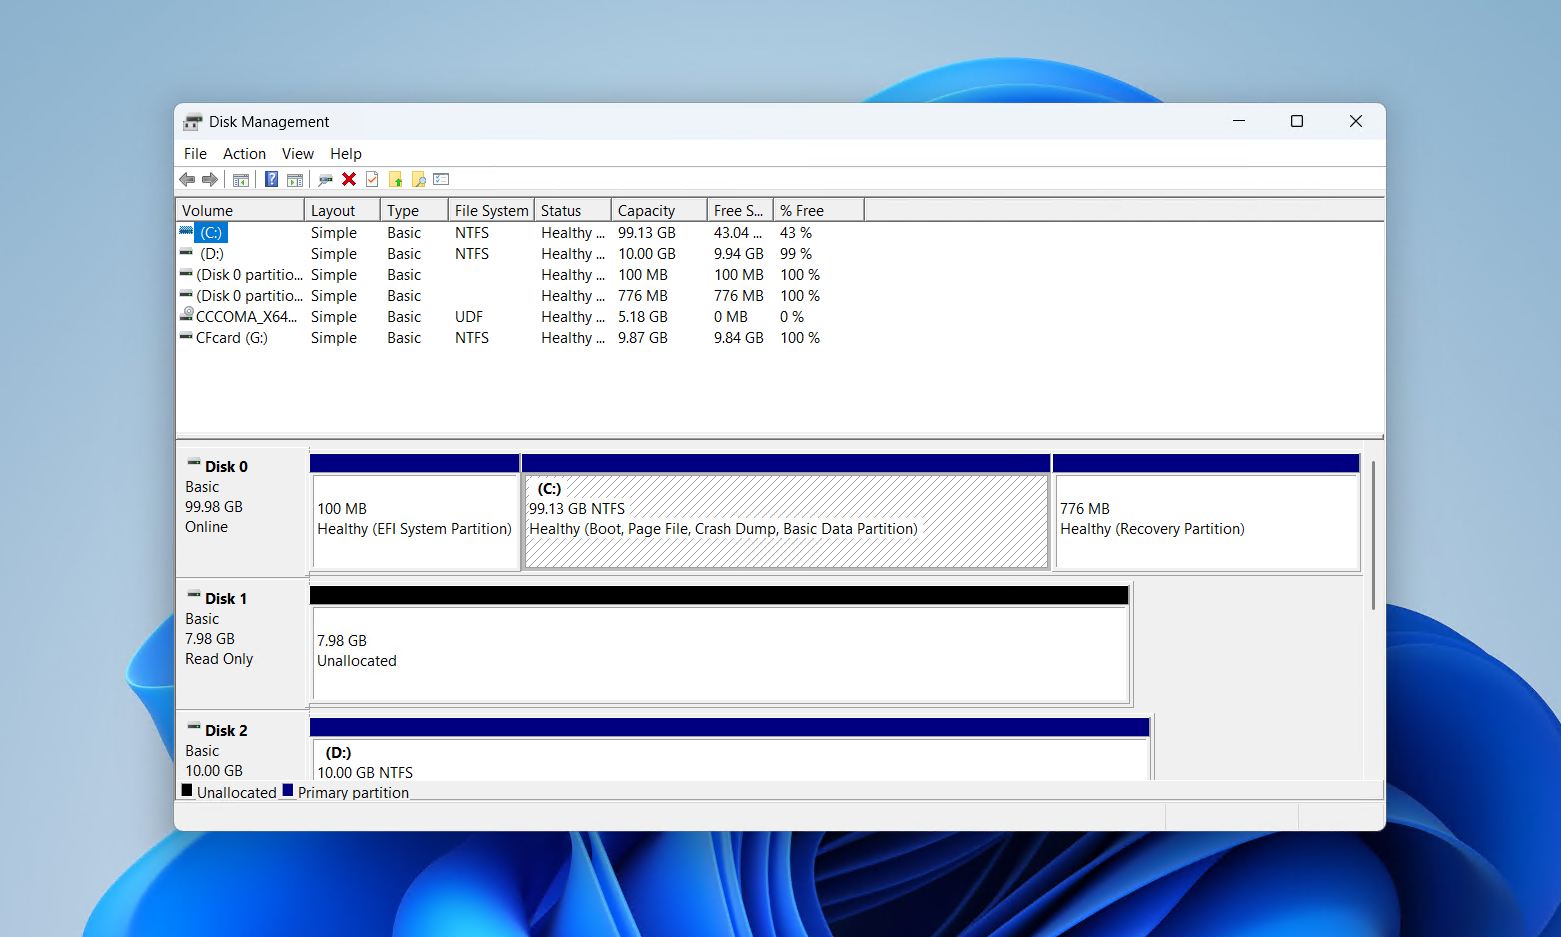
- Select Disk Management from the menu that appears. The tool will open immediately.

This method requires no typing and no searching, making it the go-to option for most users.
Method 2: Windows Search
Windows Search is another quick way to reach Disk Management, and it works well when the Power User menu is not convenient.
- Click the Search icon or bar in the taskbar, or press Windows + S to open search.
- Type disk management or the full label Create and format hard disk partitions. The second search term tends to surface the correct result most reliably.
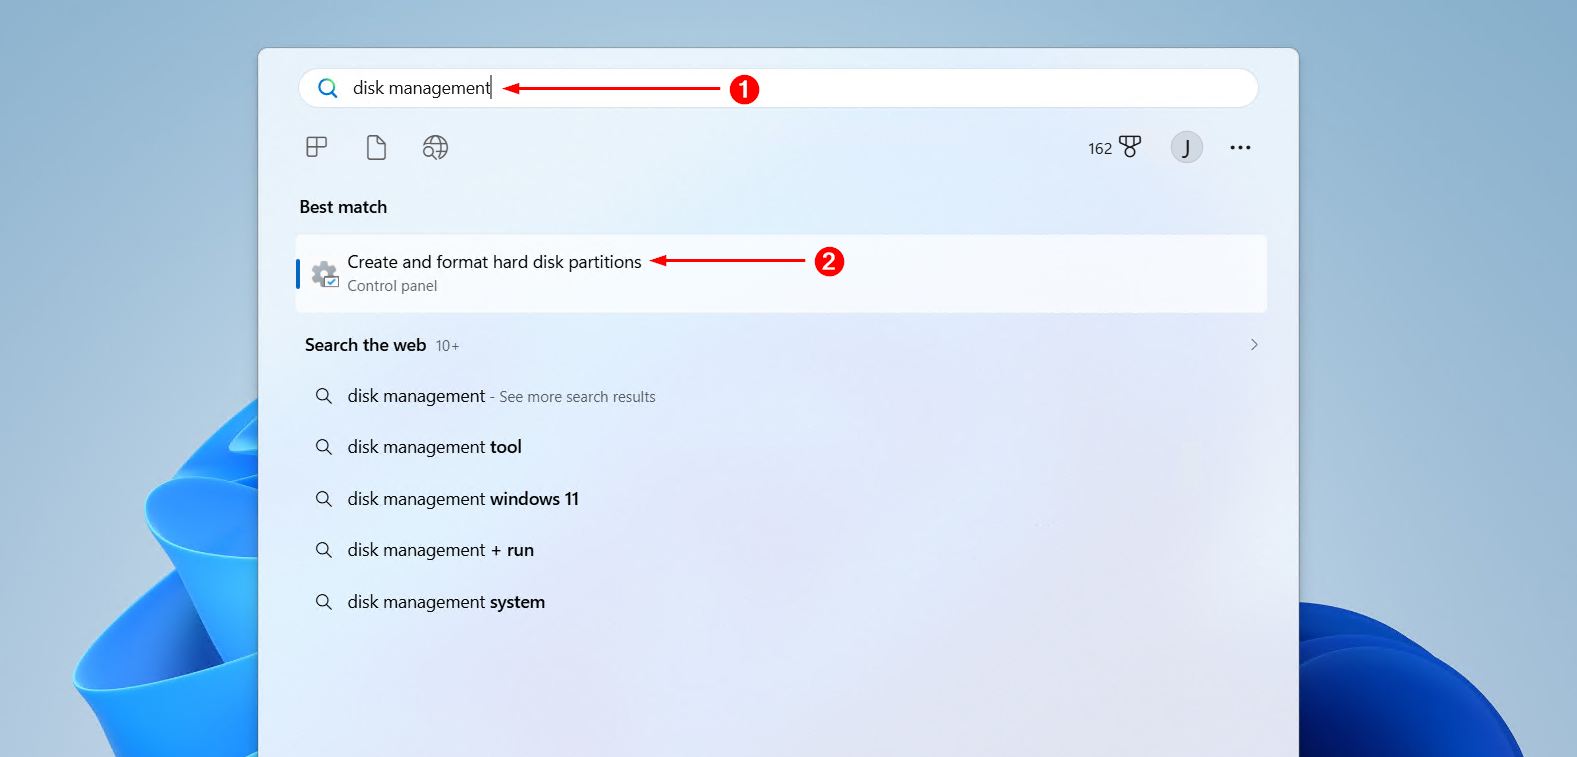
- Click Create and format hard disk partitions from the results to open the tool.
Method 3: Run Dialog
The Run dialog is a dependable fallback, particularly when the taskbar or Start menu is unresponsive. This is also useful for users who prefer keyboard-driven workflows, similar to how some use keyboard shortcuts to open Task Manager in Windows 11.
- Press Windows + R on the keyboard to open the Run dialog.
- Type diskmgmt.msc in the text field.
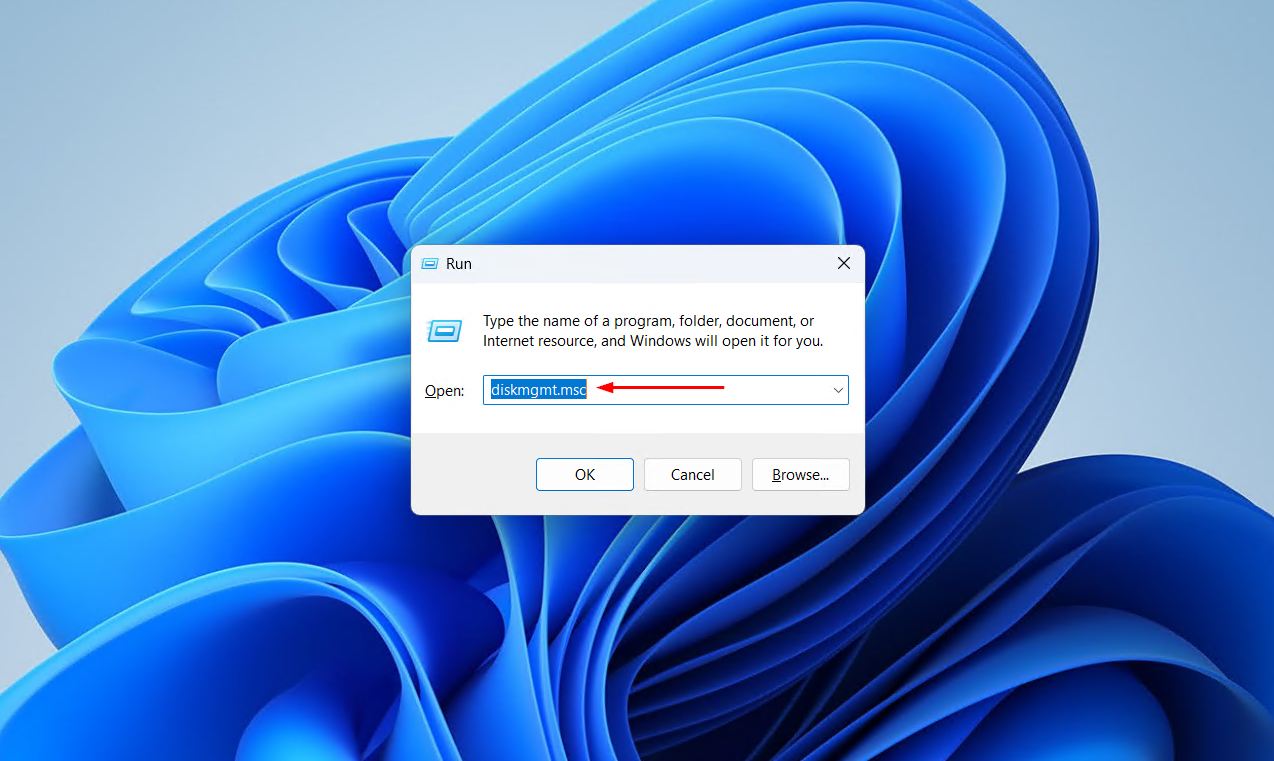
- Click OK or press Enter. Disk Management will open directly.
Method 4: Command Prompt, PowerShell, or Windows Terminal
Disk Management can also be launched from any command-line environment. This method suits users who are already working in a terminal window.
- Open Command Prompt, PowerShell, or Windows Terminal by searching for any of them in the Start menu, or by right-clicking the Start button and selecting one from the Power User menu.
- Type diskmgmt.msc and press Enter. Disk Management will launch in a separate window.
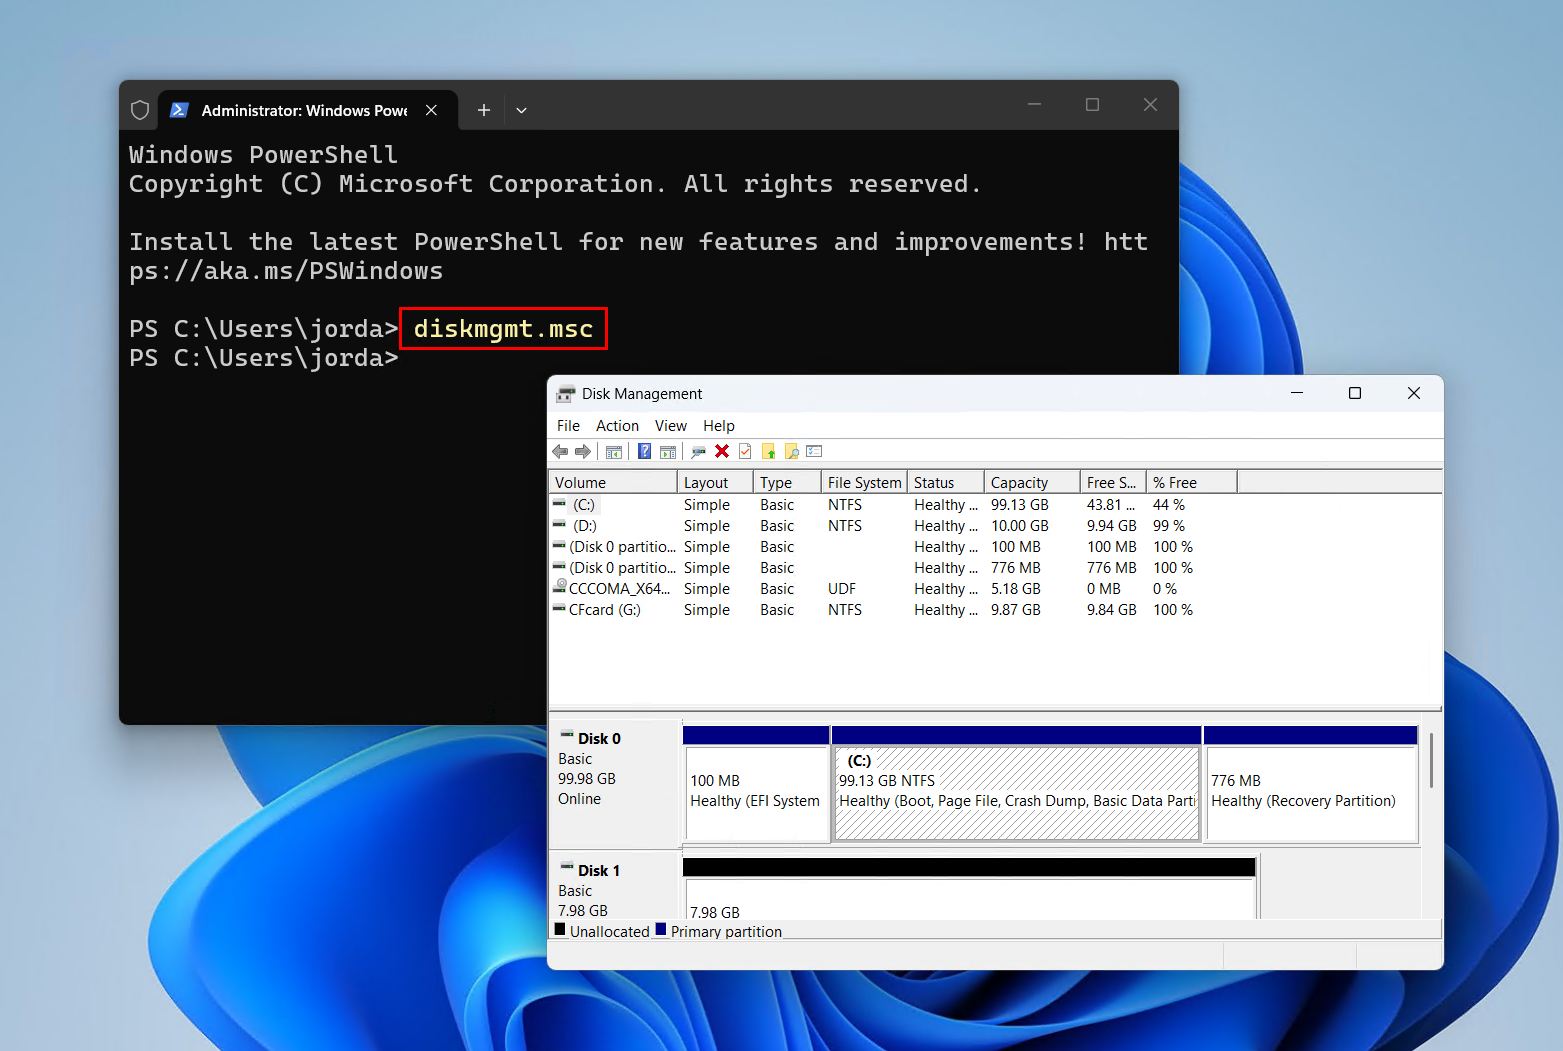
This works identically across all three command-line tools on both Windows 10 and Windows 11 disk management setups.
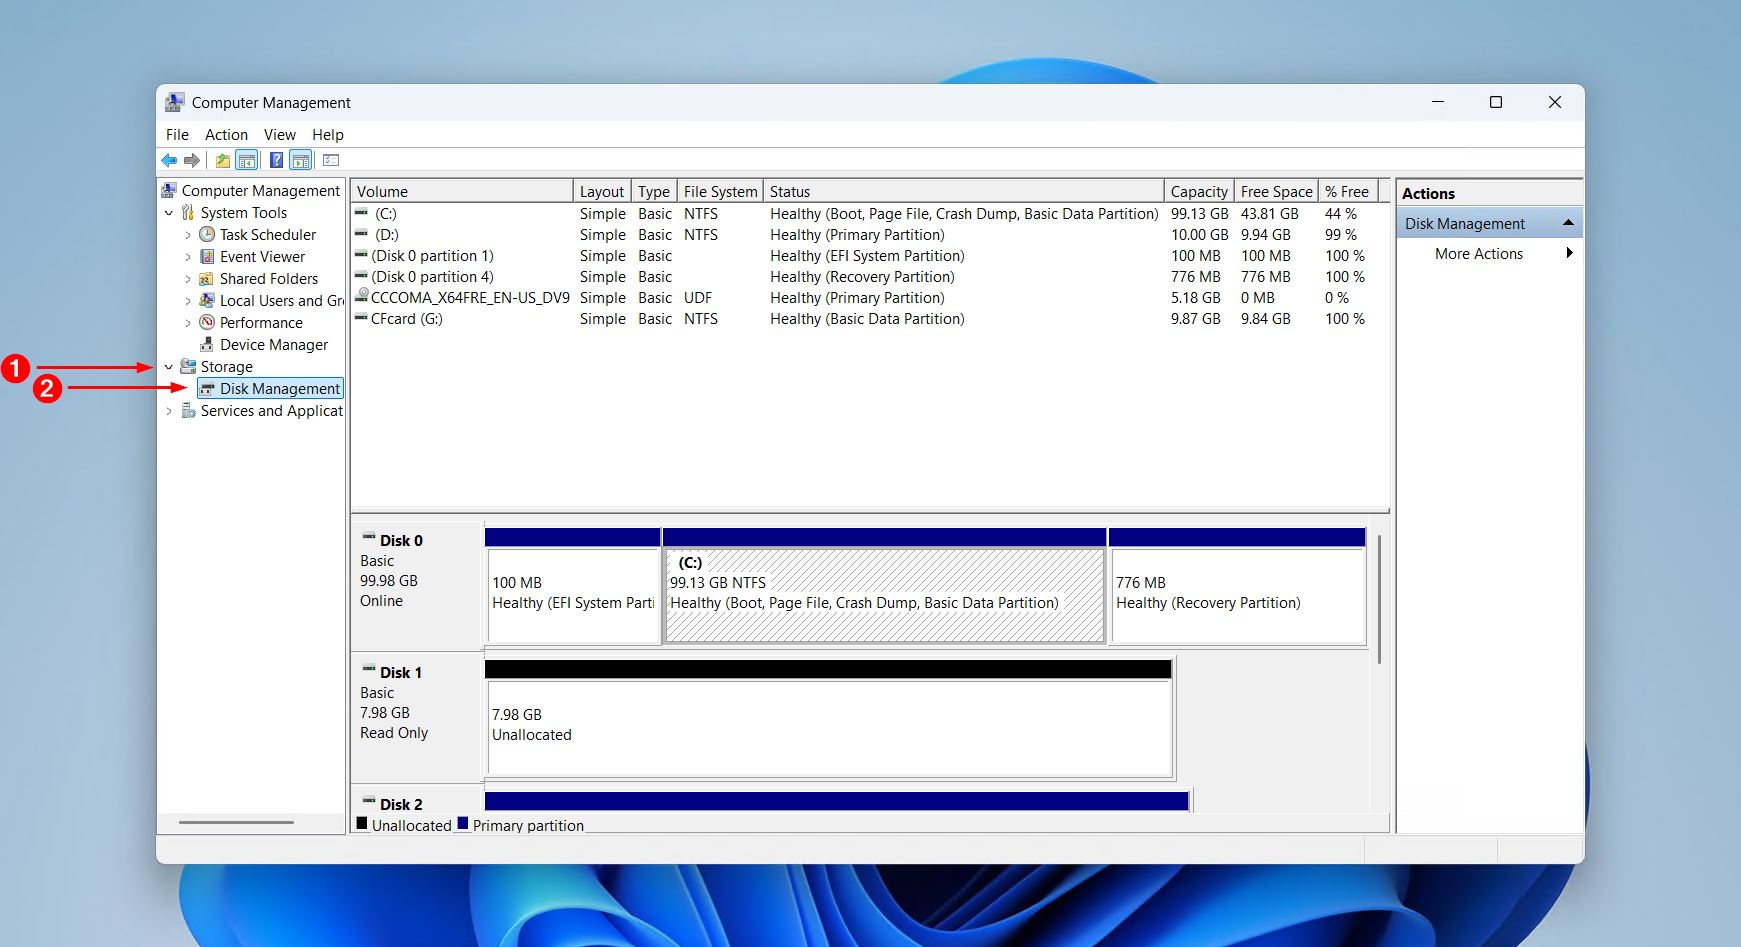
Method 5: Computer Management
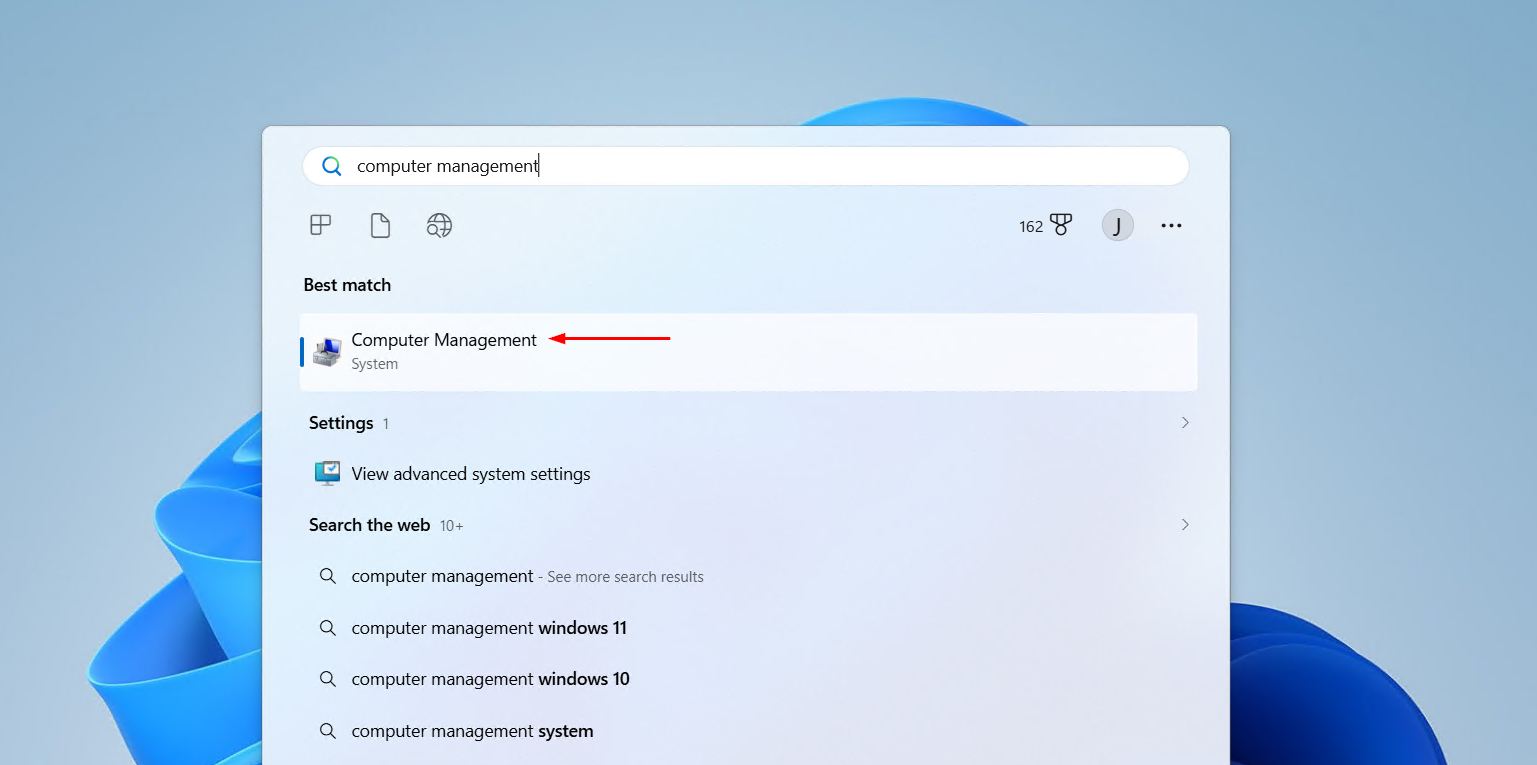
Computer Management is a central hub for several Windows administrative tools, and Disk Management is one of them. This method is worth knowing because it also gives access to other useful utilities like Event Viewer, Device Manager, and Services.
- Open Computer Management using any of the following: search for it in the Start menu, press Windows + R and type compmgmt.msc, or right-click the Start button and select Computer Management.
- In the left-hand panel, expand Storage.
- Click Disk Management to open it in the main pane on the right.
Method 6: Control Panel
Reaching Disk Management through the Control Panel is the least direct route, but it is useful for users who are already working inside Control Panel for other tasks.
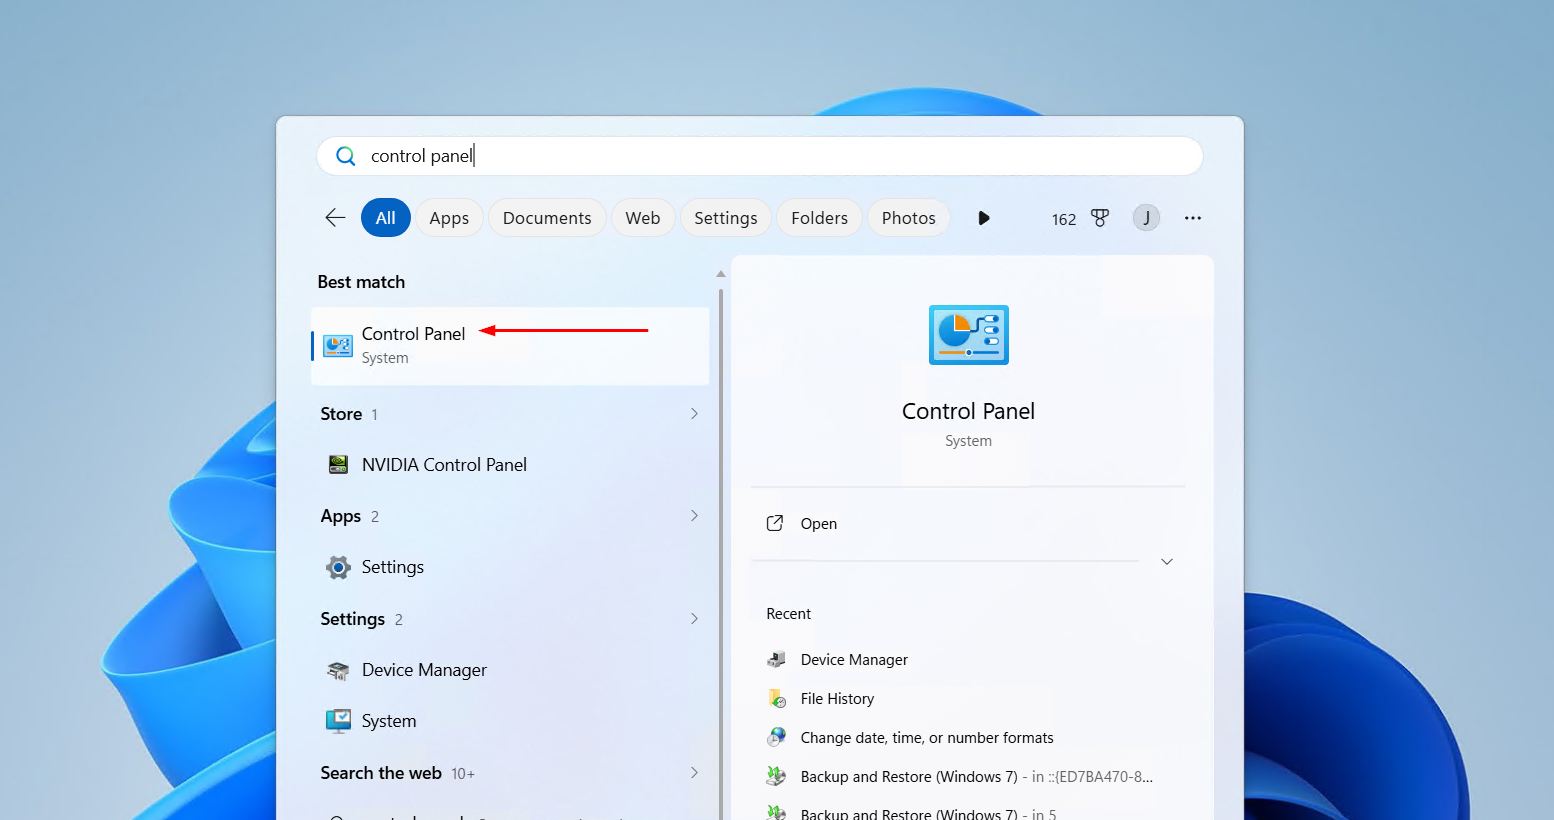
- Open Control Panel by searching for it in the Start menu.
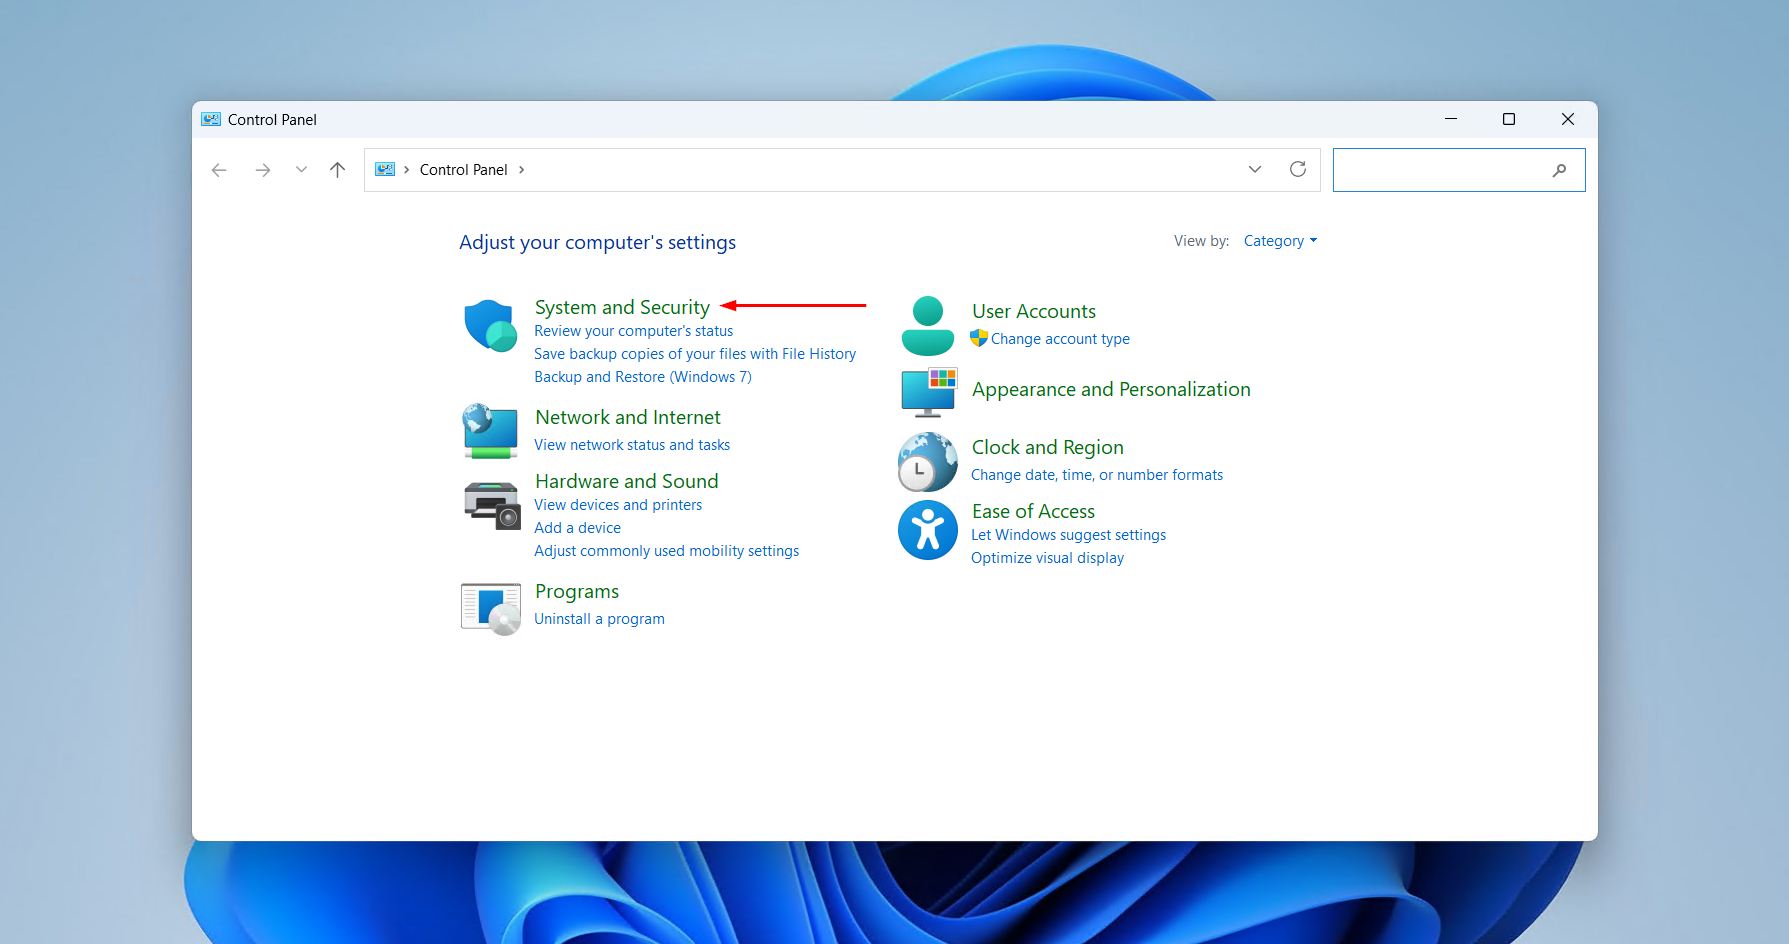
- Click System and Security.
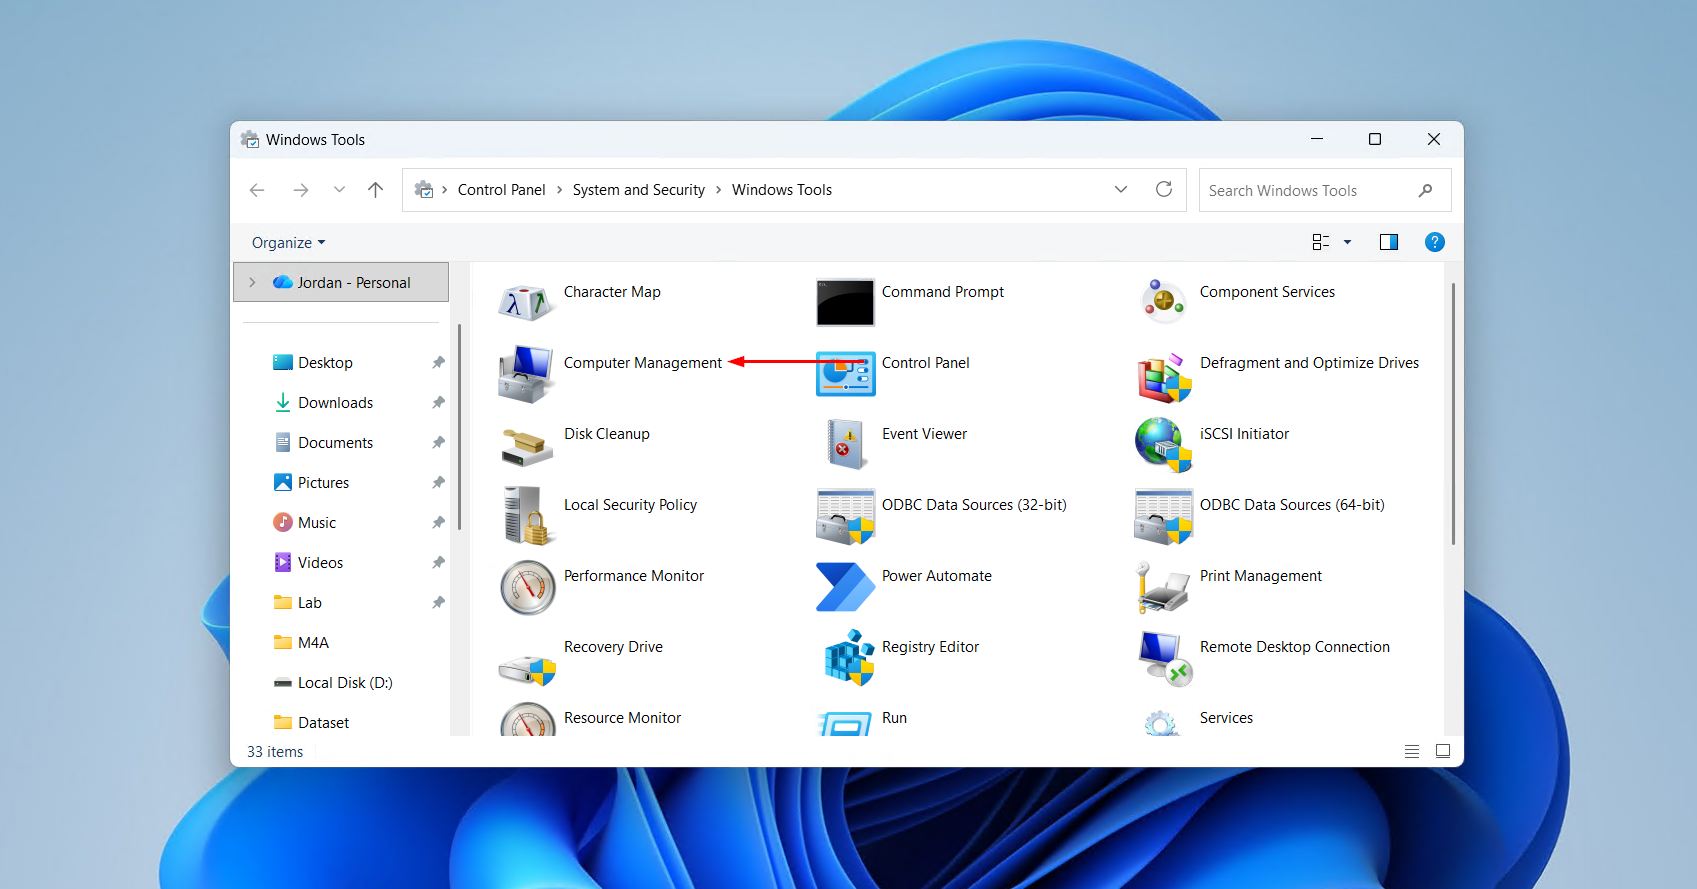
- Click Windows Tools (Windows 11) or Administrative Tools (Windows 10).
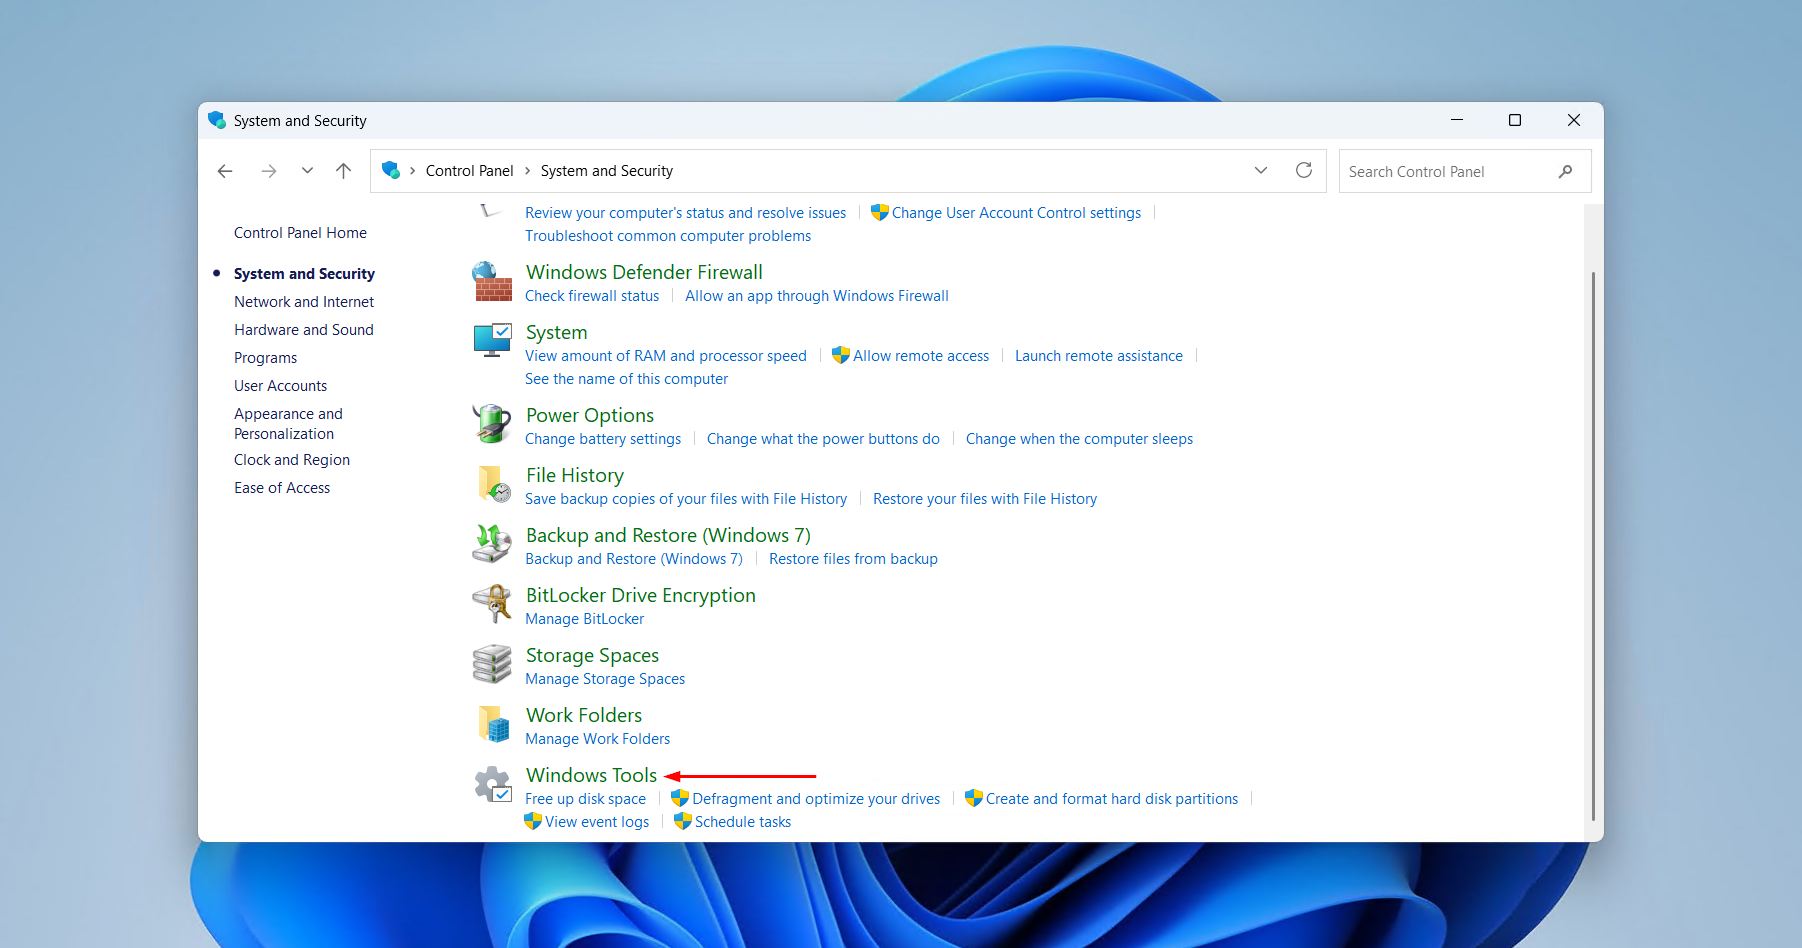
- Double-click Computer Management in the list of tools.
- In the left-hand panel of Computer Management, expand Storage and click Disk Management.
If Control Panel is a tool used frequently, it may be worth taking a moment to pin Control Panel to Start for faster access in the future.
How to Pin Disk Management to the Start Menu or Taskbar
For anyone who regularly manages a Windows 11 partition, handles Windows 11 format partition tasks, or needs to extend Windows 11 partition configurations, pinning Disk Management saves time on every visit. The process involves creating a shortcut for the tool and then pinning it.
Creating the shortcut:
- Right-click an empty area on the Desktop and select New > Shortcut.
- In the location field, type diskmgmt.msc and click Next.
- Give the shortcut a name such as Disk Management and click Finish.
Pinning to the Start menu:
- Right-click the shortcut on the desktop and select Pin to Start. On Windows 11, this adds it to the pinned apps grid at the top of the Start menu.
Pinning to the Taskbar:
- On Windows 10, right-click the shortcut and select Pin to taskbar.
- On Windows 11, direct pinning of a shortcut file to the taskbar is restricted. The easiest workaround is to open Disk Management first, then right-click its icon in the taskbar and select Pin to taskbar.
For a broader look at managing pinned apps, the guide on how to pin apps to the Taskbar covers the full process in detail.
Conclusion
To sum up, there are 6 reliable methods to open Windows Disk Management on both Windows 10 and Windows 11, ranging from a right-click on the Start button to paths through the Control Panel or command-line tools. Windows 11 disk management and Windows 10 disk management work identically once open, with no feature differences between versions. For anyone who regularly manages partitions, formats drives, or extends volumes, pinning Disk Management to the Start menu or taskbar is a practical step that removes the need to search for it every time.