Keeping multiple projects open at once on a single desktop can quickly become overwhelming. Windows 11 solves this with virtual desktops, letting users spread work across separate spaces and switch between them in seconds. This guide covers every method for switching desktops on Windows 11, from keyboard shortcuts to touchpad gestures, plus how to customize or disable those gestures.
6 Ways to Switch Desktops on Windows 11
Windows 11 gives users several options for switching between virtual desktops, whether they prefer keyboard shortcuts, touch input, or mouse clicks. The methods below cover every approach, from the quickest shortcut to a fully custom script.
Method 1: Keyboard Shortcut (Ctrl + Win + Arrow Keys)
This is the fastest way to switch desktops on Windows 11. The shortcut moves directly to the next or previous desktop without opening any menus.
- Press Ctrl + Windows key + Right Arrow to move to the next desktop. The screen will animate across to the desktop on the right.
- Press Ctrl + Windows key + Left Arrow to move to the previous desktop. This cycles back through desktops in the opposite direction.
This shortcut only works if more than one virtual desktop exists. If only one desktop is open, the shortcut does nothing.
Method 2: Task View (Windows Key + Tab)
Task View gives a visual overview of all open desktops and the windows on each one. It’s a good option for users who want to see what’s on each desktop before switching.
- Press Windows key + Tab to open Task View. Or click the virtual desktops button in the taskbar. All virtual desktops appear as thumbnails along the bottom of the screen.
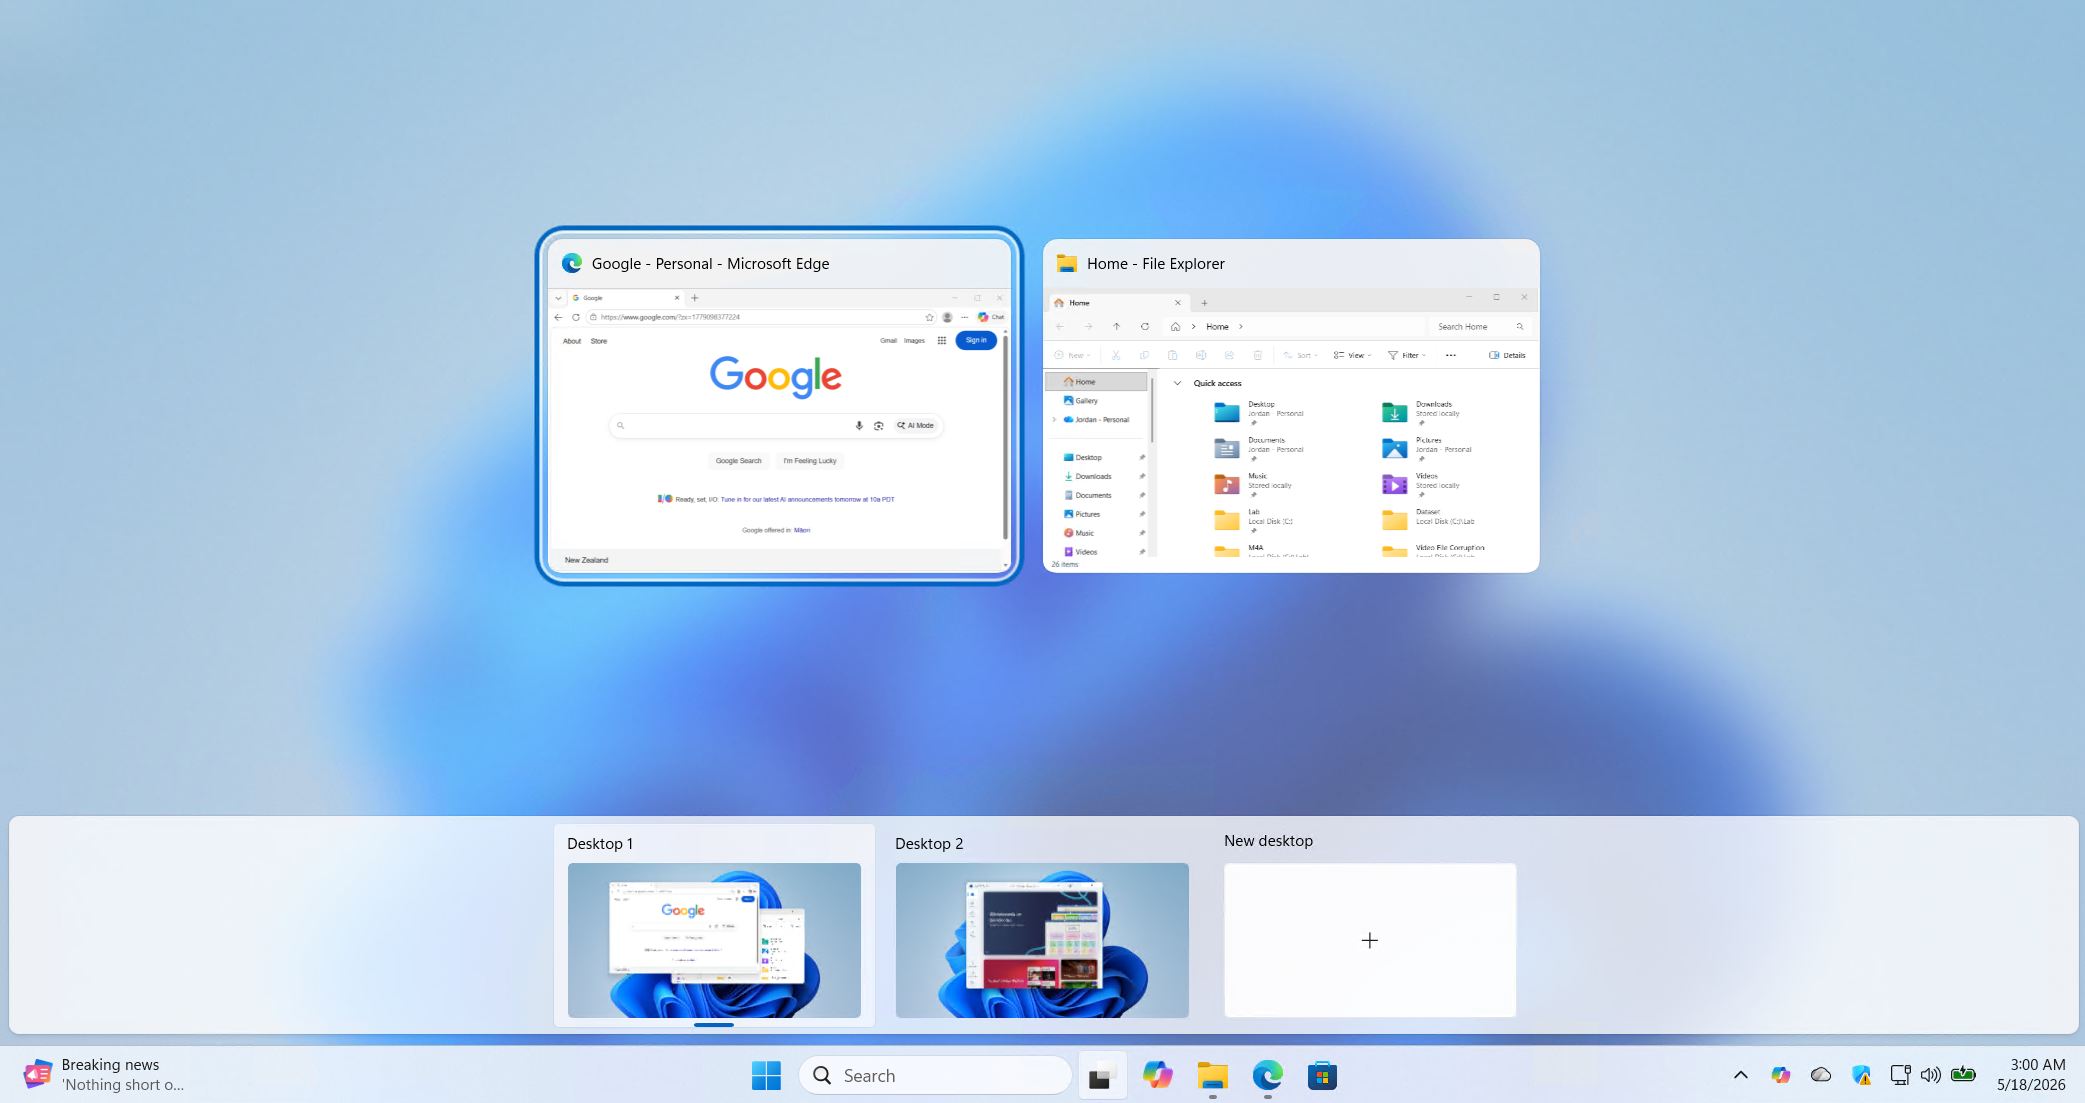
- Click the desktop thumbnail to switch to it. The view closes and the selected desktop becomes active.
Task View can also be accessed by clicking the Task View button on the taskbar, which looks like two overlapping rectangles.
Method 3: Touchscreen Swipe
On devices with a touchscreen, switching desktops is handled with a four-finger swipe directly on the display.
- Place four fingers on the touchscreen. Make sure all four fingertips are in contact with the screen at the same time.
- Swipe left or right across the screen. Swiping right moves to the previous desktop, and swiping left moves to the next one.
Method 4: Touchpad Four-Finger Swipe
On laptops with a precision touchpad, a four-finger swipe performs the same action as the touchscreen gesture.
- Place four fingers on the touchpad. All four fingers need to be on the surface at once.
- Swipe left or right to switch desktops. The direction works the same as the touchscreen method: left for the next desktop, right for the previous one.
Note that the four-finger swipe is the default setting. Windows 11 also allows this gesture to be reassigned or disabled, which is covered later in this guide.
Method 5: Touchpad Three-Finger Swipe (if reassigned)
By default, a three-finger swipe on the touchpad switches between open app windows rather than virtual desktops. However, Windows 11 allows users to reassign the three-finger gesture to switch desktops instead.
If the three-finger swipe has been configured to switch desktops:
- Place three fingers on the touchpad.
- Swipe left or right to switch desktops.
To change what the three-finger gesture does, see the section on customizing touchpad gestures below.
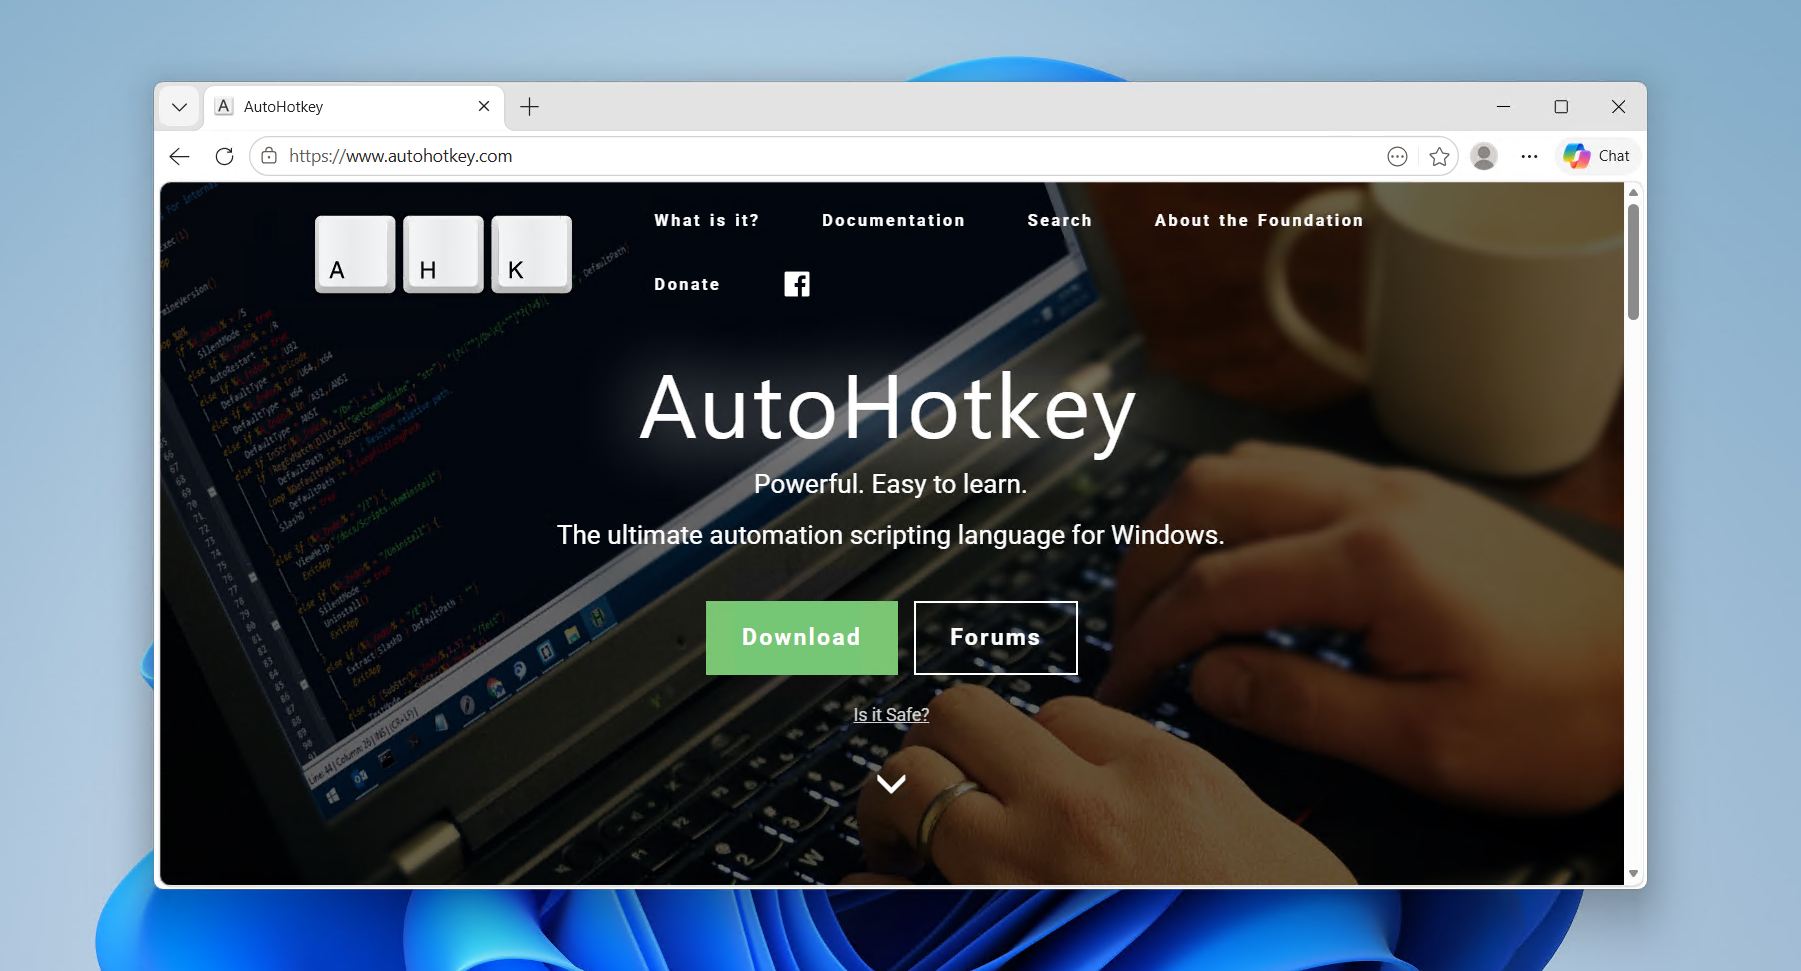
Method 6: AutoHotkey Script (Custom Shortcut)
The built-in shortcut for switching desktops uses three keys (Ctrl + Win + Arrow), which some users find awkward. An AutoHotkey (AHK) script can remap this to any key combination, such as Win + Left or Win + Right.
- Download and install AutoHotkey from the official site. AutoHotkey is a free scripting tool for Windows.
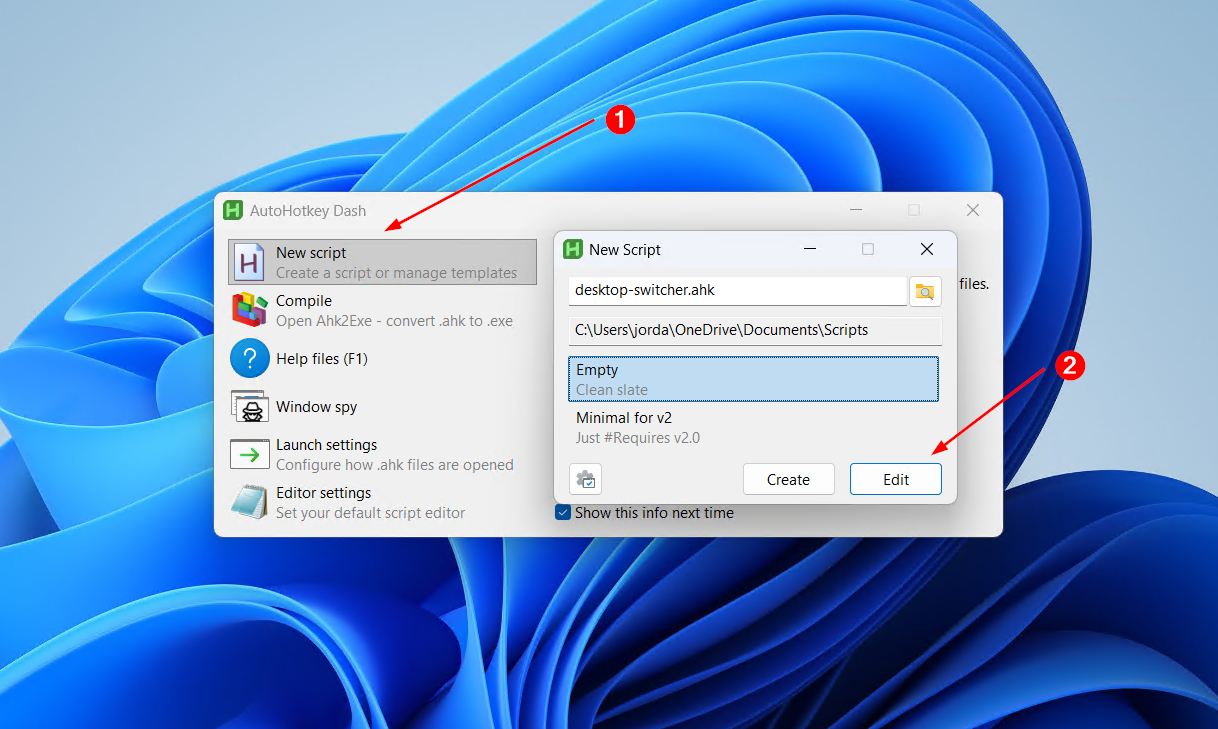
- Click New script when AutoHotKey opens. If it doesn’t open automatically, go ahead and open it up. Give the file a name like desktop-switcher.ahk, and change the output location if necessary. Click Edit when ready.
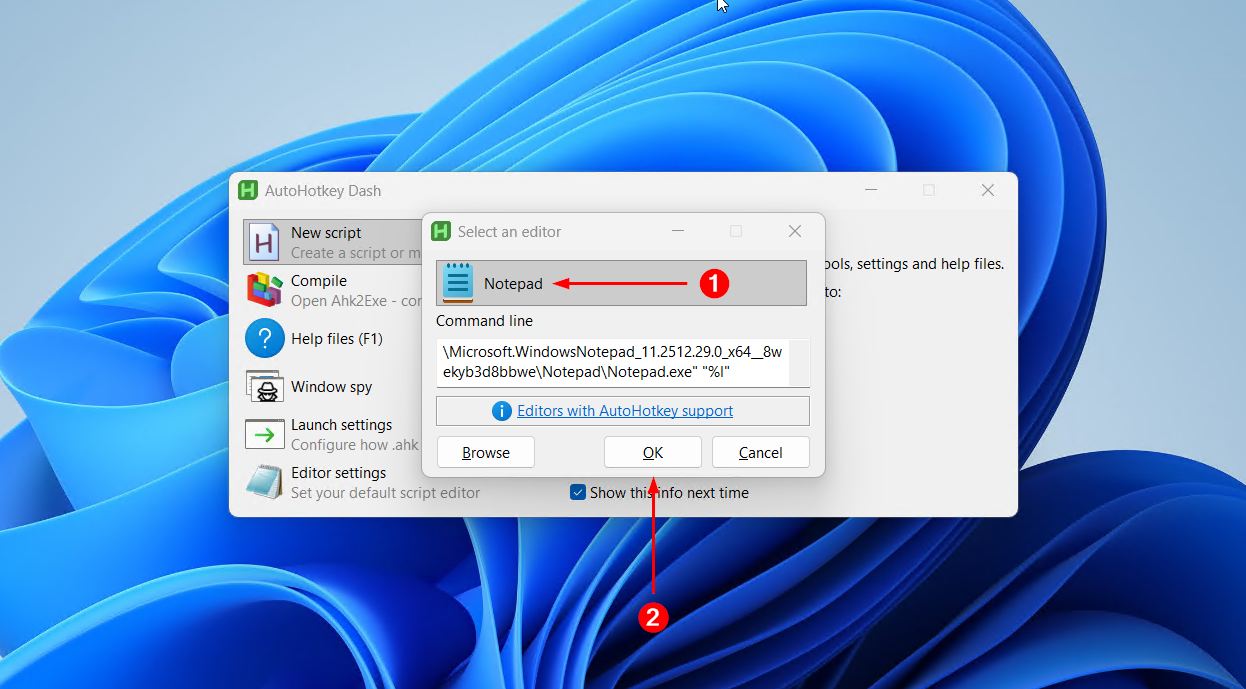
- Click Notepad to open the new script.
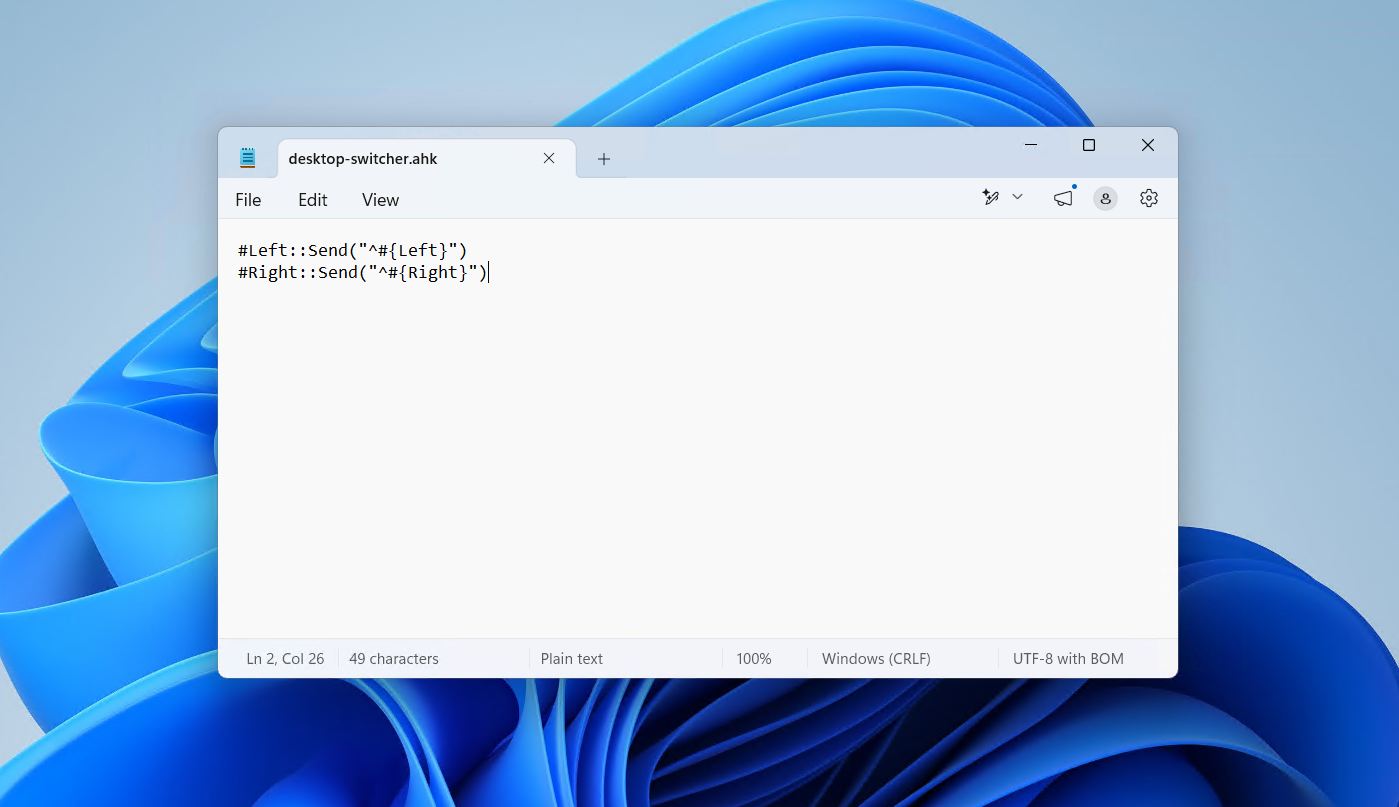
- Add the following lines to the script and save the file:
#Left::^#{Left}
#Right::^#{Right}
This remaps Win + Left and Win + Right to trigger the Ctrl + Win + Left/Right shortcut. Any other key combination can be used instead.
- Double-click the script file to run it. An AutoHotkey icon will appear in the system tray while the script is active.
To run the script automatically on startup, place a shortcut to the .ahk file in the Windows Startup folder, located at:
C:\Users\<YourUsername>\AppData\Roaming\Microsoft\Windows\Start Menu\Programs\Startup
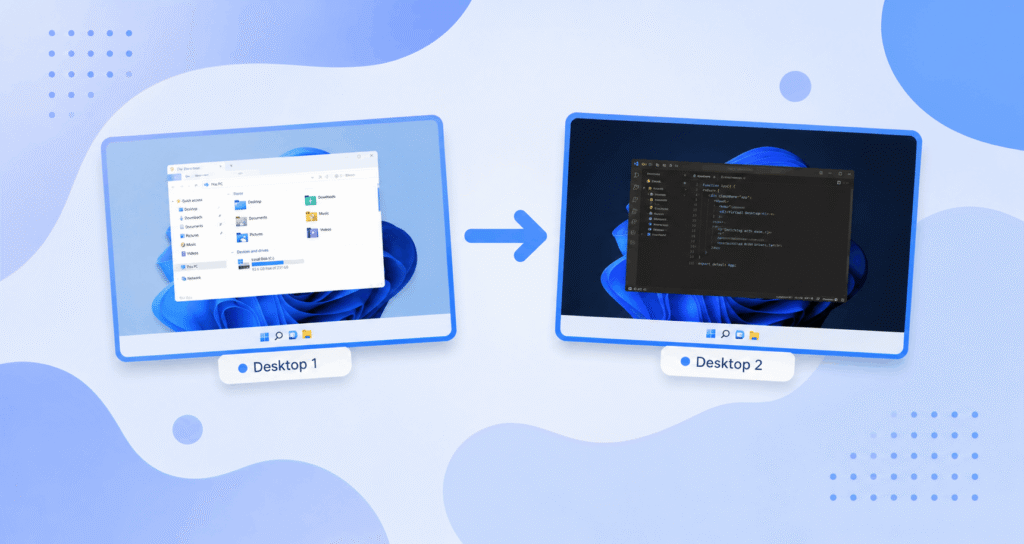
What Virtual Desktops Are and What They Do
Virtual desktops are separate workspace environments within the same Windows session. Each desktop can hold its own set of open windows and apps, completely independent from the others. Switching between them is instant, and windows do not carry over unless moved manually.
Microsoft introduced virtual desktops in Windows 10 as part of the Task View feature. Windows 11 expanded on this with the ability to set a unique wallpaper for each desktop, making it easier to tell them apart at a glance.
The main practical benefits include:
- Reduced clutter: Different projects or tasks can each have their own desktop, keeping the taskbar and screen clear.
- Faster context switching: Moving between a work desktop and a personal one takes a single shortcut rather than alt-tabbing through a pile of windows.
- Better focus: Unrelated apps and notifications stay out of sight while working on a specific task.
Virtual desktops are especially useful for users who run a large number of applications at once, such as developers, designers, or anyone juggling multiple workflows throughout the day.
How to Change or Disable the Touchpad Gesture for Switching Desktops
Windows 11 lets users reassign or turn off the three-finger and four-finger touchpad gestures through the Settings app. This is useful for users who accidentally trigger desktop switches, or who prefer a different action for those gestures.
- Open Settings. Press Windows key + I or click the Start menu and select the Settings icon.
- Go to Bluetooth & devices, then click Touchpad.
- Expand the Three-finger gestures or Four-finger gestures section depending on which gesture to change.
- Click the Swipes dropdown and select the desired action. Options include switching desktops, switching apps, changing audio and volume, or doing nothing. Select “Nothing” to disable the gesture entirely.
- Close Settings. The change takes effect immediately.
Note that these settings only apply to precision touchpads. Older touchpads that use third-party drivers, such as those from Synaptics, may have their own gesture settings accessible through a separate control panel or system tray icon.
Conclusion
To sum up, there are six ways to switch desktops on Windows 11: the Ctrl + Win + Arrow keyboard shortcut, Task View, touchscreen swipe, touchpad four-finger swipe, a reassigned three-finger swipe, and a custom AutoHotkey script. The keyboard shortcut is the quickest for most users, while Task View works well for visually confirming which desktop to switch to. For those who want to change or disable touchpad gestures, the Touchpad section in Windows Settings provides full control over swipe behavior.