Allocating the appropriate amount of RAM (Random Access Memory) in the CurseForge Launcher is essential for optimizing Minecraft’s performance, especially when using mods. This guide provides step-by-step instructions to adjust RAM settings, ensuring a smoother gaming experience.
Why Changing the RAM Amount Matters
Minecraft’s performance heavily relies on the amount of memory allocated to it. Insufficient RAM can lead to lag, longer loading times, and even crashes, particularly when running large modpacks. By allocating more RAM, players can enhance game responsiveness and stability. However, it’s crucial to balance allocation, as dedicating too much RAM can adversely affect system performance.
How to Change Memory (RAM) Amount in CurseForge
Adjusting the RAM allocation in the CurseForge Launcher is straightforward. Follow these steps:
- Open the CurseForge launcher. Launch the CurseForge application on your computer.
- Access the settings. Click on the gear icon located in the bottom-left corner to open the settings menu.

- Navigate to Minecraft settings. Within the settings, select the Minecraft tab under Game Specific settings.

- Adjust the allocated memory. Find the Allocated Memory slider under Java Settings and move it to set your desired RAM allocation.

- Use the modpack author’s recommended RAM settings (optional). Toggling this option will make sure CurseForge only dedicates the amount of RAM recommended by the modpack author. This is best to avoid dedicating too much or too little RAM.
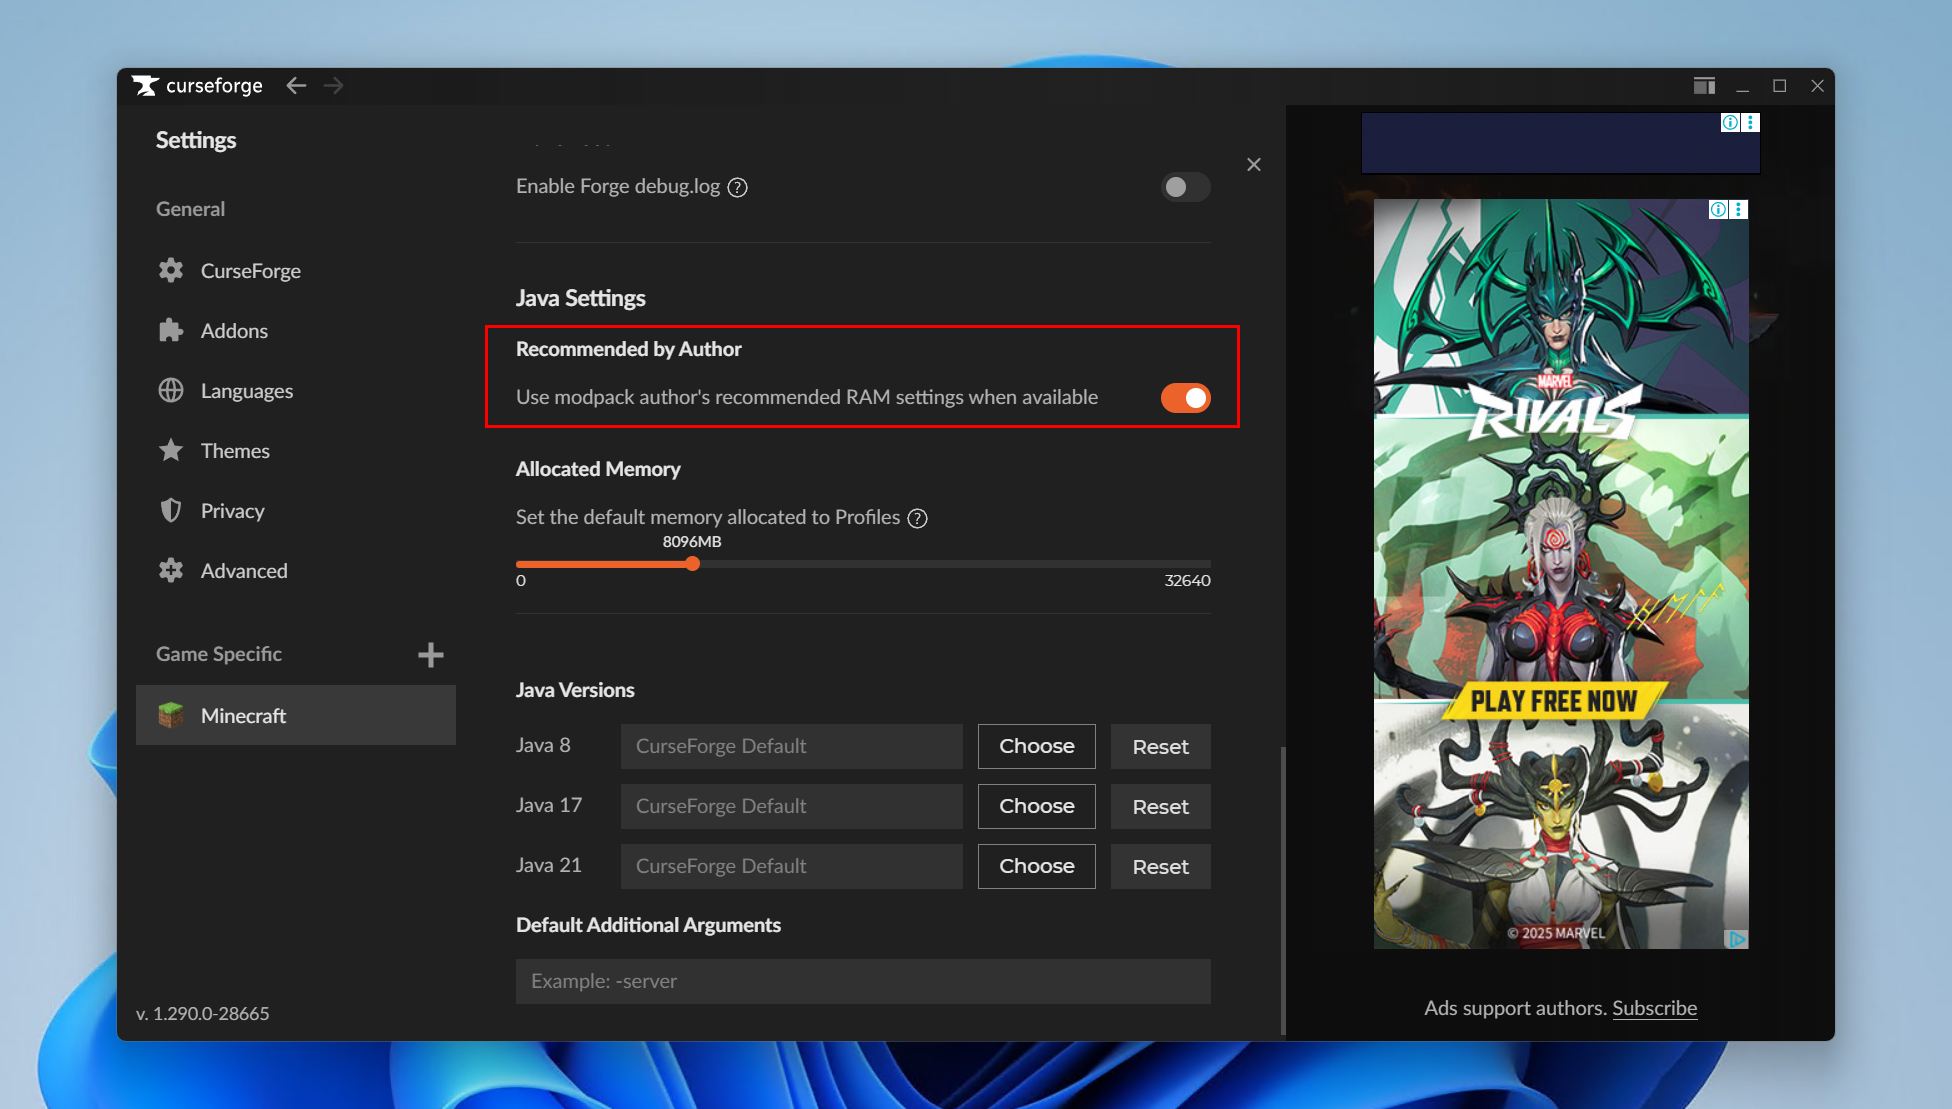
These changes will apply to all Minecraft modpacks launched through CurseForge.
When to ‘Use System Memory Settings’
The ‘Use System Memory Settings’ option in CurseForge allows individual modpacks to inherit the default memory allocation set in the main settings. This feature is beneficial when you want a consistent RAM allocation across all modpacks.
Benefits of Using System Memory Settings:
- Consistency: Ensures all modpacks use the same amount of allocated RAM, providing a uniform experience.
- Simplified Management: Eliminates the need to adjust memory settings for each modpack individually.
When to Disable ‘Use System Memory Settings’:
If a specific modpack requires more or less RAM than the default allocation, it’s advisable to customize its settings:
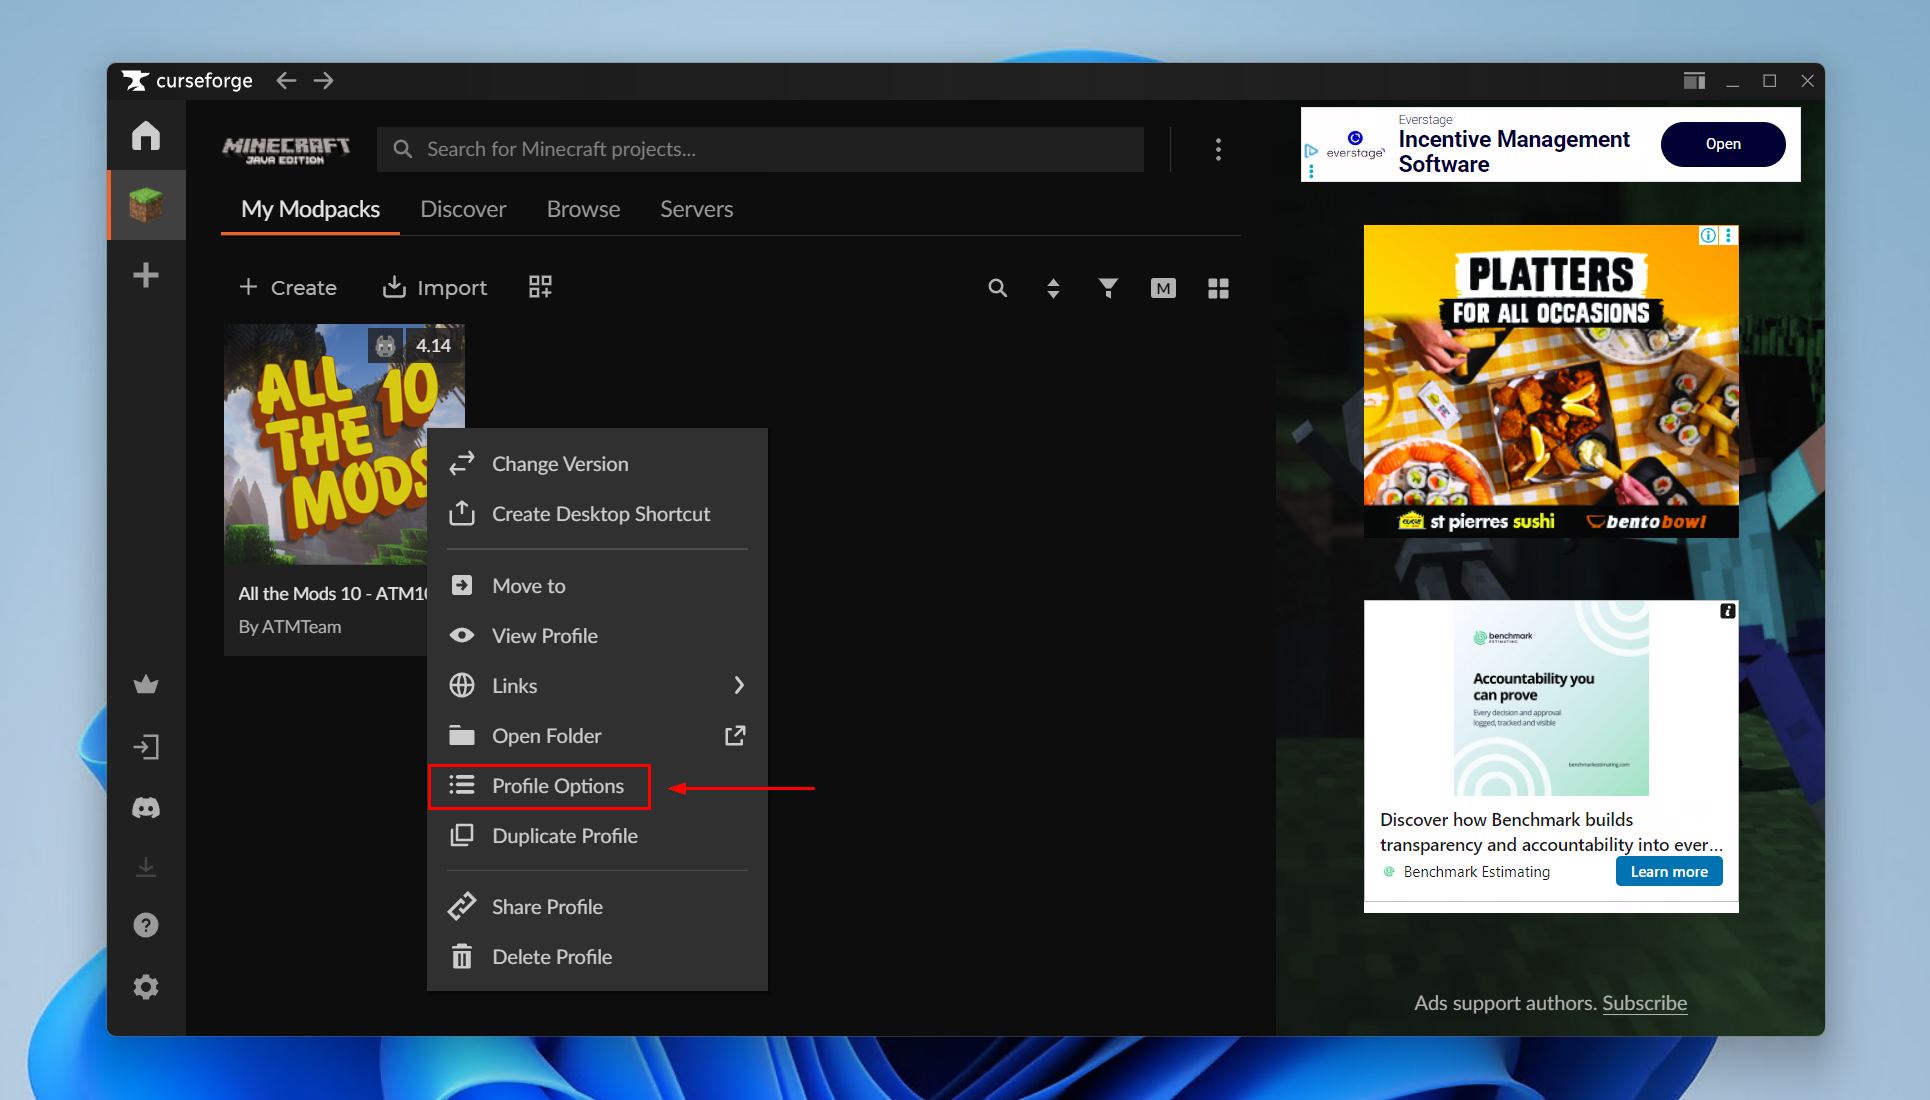
- Access your modpacks. Go to the My Modpacks tab.
- Open the profile options. Right-click on the profile, then click Profile Options.
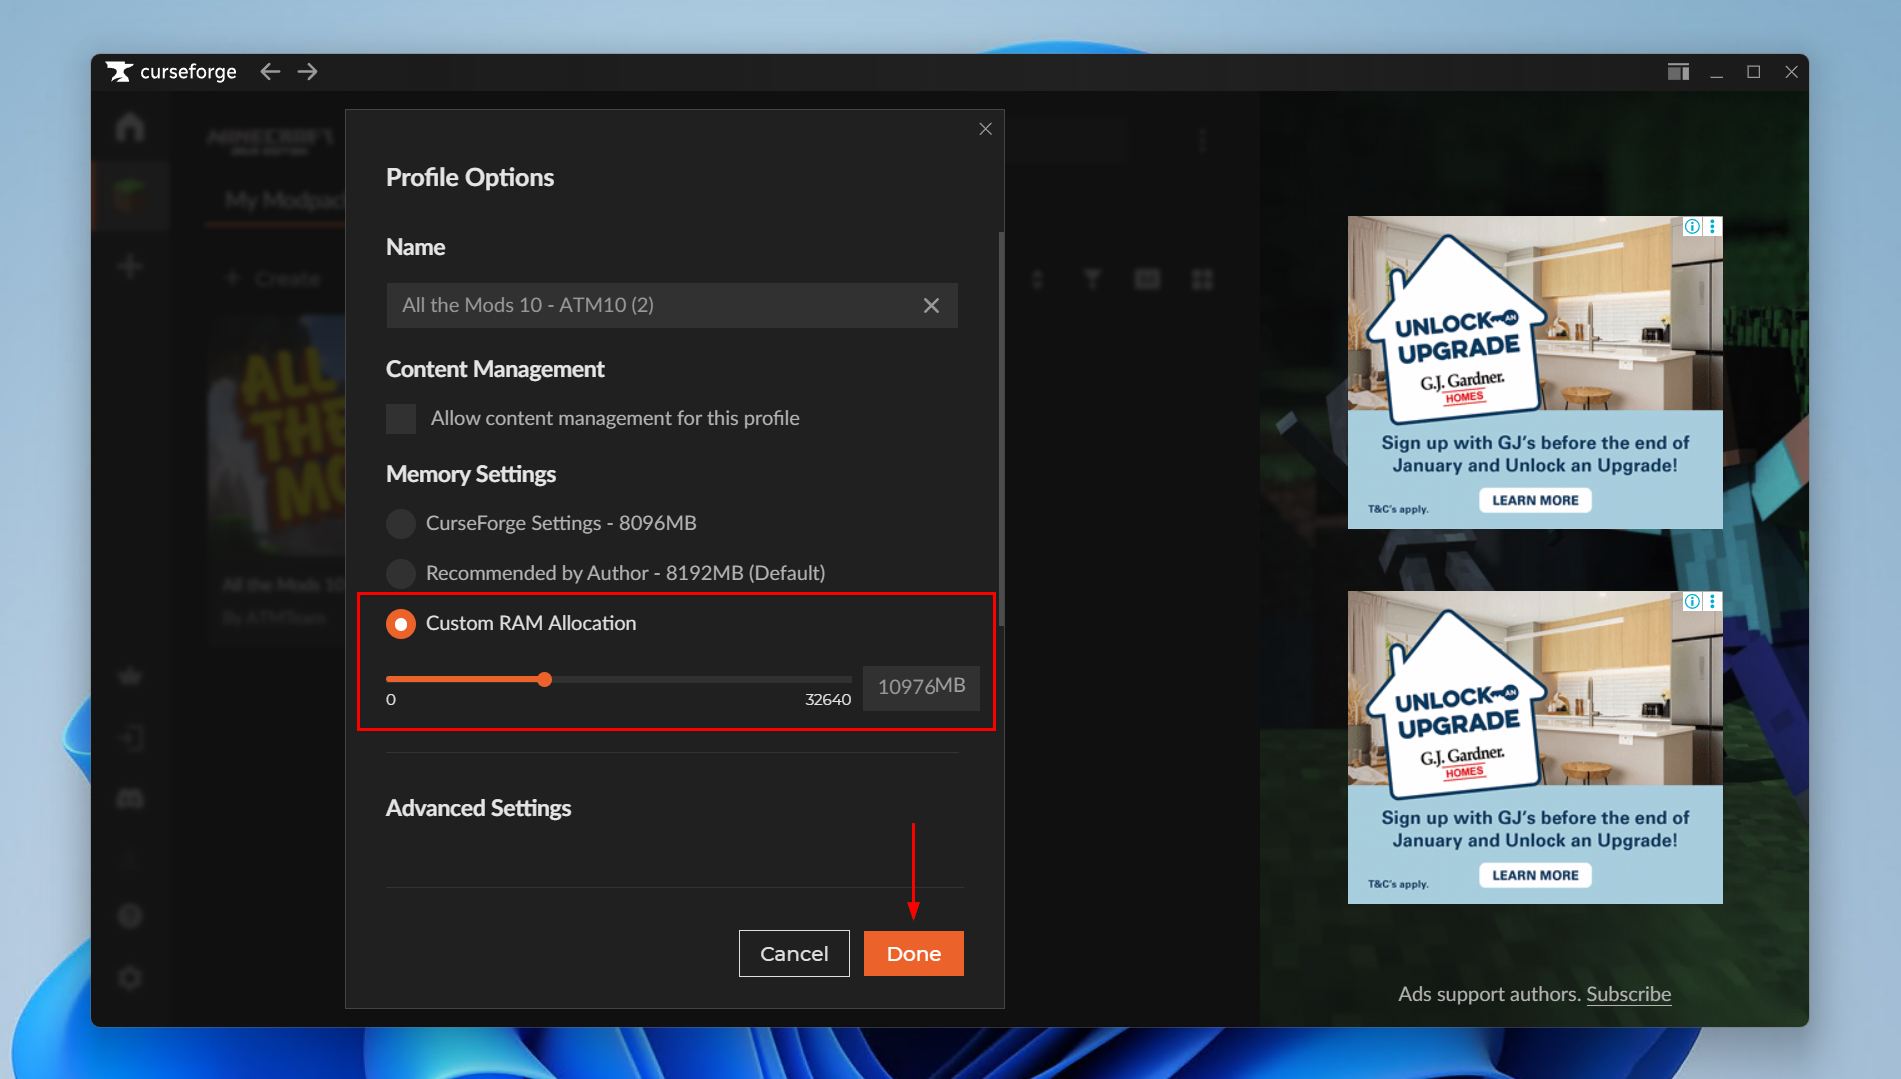
- Set custom RAM allocation. Click on the Custom RAM Allocation option, then choose how much memory you want to dedicate to this specific profile. Click Done when finished.
This approach allows for tailored performance settings based on the modpack’s requirements.
Conclusion
Properly managing RAM allocation in the CurseForge Launcher is vital for an optimal Minecraft experience, especially when engaging with various modpacks. By understanding and adjusting both global and individual modpack memory settings, players can ensure smoother gameplay and prevent performance issues.